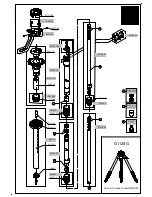
MECH-64
1-18. A/C Head Azimuth and X-value Adjustment (SD 50M)
TEST POINT
R/P ENV: TP1(HEAD BUFFER P.C.B.), R/P HSW: TP2(HEAD BUFFER P.C.B.)
CUE: TP901(AUDIO LCD P.C.B.), CTL: TP1(SERVO P.C.B.)
ADJUSTMENT MODE
X VALUE SET(SERVICE MENU)
<25M and 50M mode setting procedure>
1. Press the “MENU button” pushing “HOLD button” and “LIGHT button” together so that “CAM SERVICE MENU”
screen is appears on VF and VIDEO OUT.
2. Press the “JOG DIAL button” to select the “MAIN MENU” (Menu display is change like below)
CAM SERVICE MENU
→
VTR SERVICE MENU
→
MAIN MENU
3. Set the item “REC MODE” to 25M MODE referring following process.
MAIN
MENU
→
SYSTEM SETTING
→
SYSTEM MODE
→
REC MODE 4:3/25M (or 16:9/25M)
4. In case of 50M mode, set to 4:3/50M (or 16:9/50M) on item “REC MODE”.
<Adjustment mode setting procedure>
1. Press the “MENU button” pushing “HOLD button” and “LIGHT button” together so that “CAM SERVICE MENU”
screen is appears on VF and VIDEO OUT.
2. Press the “JOG DIAL button” to select the “VTR SERVICE MENU” (Menu display is change like below)
CAM SERVICE MENU
→
VTR SERVICE MENU
→
MAIN MENU
3. Rotate the “JOG DIAL button” to select the item “VTR SERVICE 2/3” in “VTR SERVICE MENU” screen and
press the “JOG DIAL button” to open the “VTR SERVICE 2/3” menu screen.
4. Select item “X VALUE SET” rotating “JOG DIAL button”.
5. Press “JOG DIAL button”, then displayed character “OFF” is flashed.
6. Rotate the “JOG DIAL button” to select the display “ON”.
NOTE:
The character “ON” is flash condition, which is adjustment mode.
Click this button , then go to item “1-18. A/C Head Azimuth and X-value Adjustment (SD 50M)” .
1-20. REV Tape Path Confirmation and Adjustment (T4 Post Height Adjustment)
TEST POINT
CTL: TP1(SERVO P.C.B.)
PLAY(+1)
PLAY on 25M mode
VTR MODE
REV(-1)
REV -1 on 25M mode(how to set PLAY and REV x1 mode, refer to below
description)
<25M mode setting procedure>
1. Press the “MENU button” pushing “HOLD button” and “LIGHT button” together so that “CAM SERVICE MENU”
screen is appears on VF and VIDEO OUT.
2. Press the “JOG DIAL button” to select the “MAIN MENU” (Menu display is change like below)
CAM SERVICE MENU
→
VTR SERVICE MENU
→
MAIN MENU
3. Set the item “REC MODE” to 25M MODE referring following process.
MAIN
MENU
→
SYSTEM SETTING
→
SYSTEM MODE
→
REC MODE 4:3/25M (or 16:9/25M)
<REV(-1) Mode Setting Procedure>
1. Set the VTR to STILL mode by press PLAY button twice.
2. Keep pressing RESET button and press PLAY button.
Click this button , then go to item “1-20. REV Tape Path Confirmation and Adjustment (T4 Post Height
Adjustment)” .
Содержание AJ-D908MC
Страница 3: ... 3 ...
Страница 4: ... 4 AJ SDX900E ...
Страница 5: ... 5 ...
Страница 7: ... 7 AJ SDX900P ...
Страница 8: ... 8 AJ SDX900E ...
Страница 9: ...FCD0307NTNK96E440E441 ...
Страница 32: ...INF 22 8 Open a target folder and select mem jcf file And click OK 9 Click OK 10 Click Program ...
Страница 156: ...SCHEMATIC DIAGRAMS NOTE BE SURE TO MAKE YOUR ORDERS OF REPLACEMENT PARTS ACCORDING TO PARTS LIST SECTION 7 ...
Страница 279: ...CBA 1 MOTHER P C BOARD VEP89140A FOIL SIDE FOIL SIDE REF LOC P6 C6 P11 A6 P13 A6 ...
Страница 308: ...CBA 30 FRONT SW P C BOARD VEP80C57A FOIL SIDE COMPONENT SIDE REAR JACK P C BOARD VEP80C52A COMPONENT SIDE FOIL SIDE ...
Страница 310: ...CBA 32 MENU SW P C BOARD VEP80C58A FOIL SIDE COMPONENT SIDE ...
Страница 312: ...PRE REC P C BOARD VEP83608A AJ YA903G FOIL SIDE COMPONENT SIDE CBA 34 ...


