


Replace a Disk Drive
20
• Maintaining the Hardware
Palo Alto Networks
By default, the M-500 appliance ships with 8 1TB drives in RAID1 pairs installed in drive bays
A1-D2 to provide 4TB of storage. You can install additional RAID1 pairs from E1-H2 to add
up to 8 more drives (4 pairs) for a total of 8TB of storage. Drive bays I1 to L2 are reserved for
future use.
The only drive maintenance you will need to perform is a replacement of a failed drive in one
of the RAID1 pairs as follows:.
1.
Place an anti-static wrist strap around your wrist and connect it to ground.
2.
Identify the failed drive indicated by the red LED on the drive bay. You can also check the
drive status by running the
show system raid
CLI command and viewing the output.
You will see Disk Pair A and Disk Pair B and the failed drive will show
Missing
or
Failed
.
3.
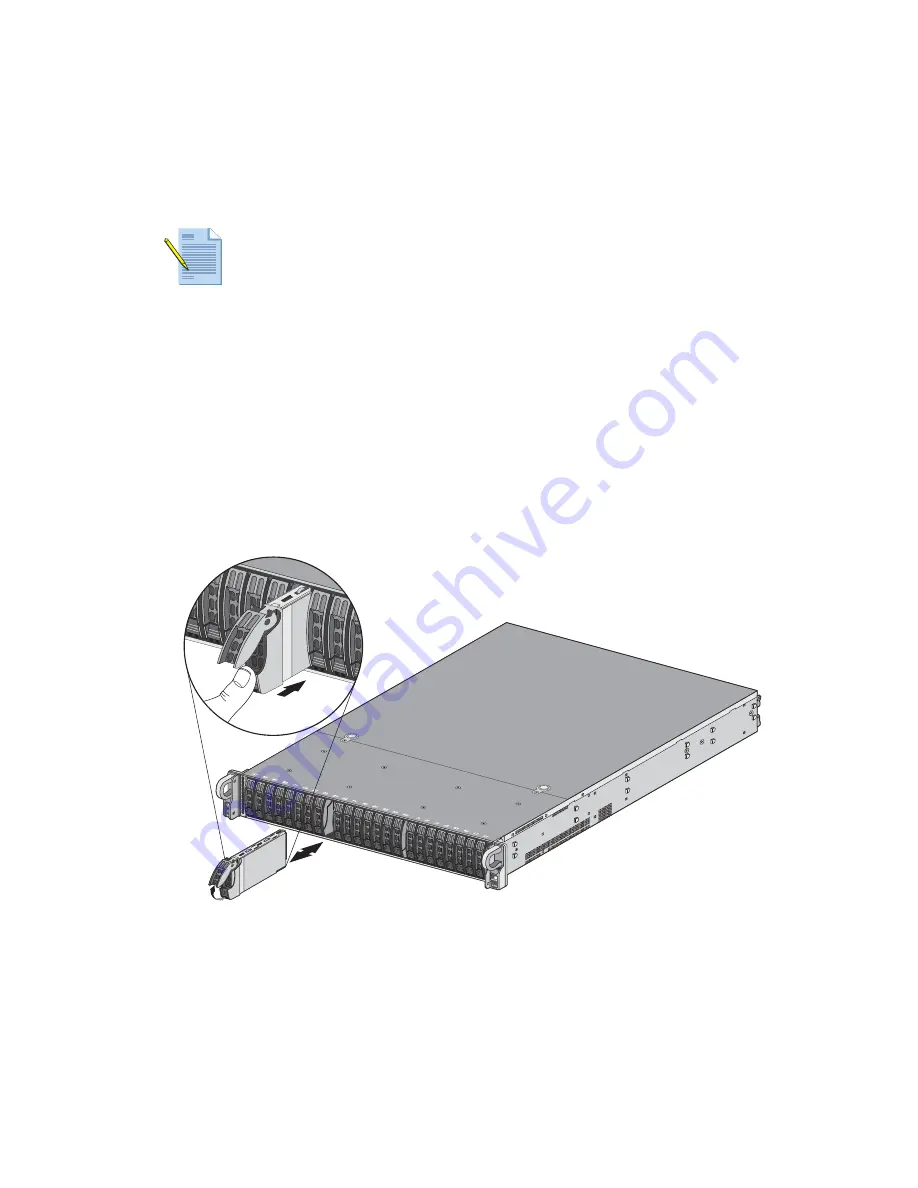
Press the purple button on the drive bay of the failed drive as shown in Figure 11.
4.
Eject the failed drive by gently rotating the drive bay lever away from the drive until it
stops.
5.
Remove the failed drive by gently pulling on the lever and then remove it from the
appliance.
Figure 11. Replace a Disk Drive
6.
To install a new drive in the appliance, remove the old drive from the drive carrier. Place
the failed drive assembly on a flat surface with the label side down and place the new
drive next to it.
Note:
The disk drives in the front drive bays of the M-500 appliance are hot
swappable.
Содержание M-500
Страница 1: ...M 500 Appliance Hardware Reference Guide...
Страница 18: ...Connecting Power 18 Installing the Hardware Palo Alto Networks...
Страница 26: ...Environmental Specifications 26 Specifications Palo Alto Networks...
Страница 28: ...28 Compliance Statements Palo Alto Networks...
Страница 32: ...32 Palo Alto Networks...


