first two weeks: using organizer features
:: 81
first two weeks:
using
organizer
features
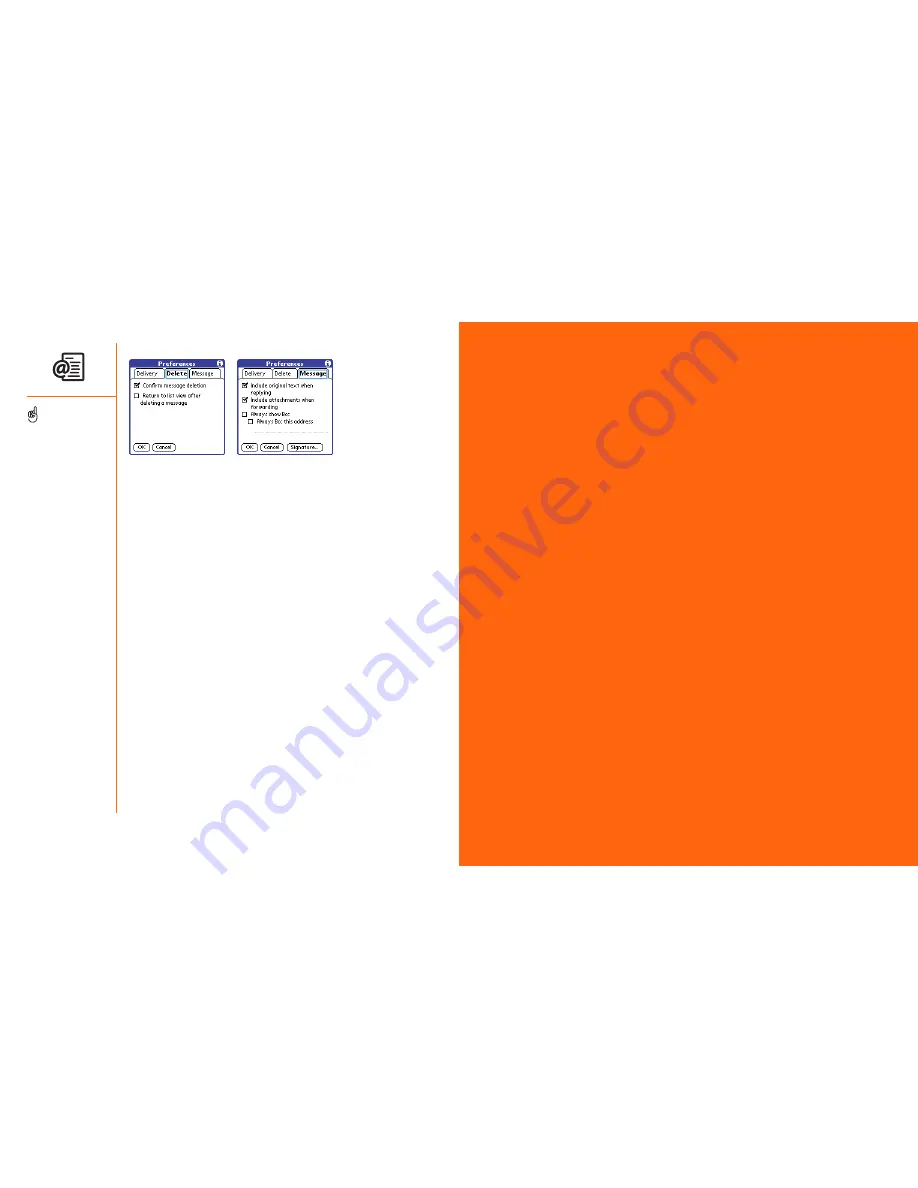
4. Choose the Delete tab and set any of the following preferences:
• Confirm message deletion:
Asks if you’re sure you want to delete a
message before erasing it.
• Return to list view after deleting a message:
Shows the E-Mail list
view after you delete a message, if checked, or shows the next
message in the list, if unchecked.
5. Choose the Message tab and set any of the following preferences:
• Include original text when replying:
Appends the full text of the
original message when you reply to a message.
• Include attachments when forwarding:
Sends attachments as well as
the original message when forwarding, even if you cannot open an
attachment on Treo.
• Always show Bcc:
Displays the Bcc field when creating messages
and allows you to pre-fill this field with a default address (useful for
creating a backup copy of email that is sent to your email server).
• Signature:
Controls what messages have your signature automatically
appended to them and lets you define a custom signature.
6. Choose OK.
80 ::
Sending and receiving messages with E-Mail
If you want to access more
than one email account with
your Treo, choose Add
Account.
If you assign E-Mail to an
application button, you can
press and hold that button
to send and receive mail.
This is very useful for
discreet mail checking.


