background image


14 

Identifying the Terminals of an Unknown Throttle Position Sensor 


This is a procedure for identifying the correct terminal connections of 

any potentiometer-style throttle position sensor (almost all three-terminal 
TP sensors). A DVOM or analog Ohmmeter is required.  


1. 

Set the meter to resistance mode and set it to a scale that can read up 
to 10K or 20K Ohms (if it is not auto-ranging). Please keep in mind when 
setting up and reading the meter that "K" means thousands of Ohms. In 
other words, 15K Ohms is the same as 15,000 Ohms. 


2. 

Connect the meter to two pins at a time while operating the lever or cam 
of the TPS. Watch the meter while rotating the sensor. Check all three 
pairs of pins until you find a pair that does not change resistance when 
you rotate the sensor. The two pins that do not change resistance are 
the fixed ends of the resistance element (+5V and ground). The 
remaining pin that did change is known as the "wiper". It is the moving 
contact that slides along the resistance element to give the varying 
voltage. This is the output or signal terminal of the sensor and should be 
connected to the green wire (Vehicle pin 3). 


3.  

Next, with the sensor at the idle or closed throttle position, measure the 

resistance between the wiper (output) and each of the end terminals (the 
two whose resistance did not change in step 2) of the sensor. The end 
terminal with the lowest resistance to the wiper (at idle) is the ground 
terminal, and should connect to the black

, “TPS GROUND” wire of the 

controller (Vehicle pin 16). The terminal with the higher resistance to the 
wiper is the 5 volt reference input to the sensor and should connect to 
the orange wire (Vehicle pin 11) in the harness.


General Guidelines for setting up Throttle Position Sensors 


The linkage to a throttle position sensor should use most of the 

rotating range of the throttle position sensor. This can be adjusted by 
changing the ratio of the linkage. Also, please make sure that a small 
amount of the sensor's travel is being used at idle. You will want a TPS 
voltage of at least 0.35 volts at idle, never zero. This is done to allow the 
controller to detect problems with the TP sensor. For instance, if the sensor 
becomes disconnected or the linkage falls off, the TPS voltage will fall 
below the set idle threshold. If the TPS voltage goes below the idle 
threshold, the controller assumes that the TPS is bad and will switch to 
failsafe line pressure and default shift points. This is done to prevent 
damage to the transmission from low line pressure and will provide a safe 
"limp home" mode.


Содержание 66501

Страница 1: ...Installation Instructions PERFECT TORC GM 4L60 65E and 4L80 85E Part 66501...

Страница 2: ...rned about corrections or improvements that can be made If you have found any errors or omissions or if you simply have comments or suggestions concerning these instructions please call or email using...

Страница 3: ...tallation of this product It is likely if this manual is not read completely that either the product not work due to improper installation and or damage to this product or the transmission may result...

Страница 4: ...ector General Motors has several Technical Service Bulletins recommending the upgrade to the newer style connector and harness The TORC Controller s main harness connector is not compatible with the e...

Страница 5: ...Small 4 Zip Ties 1 Installation Instruction Manual X Necessary crimp on terminals to complete installation Software Note Due to the growing number of PCs lacking a CD drive the software is not include...

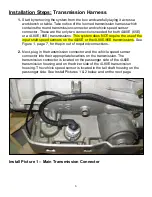
Страница 6: ...he input shaft speed sensors on the 4L65E or the 4L80E 85E transmissions See Figure 1 page 7 for the pin out of required connections 2 Next plug in the transmission connector and the vehicle speed sen...

Страница 7: ...7 Install Picture 2 VSS Vehicle Speed Sensor Connector Figure 1 Transmission Harness Connections on Transmission...

Страница 8: ...unit in a way that gives easy access to the USB port knob and display If you will be using a desktop PC for programming install the unit so that it can be unplugged and moved easily 3 To mount the mo...

Страница 9: ...9 Diagram 1 4L60E 65E Connection Diagram...

Страница 10: ...10 Diagram 2 4L80E 85E Connection Diagram...

Страница 11: ...p Instructions 1 Unscrew the larger cap from the end of the Posi Tap The slot in this cap will slide over the existing wire you are tapping into 2 Screw the body of the Posi Tap onto the cap watching...

Страница 12: ...The reason for this connection method is because the TPS is shared between the two systems and improper grounding will corrupt the TPS signal Splices and a Posi Tap have been provided to allow this c...

Страница 13: ...GM Throttle By Cable applications this is the Dark Blue wire at the Throttle Position Sensor connector Splices and a Posi tap have been provided to make this connection Carbureted Mech Injected Diese...

Страница 14: ...losed throttle position measure the resistance between the wiper output and each of the end terminals the two whose resistance did not change in step 2 of the sensor The end terminal with the lowest r...

Страница 15: ...15...

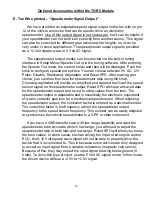
Страница 16: ...l on the speedometer output Reset SPO will clear all saved data for the speedometer output and revert to using values from the tune The speedometer output is adjustable and is essentially the electron...

Страница 17: ...d to the coil negative terminal For this configuration add the supplied 47K Ohm resistor yellow violet orange and gold bands to the yellow lead pin 7 in line with the tachometer signal The correct set...

Страница 18: ...until Setup Menu is highlighted Click the knob to enter the menu The first item that will be highlighted is TPS Setup Click the knob to enter the TPS screen It will show the current idle and WOT volt...

Страница 19: ...s for specific tunes Possible TPS Calibration Errors Pedal Not Pressed Acc Pedal Not Held The throttle wasn t pushed or held at maximum long enough for the test to complete Accelerator pedal must be h...

Страница 20: ...aults When low range is engaged LO will be shown beside speed KEY OFF will show in the PRNDL location if ignition is off and the controller is being powered by USB Error will show in the PRNDL locatio...

Страница 21: ...21 Home Screen Normal Mode Home Screen Enlarged Mode...

Страница 22: ...the main menu The tutorial will continue to play until you select home screen info screen or turn off the vehicle Display Off Keeps the screen off until you turn the knob The display will continue to...

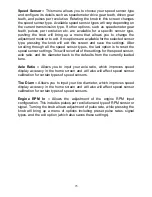
Страница 23: ...t option is to reset the speed sensor settings This will revert all of the settings for the speed sensor axle ratio and tire diameter back to the defaults from the currently loaded tune Axle Ratio All...

Страница 24: ...ccess options such as enabling torque converter clutch TCC activation above 1800 RPM disabling the TCC and exiting dyno mode Please note that it is not safe to use this mode while driving Data Display...

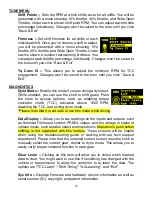
Страница 25: ...lly Use this only if you were instructed to do so by a Painless technician TCC Sol can be used to manually lock the TCC by holding the knob down When released the TCC will unlock Doing this while idli...

Страница 26: ...the Open button on the toolbar left hand side of the screen then browse to the folder where the transmission calibration files are located Default location is C Shiftware The files are named accordin...

Страница 27: ...ion button and then clicking on an item This can be used in any area of the software Pressing F1 will show help on whatever item is currently active The help messages in the settings pages are transmi...

Страница 28: ...unusual TCC operation This is normal and will end once learning is complete Once learned the data will not change unless it is erased using the clear command on the controller s user interface found...

Страница 29: ...is disconnected from the computer the Write Calibration button will be grayed out IMPORTANT INFORMATION How to Avoid Errors The Shiftware software gives you complete freedom and flexibility to customi...

Страница 30: ...s renders engine RPM values meaningless It is usually desirable to have light throttle shift points within a low RPM range In this case it is best to base light throttle shift points on vehicle speed...

Страница 31: ...unting location Battery voltage is too low The voltage to the controller has dropped below 8 volts Battery voltage is too high The voltage to the controller is above 17 2 volts Shift Solenoid A SSA ov...

Страница 32: ...turned off EPC PCS Solenoid overcurrent error An over current condition was detected on the line pressure control solenoid A short circuit may be present in the solenoid circuit The controller will at...

Страница 33: ...noid resistance Shift Solenoid B SSB circuit shorted The indicated Shift Solenoid s resistance measured too low during the power on solenoid check Refer to the data display screen in the diagnostic me...

Страница 34: ...Shift Solenoid s resistance measured too high during the power on solenoid check Refer to the data display screen in the diagnostic menu to see the measured solenoid resistance 3 2 D S Solenoid circu...

Страница 35: ...the setup menu TFT Circuit Voltage Low or Shorted The Transmission Fluid Temperature sensor voltage is too low A possible cause of this could be that it is shorted to ground TFT Circuit Voltage High...

Страница 36: ...wice in this drive cycle max line pressure latched Ratio too High in Gear s 2 3 4 etc Transmission gear ratio appears to be too high in the indicated gear or gears Error PRNDL Out of Range Sensor volt...

Страница 37: ...purchaser to be free from defects in material and workmanship under normal use Painless Performance will repair or replace defective products without charge during the first 12 months from the purcha...

Отзывы: