


User’s Manual
18
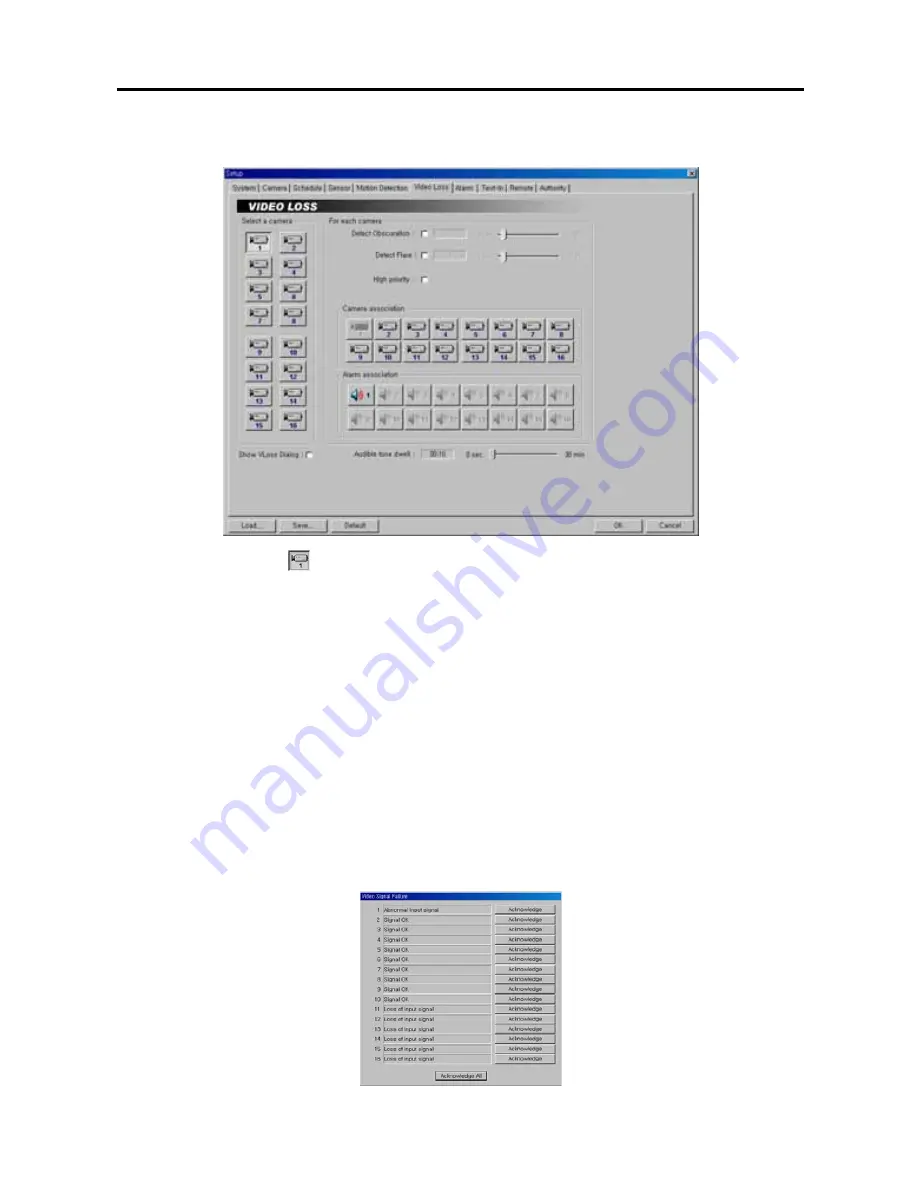
Setting Up the Video Loss
1.
Click the
Camera
icon.
2.
Move to
Detect Obscuration
, and check the box to use the obscuration detection. And then set the obscuration
level from
0%
to
50%
by holding down and dragging the pointer. The higher the percentage, the more sensitive
it is. If the obscuration detection is selected, the DVR will check the brightness of the target camera, and consider
the obscuration on the images as video loss.
3.
Move to
Detect Flare
, and check the box to use the flare detection. And then set the flare level from
0%
to
50%
by holding down and dragging the pointer. If the flare detection is selected, the DVR will check the brightness of
the target camera, and consider the flare on the image as video loss.
4.
Move to
High priority
, and check the box to give high priority to the target camera. The DVR will follow the
advanced camera setup when the target camera detects video loss. See the
Setting Up Cameras
for configuring
advanced camera setup.
5.
Move to
Camera association
, and click the camera icon to associate it with the camera selected step 1. If video
loss is detected by one camera, other cameras can be associated with it so that video will also be recorded from
the associated cameras.
6.
Move to
Alarm association
, and click the alarm icon to associate it with a selected sensor. The alarm will go off
when an associated sensor is activated.
7.
Move to
Show video loss dialog
, and check the box if you want to show the following
Video Signal Failure
dialog box on the screen when the video loss is detected. Click the
Acknowledge
or
Acknowledge All
button to
close the dialog box.


