


Oz-View Technical Manual V1.02 - 1
st
Jan 2011
15
set at 8 seconds.
Note: The users can only unlock for the visitors during the talking and
communication mode.
In communication status, if either part is powered-off, then the other will
return back to standby status after one “Di” sound.
The 1.8S unlocking time has 2 pulses, while the 4S unlocking time and 8S
unlocking time have only 1 pulse. Choose the proper unlocking time as
your request.
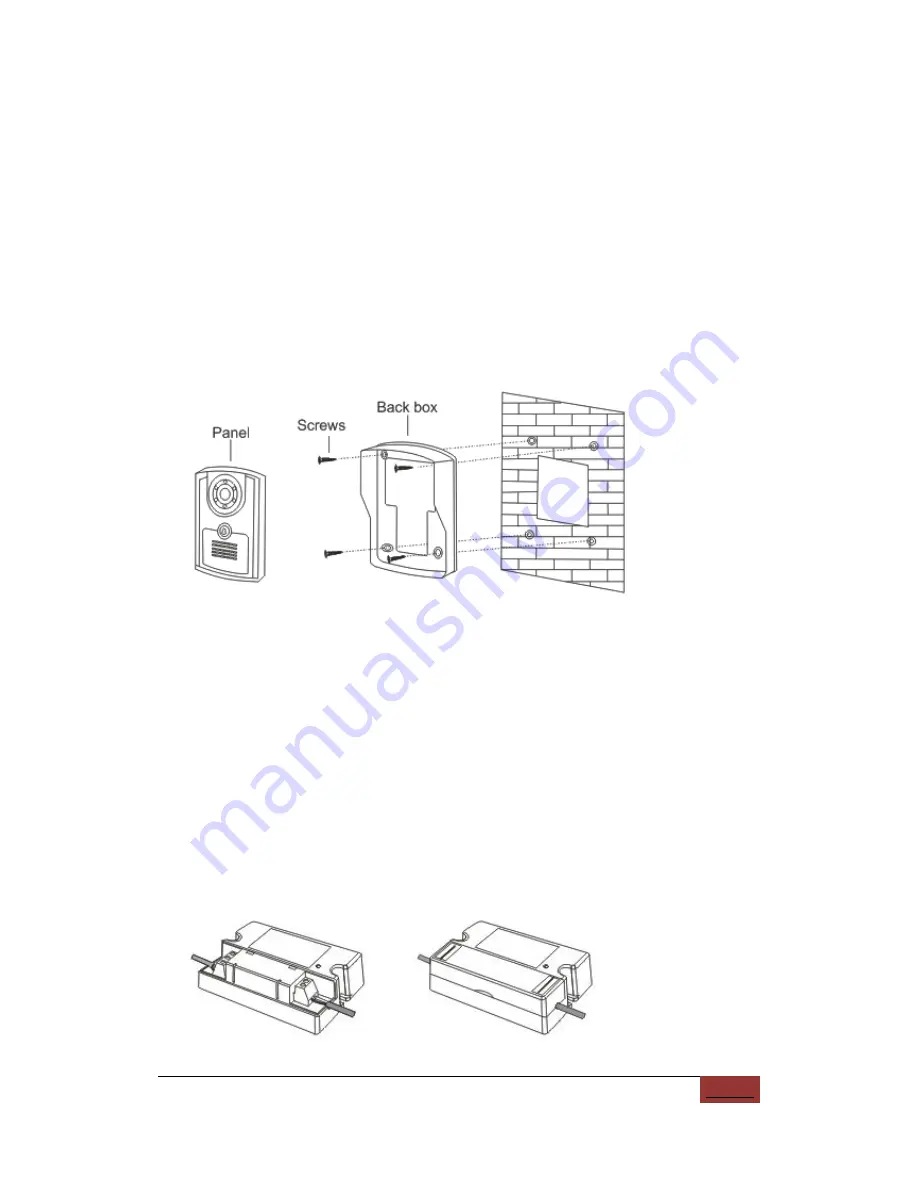
Installation
Step 1: Install the back
Step 2: Install panel
1).Release the call station from back box by removing the locking screw under the
front edge of the unit.
2).Drill proper wire-through holes according to the mounting units.
3).Use four screws to fix the installation panel on the wall.
4).Connect the cables from wire-through holes and square holes of rear panel in the
call station.
(When an electric lock is not being connected, any unused cables or terminals should
be protected and insulated to avoid the possibility of short circuits)
5).Use screws to fix the door station on the rear installation panel.
Wiring of in-line PSU power adaptor
1).Check and keep the power in OFF status.
Содержание Wireless video intercom
Страница 1: ......
Страница 2: ...Oz View Technical Manual V1 02 1st Jan 2011 2 ...
Страница 5: ...Oz View Technical Manual V1 02 1st Jan 2011 5 Products description ...
Страница 6: ...Oz View Technical Manual V1 02 1st Jan 2011 6 Handset cradle 1 Desk mounted 2 Wall mounted ...
Страница 7: ...Oz View Technical Manual V1 02 1st Jan 2011 7 Charger fixing procedure ...
Страница 17: ...Oz View Technical Manual V1 02 1st Jan 2011 17 Technical specifications ...
Страница 18: ...Oz View Technical Manual V1 02 1st Jan 2011 18 Trouble shooting ...


