2) Accept the end user license agreement (EULA) by tapping the
Accept
button. If the end user license agree
ment (EULA) is not accepted, the Cockpit app cannot be used.
→
The welcome screen appears.
3) Hold the prosthesis with the sole of the foot facing up, or connect and then disconnect the battery charger, in
order to activate recognition (visibility) of the Bluetooth connection for 2 minutes.
4) Tap the
Add component
button.
→
The Connection Wizard opens and guides you through the process of establishing a connection.
5) Follow the subsequent instructions on the screen.
6) After the Bluetooth PIN is entered, a connection to the component is established.
→
While the connection is being established, 3 beep signals sound and the
symbol appears.
The
symbol is displayed when the connection has been established.
→
Once the connection has been established, the data are read from the component. This process may take up to
a minute.
Then the main menu appears with the name of the connected component.
INFORMATION
After the initial connection to the component has been established successfully, the app will connect automatically
each time it is started. No further steps are required.
Only when "DUAL" marking is present (
see Page 66
INFORMATION
After activating the "visibility" of the component (holding the component with the sole of the foot facing up, or con
necting and then disconnecting the battery charger), the component can be recognised by another device
(e.g. smartphone) within 2 minutes. If registration or establishing the connection takes too long, the process of
establishing a connection is cancelled. In this case, hold the component with the sole of the foot facing up again,
or connect and then disconnect the battery charger.
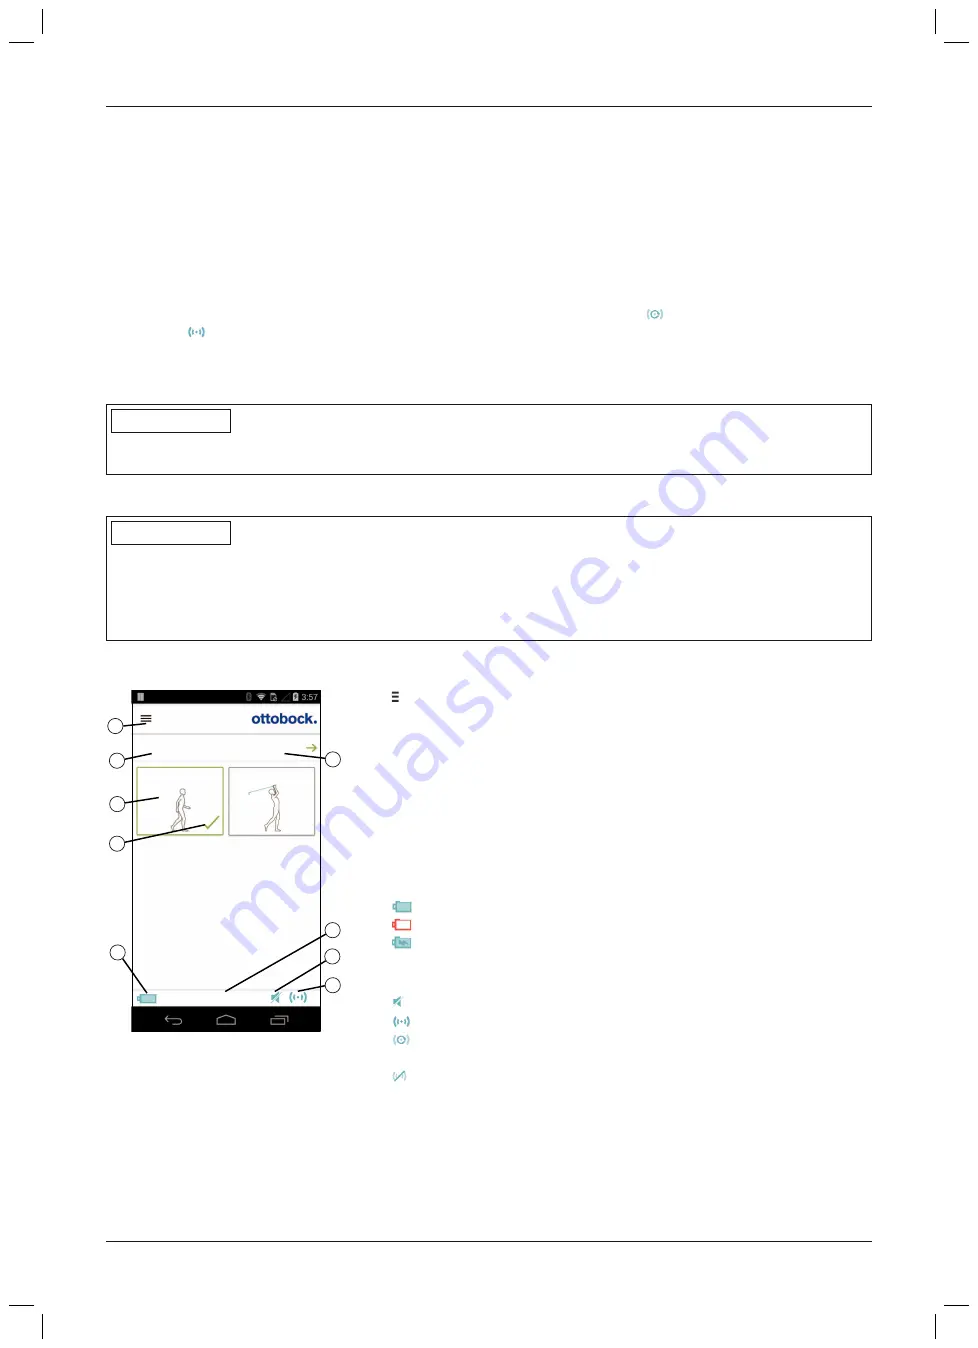
8.3 Control elements for cockpit app
1
2
3
4
5
6
7
8
9
Product
change
2. Golf
1. Basic Mode
1. Basic Mode
100%
1.
Access the navigation menu (see Page 88)
2. Product
The component name can only be changed with the adjustment soft
ware.
3. If connections to more than one component have been saved, you can
switch between the saved components by tapping the entry
change
.
4. MyModes configured with the adjustment software.
Switching the mode by tapping the corresponding symbol and confirm
ing by tapping "
OK
".
5. Currently selected mode
6. Charge level of the component.
Component battery fully charged
Component battery empty
Component battery is being charged
The current charge level is also displayed in %.
7. Display and name of the currently selected mode (e.g.
1. Basic Mode
)
8.
Mute mode is activated
9.
Connection to component has been established
Connection to component has been interrupted. The app is attempt
ing to re-establish the connection automatically.
No existing connection to the component.
87
Cockpit app
Содержание 3B1-2/3B1-2-ST
Страница 4: ...min 3 mm min 5 mm 7 1 8 5 sec 1 2 3 7 1 1 3 Connection Job Specification Alignment Basic Mode 7 1 6 4 ...
Страница 62: ...62 ...
Страница 115: ...115 ...


