


200
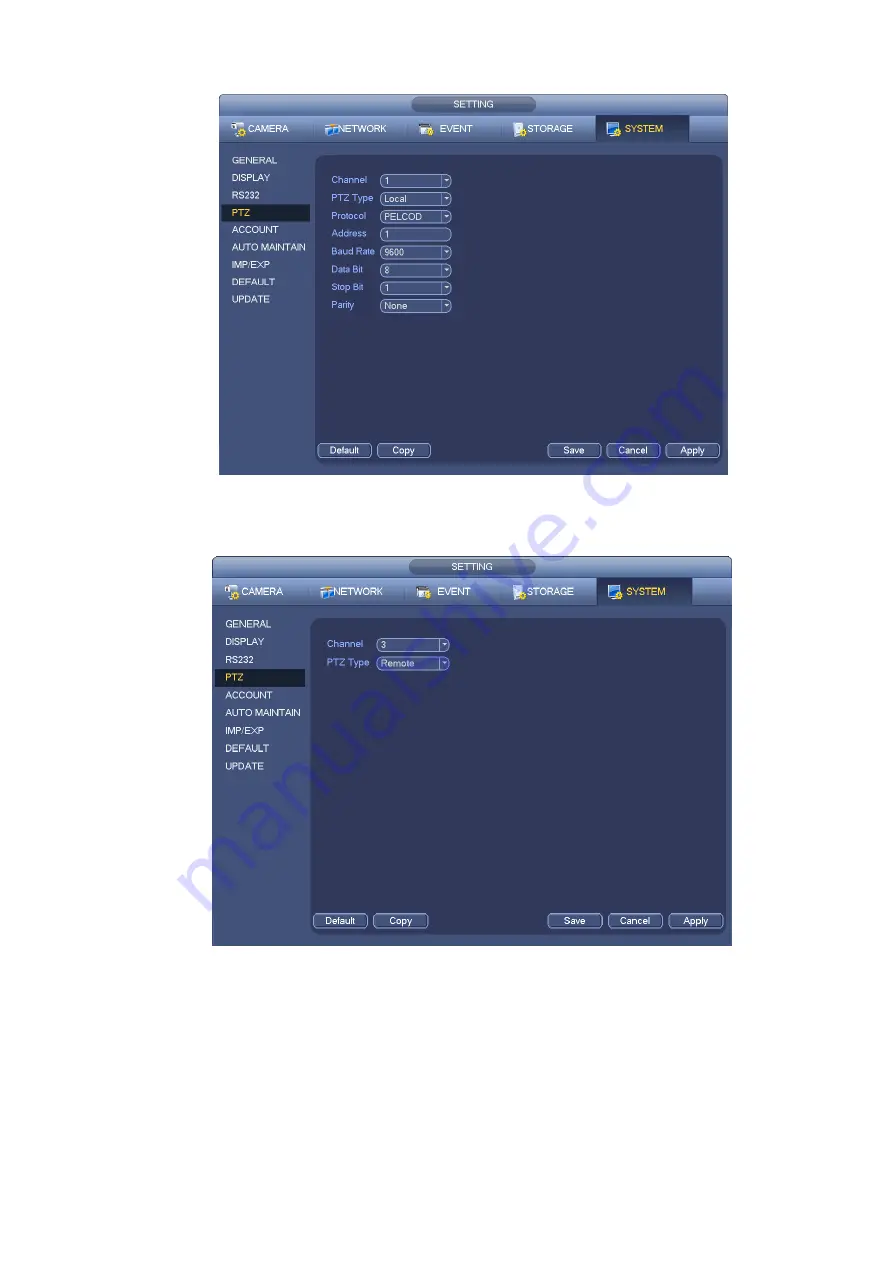
Figure 4-44
If you are connecting to network PTZ, the PTZ type shall be remote. See Figure 4-45.
4.9.2
PTZ Control
Figure 4-45
After completing all the setting please click save button. Right
click mouse (click “Fn” Butto n in the
front panel or click “Fn” key in the remote control). The interface is shown as in Figure 4-46. Please
note you can only go to the PTZ control interface when you are in 1 -window display mode.
Содержание NV432P16-4K
Страница 1: ...Network Video Recorder User s Manual V 2 7 0...
Страница 42: ...109 VIEDEO OUT Video output port CVBS output...
Страница 74: ...141 Figure 4 19 Click smart add button you can see device enables DHCP function See Figure 4 20 Figure 4 20...
Страница 129: ...236 Figure 4 89 Figure 4 90...
Страница 130: ...237 Figure 4 91 Figure 4 92...
Страница 145: ...252 Figure 4 110 Figure 4 111...
Страница 146: ...253 Figure 4 112 Figure 4 113...
Страница 147: ...254 Figure 4 114 Figure 4 115...
Страница 149: ...256 Figure 4 117 Figure 4 118...
Страница 176: ...283 Figure 4 148 In Figure 4 148 click one HDD item the S M A R T interface is shown as in Figure 4 149 Figure 4 149...
Страница 241: ...348 Figure 5 55 Figure 5 56...
Страница 242: ...349 Figure 5 57 Figure 5 58 Figure 5 59...
Страница 253: ...360 Figure 5 73 Figure 5 74...


