background image

Kiosk Manager’s Guide: 20 Series


Go to Table of Contents 


1/14/2022 

V1.01 

|

 Pg. 36


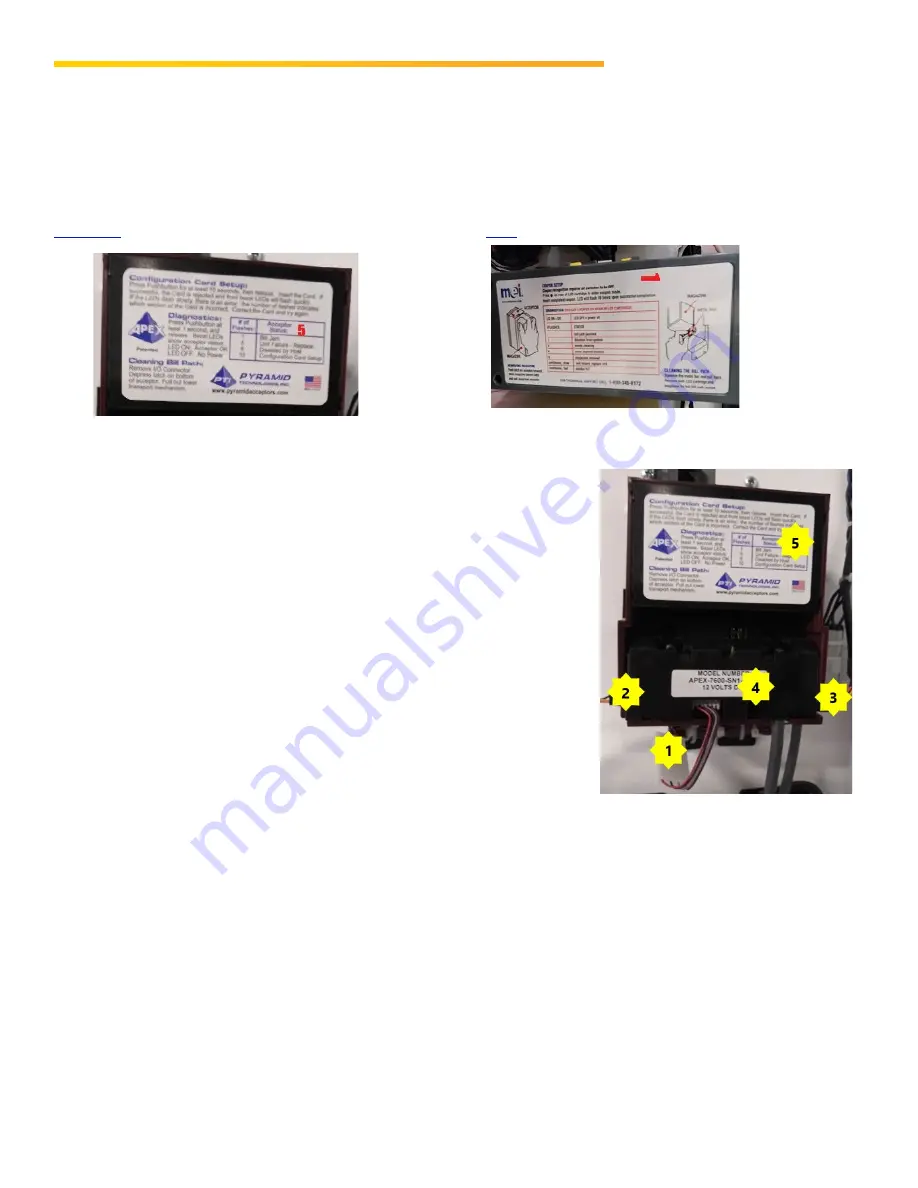
Depending on your kiosk’s model and issue date, your machine will have one of two bill 

acceptors installed. Identify which one is in your kiosk and click on the correct link for 

troubleshooting. 


Pyramid


MEI


Pyramid bill acceptor 

Parts descriptions – use photo for reference 

1.


Power connector strip – used to power cycle the 

device. There are 

red

black

purple,


and 

brown


wires.  

Note: Do Not Discard! Replacement devices do not include 

this cable so remove(pull firmly on all 4 wires at once) and 

keep the one from the original unit  

2.


Flash Memory Port and cable – one end is plugged 

into the bill acceptor port labeled “Flash Memory 

Port” and the other end stays coiled underneath the 

BA unless we need to flash the device’s firmware 

3.


USB cable – 

orange

black

 and 

yellow


wire 

combination that goes into a black Molex 

connection on the right side of the bill acceptor (the other end is a white USB 

cable that plugs directly into the PC) 

4.


The label provides the device’s model number and voltage in case your 

technician asks, and a legend to decipher the flashing blue lights 


Содержание INSOMNIAC 120

Страница 1: ...MANAGER S GUIDE INSOMNIAC Kiosks 20 Series OpenTech Alliance 602 773 1700 support opentechalliance com ...

Страница 2: ...9 New Customer 9 Complete a Rental 9 Existing Customer 9 Purchase a Lock 9 Types of Error Messages 10 What You Can Do at the Kiosk 11 Reboot the Kiosk 11 Access the Admin Console 11 Sanitize the Kiosk 12 Inside 13 Outside 13 Surge Protection 13 Maintenance and Troubleshooting 14 Recommended Tool Kit 15 Restock the Kiosk all models except 120 15 Install Printer Paper 16 Reload the Lock Dispenser 16...

Страница 3: ...Table of Contents 1 14 2022 V1 01 Pg 3 Select a Report 19 Contact Us 21 For Non Technical Assistance 21 For Technical Support 21 Appendix Troubleshooting by Model 23 Model 120 23 Components 24 Model 220 Model 720 Model 920 28 Components 29 ...

Страница 4: ... wondering about pre installation steps the section below offers tips about how to safely remove your kiosk s packaging You may want to wait for your installer to do this we recommend that you have help For details about installation refer to your model s Installation Guide and the Kiosk Success Guide find both here to ensure that the physical installation of your new kiosk is both correct and opt...

Страница 5: ... Now you can lift the box off the kiosk Don t try this alone For safety and to avoid damage to your kiosk get some help Step 3 Remove the inner wrapping Carefully remove the clear wrap from the kiosk itself Tips to protect the finish Cut along the seams such as along the kiosk door Anywhere else on the kiosk carefully cut a slit in the shrink wrap and insert a piece of cardboard cut from the shipp...

Страница 6: ...nside Model 720 only Use the T25 screwdriver to remove the four screws holding the base of the kiosk in place on the pallet be sure to replace the screwdriver inside the kiosk so it always will be available Slide the base cover plate away to reveal the four lag bolts you will remove using the ratchet socket bits Your kiosk is now free to be relocated but for your safety and to prevent tipping and ...

Страница 7: ...ly to that section of this guide INSOMNIAC Kiosk 20 Series Universal Features Creates and completes new rentals Takes payments Updates accounts Provides rental insurance Sends email and or prints receipts and leases Connects to Live Help with trained storage counselors All models except the compact 120 also dispense locks accept cash and take photos of driver s licenses Note for a more detail comp...

Страница 8: ...ackground Home Facility Info and Live Help Buttons Tapping HOME from any kiosk screen will refresh the kiosk and return the user to the Welcome screen Touching FACILITY INFO launches a pop up screen with additional information about your location Pressing LIVE HELP during Call Center hours will connect the user with a trained storage counselor for assistance After hours the user will either reach ...

Страница 9: ...omer Current tenants select this option to check account balances and make payments Depending on the preferences requested with your kiosk order they also may be able to retrieve forgotten gate codes make partial payments and update contact or payment information Purchase a Lock All models except the compact 120 have lock dispensing capabilities Model 920 has two slots and can accommodate 10 locks...

Страница 10: ...es etc Below are some examples of the types of error messages that may pop up In specific situations such as a frozen account in your PMS the user may be referred directly to facility management for assistance This is a common pop up usually because the wrong information was entered Sometimes an error message will advise the user to press Live Help for assistance from a storage counselor ...

Страница 11: ...eboot the Kiosk You or a tenant may get a message saying the kiosk needs to be rebooted You can do this with a power cycle Just disconnect power from the entire kiosk for 3 5 minutes and reconnect If this doesn t correct the situation Contact Us for help Access the Admin Console During setup and training with OpenTech s Onboarding Team you or another manager were shown how to access the kiosk Admi...

Страница 12: ... to perform various Admin Console functions If you don t remember the required passwords Contact Us for help Sanitize the Kiosk One key to great kiosk performance and longevity is preventive care For outdoor kiosks it is especially important to regularly clean dust and debris from the machine inside and out All touchscreen users appreciate a clean and disinfected surface Routine upkeep is easy wit...

Страница 13: ...acceptor and any nooks and crannies 5 Spray disinfectant on a towel or use a disinfecting wipe and wipe down all sides except the touch screen a DO NOT spray directly on kiosk surface b DO NOT use disinfectant on touch screen AT ALL 6 Lightly spray glass cleaner on a microfiber towel and clean the screen a DO NOT spray any cleaner directly onto the touch screen b DO NOT drench the touch screen wit...

Страница 14: ...ice is working properly by testing it with another computer or device 3 If the power and internet are working check the connections outside and inside the machine one by one to verify that each one is properly seated If you aren t comfortable with these DIY steps or if the issue persists after you complete them please Contact Tech Support for assistance For specific recommendations on troubleshoot...

Страница 15: ...t driver 1 4 nut driver 5 16 nut driver 11 16 nut driver Small adjustable crescent wrench 2 4mm flathead screwdriver T25H security screwdriver Zip ties and snips Bill Acceptor X X Credit Card Reader X X Driver s License Camera X Top Image Camera X X X Touchscreen X X early units X IO Controller X X Lock dispenser X Microphone X Speaker amplifier X X X X X 7 Port Hub X X PC X X Cooling Fan X X Powe...

Страница 16: ...Tear off the excess paper from the front of the dispenser and your kiosk is ready to print you will never have to replace ink for this thermal printer Reload the Lock Dispenser Keep extra locks on hand so you ll be ready to reload as needed Locks must fit comfortably in the vending coils If you repackage locks to fit do that first and be sure the boxes are taped shut to avoid having the keys fall ...

Страница 17: ...le Confirm all locks are properly situated then close and lock the kiosk If you are unsure of these steps or have questions Contact Us for assistance A Note about On Site Kiosk Testing or Training At present there is no Demo Mode for testing or training on a 20 Series Kiosk Any information or payment that is entered into the kiosk is treated as real information and will show as such in all reporti...

Страница 18: ...Reporting from OpenPortal Other than Cash Out all kiosk reports are run from OpenPortal This is the platform where your facility information was originally entered for our storage counselors for Live Help and where you can retrieve data about the kiosk s usage Note OpenPortal was designed to work with the Internet Explorer IE browser Although IE is expiring it still is installed on many computers ...

Страница 19: ...kiosks broken down by denomination ESCROWED CASH Show cash allocated to escrow not to a tenant account at selected kiosks FAILED LOGINS See names of users who failed to log in to an existing account at selected kiosks INSURANCE SALES Create a list of tenants who purchased insurance at selected kiosk LEASE HISTORY Show rentals done on selected kiosks with links to viewable photos videos and leases ...

Страница 20: ...mpleting a transaction with links to videos Note If you have any questions about OpenPortal reports or Live Help from our call center counselors just click on Request Support on any OpenPortal page shown above and fill out a request form Your ticket will be immediately generated and sent to the correct department for response And you can always Contact Us directly ...

Страница 21: ... he or she will be able to make an immediate referral Note if you don t know how to contact your CSM click here to go to OpenTech s Territory Map Select the state where your company is headquartered to find your CSM s contact information Customer Success Manager Hours CSMs are available during business hours Monday Friday Business hours may vary depending on the time zone of your headquarters For ...

Страница 22: ...day hours vary Staffed Support Monday Friday 7am 5 pm Saturday 7am 2 pm After Hours On Call Support Voice and email messages are prioritized for urgency Monday Friday 5 pm 8 pm Saturday 2 pm 8 pm Sunday 8 am 5 pm Holidays Holiday hours vary but usually include at least one technician on call 8am 8pm Voice and email messages are prioritized for urgency ...

Страница 23: ...ith Tech Support you can expect the technician to ask you to Check the kiosk Internet service and connection o Verify that your Internet service is working o Confirm the Ethernet Cable is properly plugged in and clicked into place o Describe the status and activity lights for the Network Interface Card NIC on the computer s motherboard One light indicates connection state while the other represent...

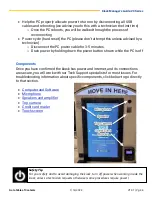
Страница 24: ...for 3 5 minutes o Drain power by holding down the power button shown while the PC is off Components Once you have confirmed the kiosk has power and internet and its connections are secure you will work with our Tech Support specialists for most issues For troubleshooting information about specific components click below to go directly to that section Computer and Software Microphone Speakers and a...

Страница 25: ...nto the kiosk Tech Support will send a replacement and walk you through the simple installation steps o If the device does not appear to be damaged you will be asked to unplug the microphone cable from the PC and plug it back in Speakers and Amplifier Assembly For Speaker and Amplifier Assembly issues check the connections first then Contact Tech Support The kiosk speakers and amplifier use a sing...

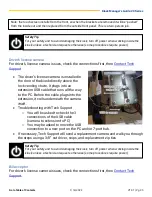
Страница 26: ...er snips and replacement zip ties Credit Card Reader For Credit Card Reader issues check the connections and confirm that your PMS and card payment services are working properly check them on the office computer or other devices then Contact Tech Support The card reader plugs into the PC via USB cable Troubleshooting with Tech Support o We will ask you to confirm the USB cable is properly plugged ...

Страница 27: ...m that all 3 cables are plugged in correctly o You may be asked to disconnect the power cable for a couple minutes then reconnect o You may be asked to power cycle the kiosk do not do this unless advised by a technician If necessary Tech Support will send a replacement screen and walk you through installation o It takes at least two people to install a replacement plus a No 2 Phillips head screwdr...

Страница 28: ...s and kiosk lights If multiple devices are not working be sure to tell the technician right away When you speak with Tech Support you can expect the technician to ask you to Check the kiosk internet service and connection Verify that your Internet service is working Confirm the Ethernet Cable is properly plugged in and clicked into place Describe the status and activity lights for the Network Inte...

Страница 29: ...you have confirmed the kiosk has power and internet and its connections are secure you will work with our Tech Support specialists for most issues For troubleshooting information about specific components click below to go directly to that section Computer and Software Microphone Speakers and Amplifier Top camera Credit card reader Touchscreen Note Interior component photos were taken with the Mod...

Страница 30: ...m Models 220 720 and 920 use a small Micro PC mounted to the back wall of the kiosk and held in place with a metal bracket Most connections use color coded USBs cords If you confirm that the power and internet are operating properly problems with the PC will require technician assistance You may be asked to open the Admin Console for rebooting or to help with performing tests Safety Tip For your s...

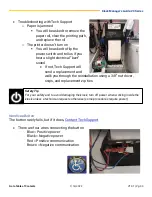
Страница 31: ...pressing it into the kiosk In this case Tech Support will send a replacement and walk you through the simple installation steps o If the device does not appear to be damaged you will be asked to unplug the microphone cable from the PC and plug it back in o If that does not fix the problem we will ask you to disconnect the microphone from the extension cable and then reconnect Speakers and Amplifie...

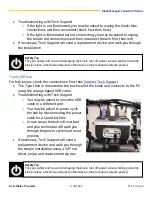
Страница 32: ...move the 3 5mm cable from the PC and reseat it so we can verify the speakers are being recognized by the operating system If necessary Tech Support will send replacement parts and walk you through installation using a 1 4 nut driver No 2 Phillips screwdriver snips and replacement zip ties Top camera For Top Camera issues check the connections first then Contact Tech Support NOTE tell the technicia...

Страница 33: ...ver snips and replacement zip ties o You may need a 3 8 nut driver to remove the mount from the kiosk frame o You may need a small adjustable crescent wrench if the wing nuts securing on the camera are too tight to remove by hand Credit card reader The credit card reader sits at an angle above the bill acceptor in the kiosk door and runs off a single USB cable that plugs directly into the PC Troub...

Страница 34: ...DMI port o Power cable plugs into the power port Troubleshooting with Tech Support o You will be asked to confirm that all cables are plugged in correctly o You may be asked to disconnect the power cable for a couple minutes then reconnect o You may be asked to power cycle the kiosk do not do this unless advised by a technician If necessary Tech Support will send a replacement screen and walk you ...

Страница 35: ... a new port on the PC and or 7 port hub If necessary Tech Support will send a replacement camera and walk you through the steps using a 3 8 nut driver snips and replacement zip ties Bill acceptor For driver s license camera issues check the connections first then Contact Tech Support Note the touchscreen installs from the front so when the brackets are removed it will be pushed from the inside out...

Страница 36: ... Replacement devices do not include this cable so remove pull firmly on all 4 wires at once and keep the one from the original unit 2 Flash Memory Port and cable one end is plugged into the bill acceptor port labeled Flash Memory Port and the other end stays coiled underneath the BA unless we need to flash the device s firmware 3 USB cable orange black and yellow wire combination that goes into a ...

Страница 37: ...mple installation using a 3 8 nut driver snips and replacement zip ties MEI bill acceptor Parts descriptions use photos for reference 1 The bill cassette where the cash is stored is removable from the rest of the device and label shows how to remove the cassette a Label includes a legend to decipher flashing red lights 2 The yellow tab at the top of the device is the latch to remove and reinstall ...

Страница 38: ...an its eye Spray a little Windex on a paper towel and gently clean the surface area of the reader do not spray directly onto the sensor Reach into the device and clean the other non removable sensor as well o You may be asked to power cycle the device by unplugging the cables 4 in the photo There are 2 groups of wires that plug into 2 different Molex connections Remove and reconnect one at a time ...

Страница 39: ...bzzt sound If not Tech Support will send a replacement and walk you through the reinstallation using a 3 8 nut driver snips and replacement zip ties Handicap Button The button rarely fails but if it does Contact Tech Support There are four wires connecting the button Blue Positive power Black Negative power Red Positive communication Brown Negative communication Safety Tip For your safety and to a...

Страница 40: ... using the orange tipped USB cable Troubleshooting with Tech Support o You may be asked to move the USB cable to a different port o You may be asked to power cycle the hub by disconnecting the power cable for a specified time o In rare cases the hub will overload and your technician will walk you through the power cycle hard reset process If necessary Tech Support will send a replacement device an...

Страница 41: ...nding motors IO controller and the handicap button Lock Vending Most lock dispensing issues can be fixed by properly reloading locks Review lock loading instructions here For lock vending issues not corrected by reloading see the IO Controller section below IO controller The Input Output IO controller converts electronic signals to computer signals and vice versa It controls the lock vending motor...

Страница 42: ...ked if the power indicator light is illuminated on the controller shown above o You will be asked if the USB cable is properly seated on both ends at the device and at the PC port If necessary Tech Support will send a replacement device and walk you through the installation using a 5 16 nut driver snips and replacement zip ties ...

Отзывы: