Maintenance
OMAX JetMachining® Center Operator’s Guide
400433D-EN
4 - 23
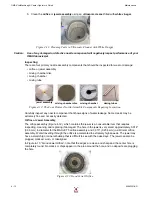
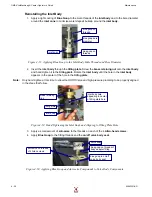
4.
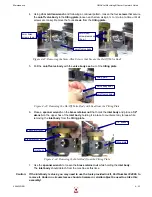
Using a
5 mm Allen wrench
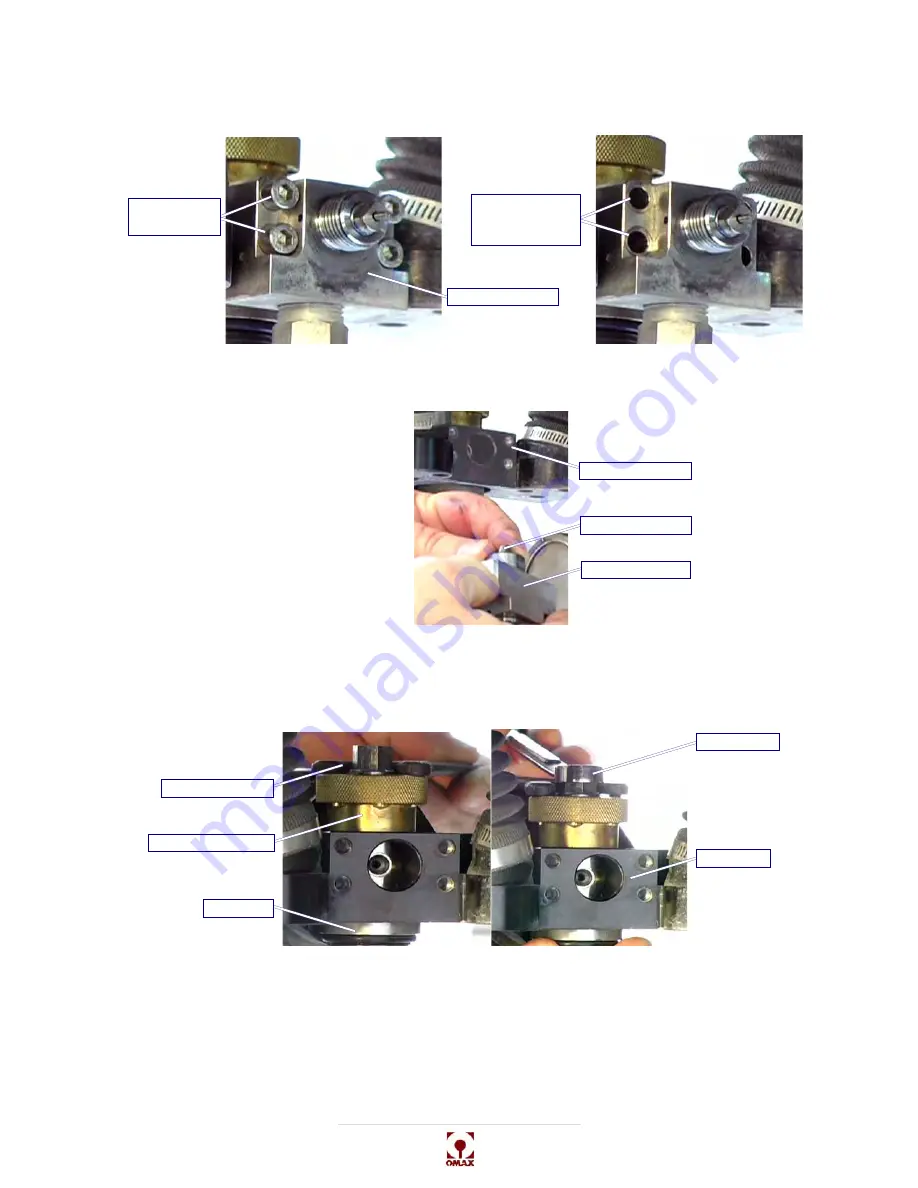
and following a continual pattern, loosen the four
screws
that secure
the
on/off valve body
to the
tilting plate
(loosen each screw using a ¼ to ½ turn at a time until all
screws are loose). Remove the four
screws
from the
tilting plate
.
Figure 4-42: Removing the 5mm Allen Screws that Secure the On/Off Valve Body
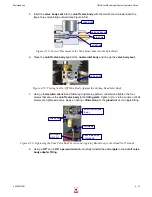
5.
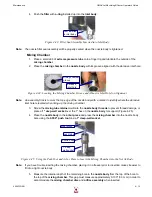
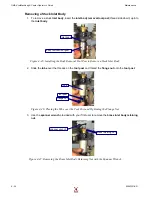
Pull the
on/off valve body
with the
valve body seat
out of the
tilting plate
.
Figure 4-43: Removing the On/Off Valve Body with Seat from the Tilting Plate
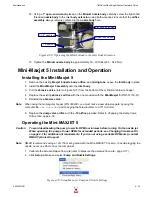
6.
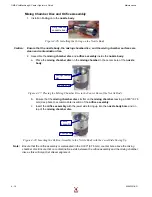
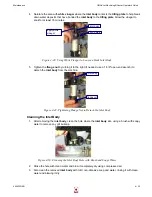
Place a
spanner wrench
on the
brass retainer nut
that holds the
inlet body
and place a
1/2"
wrench
on the upper hex of the
inlet body
, holding it in place to counteract any torque while
removing the
inlet body
from the
tilting plate
.
Figure 4-44: Removing the Inlet Body from the Tilting Plate
7.
Use the
spanner wrench
to loosen the
brass retainer nut
while holding the
inlet body
.
The
inlet body
should detach from the machine at this time.
Caution:
If the inlet body is stuck, you may need to use the tools provided in kit, Part Number 304096, to
remove it. Under no circumstances should a hammer or similar object be used to strike this
assembly!
on/off valve body
5mm Allen
screws (4 ea.)
5mm Allen
screws removed
(4 ea.)
tilting plate
on/off valve body
valve body seat
1/2" wrench
inlet body
brass retainer nut
spanner wrench
tilting plate
Содержание JetMachining Center 2626
Страница 8: ...OMAX JetMachining Center Operator s Guide viii 400433D EN ...
Страница 12: ...OMAX JetMachining Center Operator s Guide xii 400433D EN ...
Страница 22: ...OMAX JetMachining Center Operator s Guide Safety First 1 10 400433D EN ...
Страница 140: ...OMAX JetMachining Center Operator s Guide OMAX Glossary 6 16 400433D EN ...
Страница 144: ...OMAX JetMachining Center Operator s Guide Index 4 400433D EN ...


