36
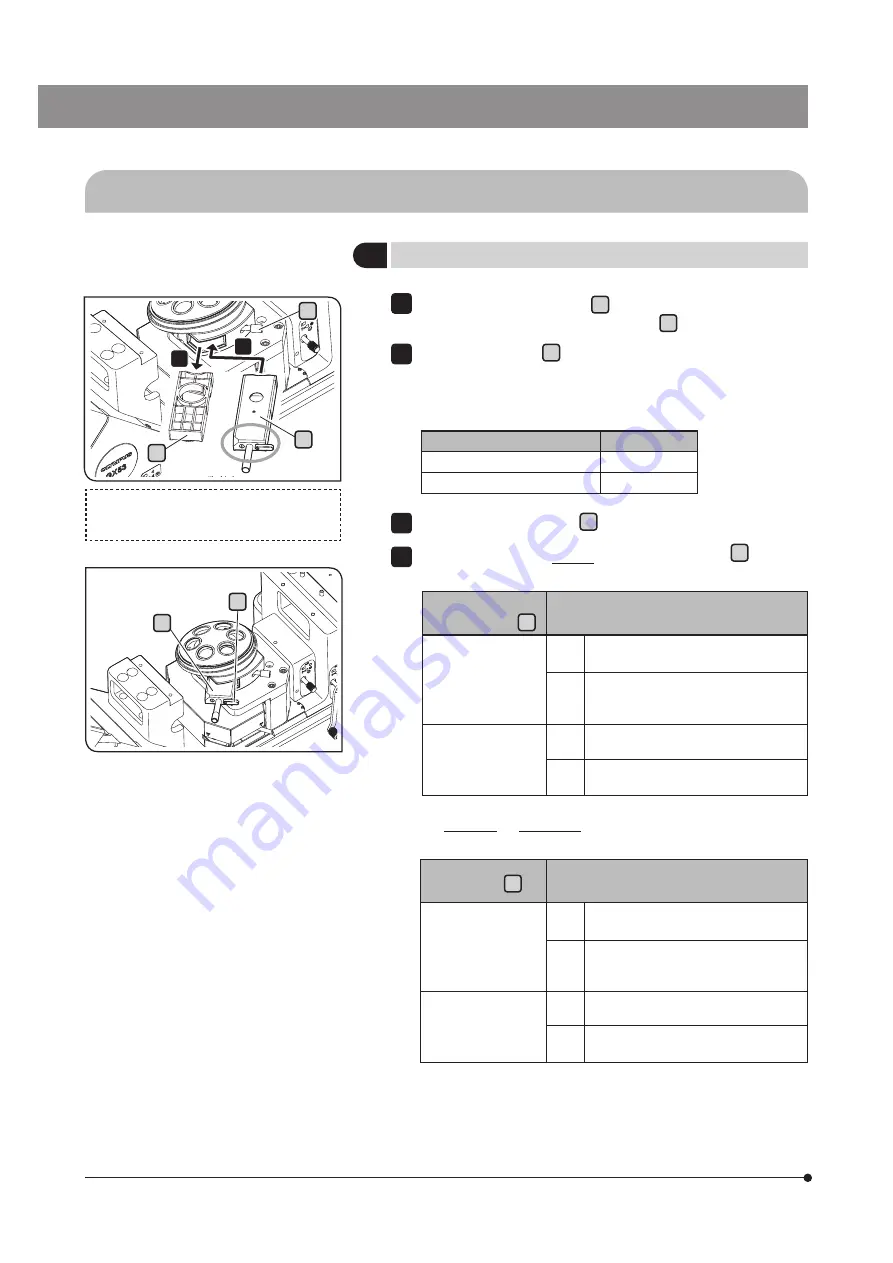
Loosen the mounting knob a at the rear right of the revolving
nosepiece and pull out the dummy slider b .
Insert the DIC slider c for reflected light observation in the slider
insertion slot of the revolving nosepiece with the display surface facing
down, and stop inserting at the first level (when the clicking sound is
heard at first).
DIC slider position
Light path
First level (pulled out)
OUT
Second level (pressed in)
IN
Tighten the mounting knob a to secure the slider.
Only with the DIC slider U-DICR, slide the selection lever d according
to the objective in use.
Position of light path
selection lever d
Applicable objectives
Pressed in
UIS2 MPLFLN/MPLFLN-BD series
MPLAPON series
UIS
UMPlanFI/UMPlanFI-BD series
MPlanApo20X, 100X
MPlanApo100XBD
Pulled out
UIS2 LMPLFLN/LMPLFLN-BD series
UIS
LMPlanFI/LMPlanFI-BD series
LMPlanApo/LMPlanApo-BD series
For U-DICRH or U-DICRHC without selection lever, the applicable
objectives are as follows.
DIC slider c
Applicable objectives
U-DICRHC
UIS2 MPLFLN/MPLFLN-BD series
MPLAPON series
UIS
UMPlanFI/UMPlanFI-BD series
MPlanFI-BD series
MPlanApo20X, 100X
U-DICRHC
UIS2 LMPLFLN/LMPLFLN-BD series
UIS
LMPlanFI/LMPlanFI-BD series
LMPlanApo/LMPlanApo-BD series
1
2
3
4
1
Inserting the DIC slider
4-7 Using the DIC slider
1
c
b
2
a
c
d
The following illustration shows the view without
stage in order to show the slider insertion slot
without obstacle.


