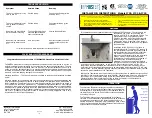
Thank you for purchasing this quality product. Olympia products are rigorously tested to provide long service
under normal conditions. Prior to installation, familiarize yourself with this parts diagram. Make sure that you have
all of the illustrated parts for your Olympia product before installation.
INSTALLATION INSTRUCTIONS
Tools you will need:
Plumbers Putty
•
Teflon Tape
•
Screwdriver
•
Flexible Supply Lines
•
Pipe Wrench
•
Adjustable Wrench
•
Basin Wrench
•
Soft Cloth
•
WATER SUPPLY HOOKUPS (NOT PROVIDED):- Choose hook-ups for 1/2” I.P.S. Connections :- Ball
Nose Riser (3/8” O.D. Copper Tubing) With Supply Nuts or 1/2” I.P.S. faucet connector
FOR 3 HOLE INSTALLATION:
Carefully shut off both hot and cold water from under the sink. Plug the sink drain with a soft cloth
1.
to prevent intrusion of debris or the loss of any faucet parts. If this installation is for a replacement,
carefully remove the existing faucet and clean the entire surface of the sink mounting holes.
Position the faucet on the top of deck plate(K), Place adequate amount of plumbers putty along
2.
the base gasket if necessary. Note:-Put base gasket under deck plate. Place deck plate with base
gasket (K) on the mounting surface. Lead supply lines through the center hole.
Attach locknut (H) onto the faucet and tighten with the help of mounting tool (J) until the faucet is
3.
securely in place. Do not overtighten.
Connect pull-down spray head hose (A) to the faucet center outlet line from underneath.
4.
From below, attach the weight (I) onto the spray hose (A).
5.
Connect inlet lines to hot (LEFT INLET) and cold (RIGHT INLET) water supply lines. Connect water
6.
supply lines to water supply stops. Use with teflon tape for threaded connections.
Turn on the hot and cold water. Check all around for any leaks.
7.
FOR 1 HOLE INSTALLATION:
Carefully shut off both hot and cold water from under the sink. Plug the sink drain with a soft cloth
1.
to prevent intrusion of debris or the loss of any faucet parts. If this installation is for a replacement,
carefully remove the existing faucet and clean the entire surface of the sink mounting holes.
Position the faucet, and from below, tighten the locknut (H) with the help of mounting tool (J) to
2.
secure faucet to the mounting surface, Do not overtighten.
Connect pull-down spray head hose (A) to the faucet center outlet line from underneath.
3.
From below, attach the weight (I) onto the spray hose (A)
4.
Connect inlet lines to hot (LEFT INLET) and cold (RIGHT INLET) water supply lines. Connect water
5.
supply lines to water supply stops. Use with teflon tape for threaded connections.
Turn on the hot and cold water. Check all around for any leaks.
6.
Olympia Faucets, Inc. © 2012
For more care information or trouble shooting inquiries
about your Olympia product, please call:
OLYMPIA FAUCETS, INC.
(888) 772-7701
Central Standard Time: 8:00am ~ 7:00pm
www.olympiafaucets.com
ITEM #
DESCRIPTION
A
OP-420039*
Pull-Down Spray Head & Hose
A
OP-420040*
1.5 GPM Pull-Down Spray Head &
Hose
B
OP-420041
Spout repair Kit
C
OP-320002
Ceramic Disc Cartridge
D
OP-420042
Retainer Nut
E
OP-420043*
Cap
F
OP-120002*
Lever Handle
G
OP-420044
Washer
H
OP-520005
Locknut
I
OP-420014
Weight
J
OP-520008
Mounting Tool
K
OP-420045*
Deck Plate
1
OP-420046
Button
2
OP-420047
Allen Screw
* Note- Please Specify finish\color code while ordering.


