background image

A7592AA  

bar shower 

mixer without shower kit

A7593AA  

bath shower 

mixer without shower kit

A7215AA & A861383AA 

wrap over shower shelves

A7594AA  

bar

shower mixer dual 

pack with overhead 

Rain shower & 

Hand spray

Thermostatic, exposed, two hole, rim 

& wall mounted bath /shower mixers
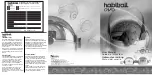
Ceratherm T125

with lever handles

INSTALLER:


After installation please pass this instruction booklet to user

IMPORTANT

BEFORE CONNECTION, FLUSH WATER THROUGH PIPEWORK TO REMOVE

ALL DEBRIS ETC. WHICH COULD DAMAGE THE VALVE MECHANISM

INSTALLATION

INSTRUCTIONS


TMV2 products

- A7592AA

- A7594AA

Summary of Contents for Ceratherm T125

Page 1: ...ead Rain shower Hand spray Thermostatic exposed two hole rim wall mounted bath shower mixers Ceratherm T125 with lever handles INSTALLER After installation please pass this instruction booklet to user...

Page 2: ...HOWER PACK INSTALLATION 16 A7594AA 16 8 OPERATING PRODUCT 17 9 TEMPERATURE ADJUSTMENT 19 10 COMMISSIONING PERIODIC CHECKS 20 11 FREQUENCY OF REGULAR SERVICING 20 12 COLD WATER ISOLATION CWI TEST 21 13...

Page 3: ...without hole for overhead outlet suitable for A7592AA Wrap over shower shelf A861383AA with hole for overhead outlet suitable for A7594AA 1 2 Wrap over shower shelves 1 1 A7592AA A7594AA Shown above...

Page 4: ...3 4 150 G 3 4 45 180 4 Basic bath shower mixer dimensions shown with deck mounting legs assembled Dimensions are in millimetres may vary within permitted tolerances 1 3 A7593AA Shown above A7593AA bat...

Page 5: ...ons are in millimetres may vary within permitted tolerances 1 4 SHOWER PACK A7594AA Note The following two products do not include a shower pack kit A7592AA A7593AA NOTES Where shower mixer products a...

Page 6: ...upplied without shower kit Right side handle controls flow to a single shower outlet Shower mixer dual pack with overhead Rain shower Hand spray supplied with A7594AA A7594AA Shower valve shown withou...

Page 7: ...ntrols flow diverts between bath fill shower hand set Note A7593AA is supplied without a shower kit 7 2 2 Deck mount mixer A7593AA NOTE Shower kits have to be carefully assembled during installation c...

Page 8: ...d as the vertical distance between the bottom of the cold water storage tank which feeds the hot water system and the highest point on the shower spray plate When installing with a shower pump the use...

Page 9: ...flow regulator A pair of service valves for isolating both water supplies MUST be fitted below the bath to permit future maintenance of this product see sect 23 These should be fitted as close as prac...

Page 10: ...tted zone of backflow risk for restrained hose which is longer than system design hose not permitted zone of backflow risk for unrestrained hose zone of backflow risk for restrained hose w c spill ove...

Page 11: ...o the water supply inlets of the mixer in an easily accessible location NOTE service valves are not supplied with thiese products see section 23 Shower Kit The flexible shower hose from the shower kit...

Page 12: ...m copper supply pipes should be run within the wall cavity Hot supply pipe should be on the left hand side and the cold on the right Ensure that the hot and cold pipes are positioned 150mm apart and a...

Page 13: ...aging conce aled pipework 10 MIN 20 MAX With the wall brackets in position the supply pipes should be trimmed as shown The pipes should project from the front face of the brackets by bet ween 10 to 20...

Page 14: ...ing to ensure that the sealing washers filters are inserted between the adaptors and the shower valve inlets Keep the mixer parallel to the wall whilst screwing the captive nuts clockwise by hand Care...

Page 15: ...ils of the legs into the two holes in the bath Align the legs and gently lower the mixer onto the rim of the bath IMPORTANT make sure the deck seals are still correctly located in the recesses of the...

Page 16: ...view of overhead shower pack installation A7594AA 1 12 1 2 3 4 5 985 6 6 X X 9 10 2 5 8 7 11 11 12 min 10 Nm Fittings grease Graisse de robinetterie Grasso per rubinetti Kraanvet Grasa de griferia Arm...

Page 17: ...nter economy flow stop delivering about 50 of the maximum flow rate achievable through this product To obtain greater flow rate press hold the right button rotate this handle further downwards The han...

Page 18: ...vering about 50 of the maximum flow rate achievable through this product To obtain greater flow rate press hold the right button rotate this handle further downwards The handle will rotate further to...

Page 19: ...efore sliding the handle off ensure the dot on the handle is inline with the 40 marker on the mixer 4 Slide the handle off the spindle 5 Slide off the plastic bush from the drive spindle 6 Turn on the...

Page 20: ...low 45 C If there is no significant change to the set outlet temperature 2 C or less change from the original settings and the fail safe shut off is functioning then the valve is working correctly and...

Page 21: ...clean all filters ensure check valves are working and make sure all isolating valves are fully open Refit the shower handset to the flexible hose upon completion of the test NOTE In order to isolate t...

Page 22: ...se inline service valves if fitted 2 Fully open the flow or diverter handle to confirm water is switched off Unscrew the shower hose from the underside of the mixer This will permit some of the trappe...

Page 23: ...y dependent upon the water quality and service life As a minimum we recommend removal both handles thermostatic cartridge flow control or diverter cartridge Cleaning the cartridge strainer screens is...

Page 24: ...then use a sharp blade to lever the cap out taking care not to damage the chromed surfaces 2 Undo the handle retaining screw using a Phillips screw driver 3 Carefully slide the handle off from the car...

Page 25: ...idge with a new one Alternatively if the cartridge is functioning correctly clean it thoroughly reuse it 5 When fitting the cartridge into the bore ensure the lug on the cartidge is orientated into th...

Page 26: ...nsert then Align the dot marker on the handle with the line marker on the stop sleeve Reverse the sequence to refit the handle 18 DIVERTER REPLACEMENT 1 Observe disassembling sequence as detailed in s...

Page 27: ...the mixer bore screw the cartridge into the mixer body by hand then tighten with a spanner or socket Ideally torque to 16Nm min to 18Nm max 6 Refit the stop ring as illustrated above Align the marked...

Page 28: ...ral strainers from inside the mixer s inlet bores keep them in a safe location On a regular basis the anti splash nozzle on the bath mixer should be inspected and cleaned if necessary In areas where l...

Page 29: ...1 371 NU 1 pcs 3 Stopring A 861 373 NU 1 pcs 4 Cartridge G1 2 180 cpl A 861 245 NU 1 Set 5 Nipple G1 2 outside cpl A 861 498 NU 1 Set 6 Non return valve A 861 372 NU 1 Set 7 Shower bracket connect A 8...

Page 30: ...61 371 NU 1 pcs 3 Stop valve with diverter A 861 375 NU 1 Set 4 Thread ring stopring cpl A 861 376 NU 1 Set 5 Connection nipple cpl A 861 387 NU 1 Set 6 Non return valve A 861 372 NU 1 Set 7 Nipple G1...

Page 31: ...109 AA 1 pcs 10 Handspray 1F 8l min BC 774 AA 1 pcs 9 10 13 5 9 11 19 12 14 15 16 17 3 4 18 8 2 1 1 6 7 Exposed Thermostatic Bar Shower Mixer with overhead Rain shower Hand spray 11 Shower bar A 861 3...

Page 32: ...stalled in an easily accessible location Basic valve with isolating only feature is available un der spares code S9005AA 15mm compression fittings at both ends plated finish E960086NU Brass valve with...

Reviews: