Page 3-8
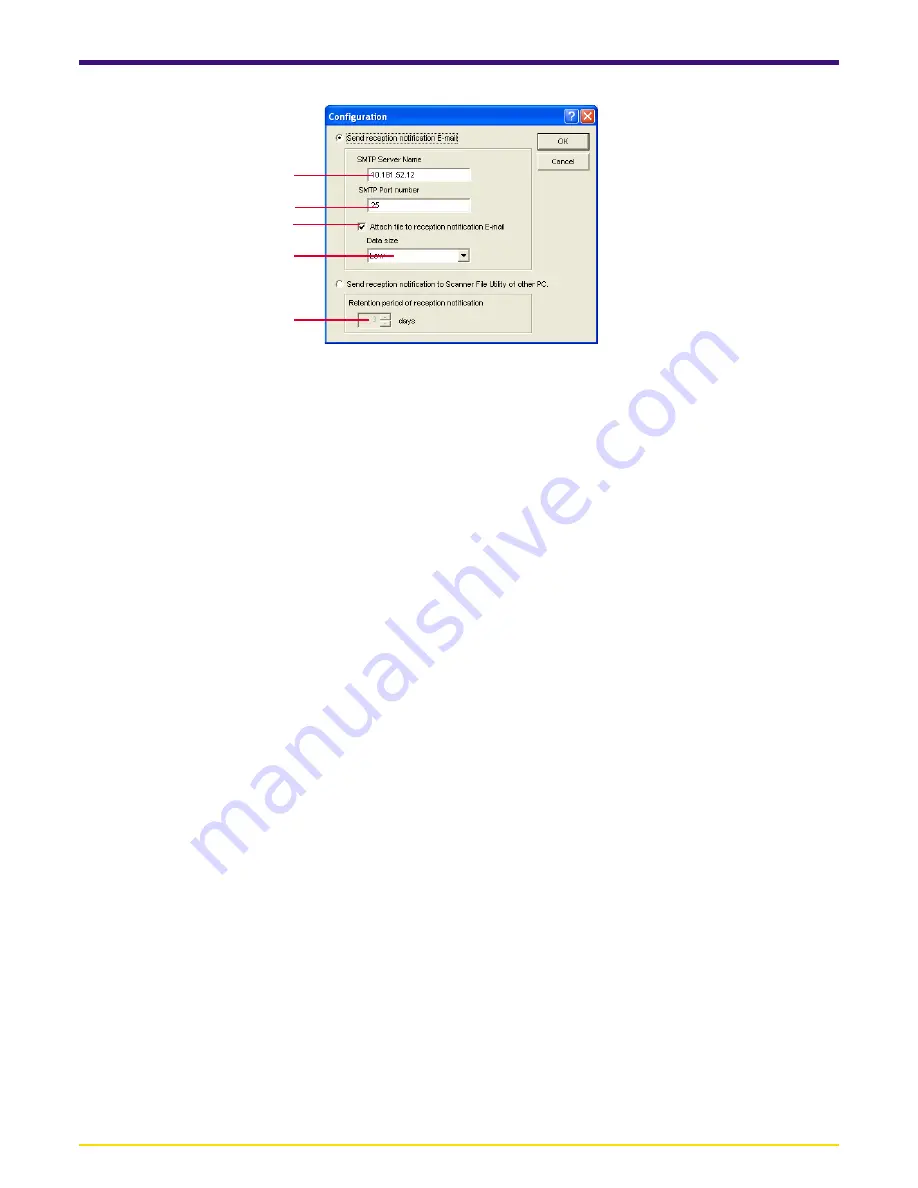
3-5 Delivery Setting List Dialogue Box
1
2
3
4
5
3. Select the transmission method for the notice of fax reception.
To have the notice of fax reception sent by e-mail, put a check mark in the
Send reception notification E-mail
checkbox.
To have the notice of fax reception sent to any other computer on the network that has the Scanner File Utility installed,
put a check mark in the
Send reception notification to Scanner File Utility of other PC
check box. The settings
related to the respective check marks will then be available.
1
SMTP Server Name
edit box
Enter the IP address or host name of the SMTP server address to be used when sending the notice of fax reception.
The server name can be up to up to 32 characters long.
* This setting is shared for all folders, so any changes made here will affect the settings for all other folders as well.
2
SMTP Port number
edit box
Enter the port number of the SMTP server to be used when sending the notice of fax reception. (Available setting:
between 1 and 32767, default setting: 25).
* This setting is shared for all folders, so any changes made here will affect the settings for all other folders as well.
3
Attach file to reception notification E-mail
check box
Put a check mark in this checkbox when you want to attach the image file of the received fax to the reception
notification mail.
4
Data size
edit box
Select the maximum size for files attached to the reception notification mail.
You can choose from among “Low”, “Mid.”, “High” and “Non-restricted”. Files which exceed the size limit will not be
attached.
* The approximate size limits for each setting is as follows, but this should not be taken as an exact representation of
actual performance ability.
“Low”: 0.5 MB, “Mid.”: 1.0 MB, “High”: 2.0 MB
5
Retention period of reception notification
edit box
Set the number of days, between 0 and 31, that retransmission of the notice will be attempted in case the computer
set to receive the notice of fax reception is not turned on.
4. Click on the
OK
button. The display will return to the
Delivery Setting
List
dialogue box.
5. To continue making delivery settings, click on the
New
button and proceed to the following procedure, “3-6 Delivery
Setting Dialogue Box”.


