[Paper]
7-5
[Paper]
The size and type of the paper to be printed on can be selected, and the size
and type settings for the paper loaded into each paper tray can be changed.
The paper size can be selected automatically according to the document size
or it can be specified manually.
"
For details on the paper types and sizes, refer to “Print Media” on
page 4-2.
"
When paper is loaded in the bypass tray, the [Paper] screen appears
while the bypass tray (tray 1) is selected automatically.
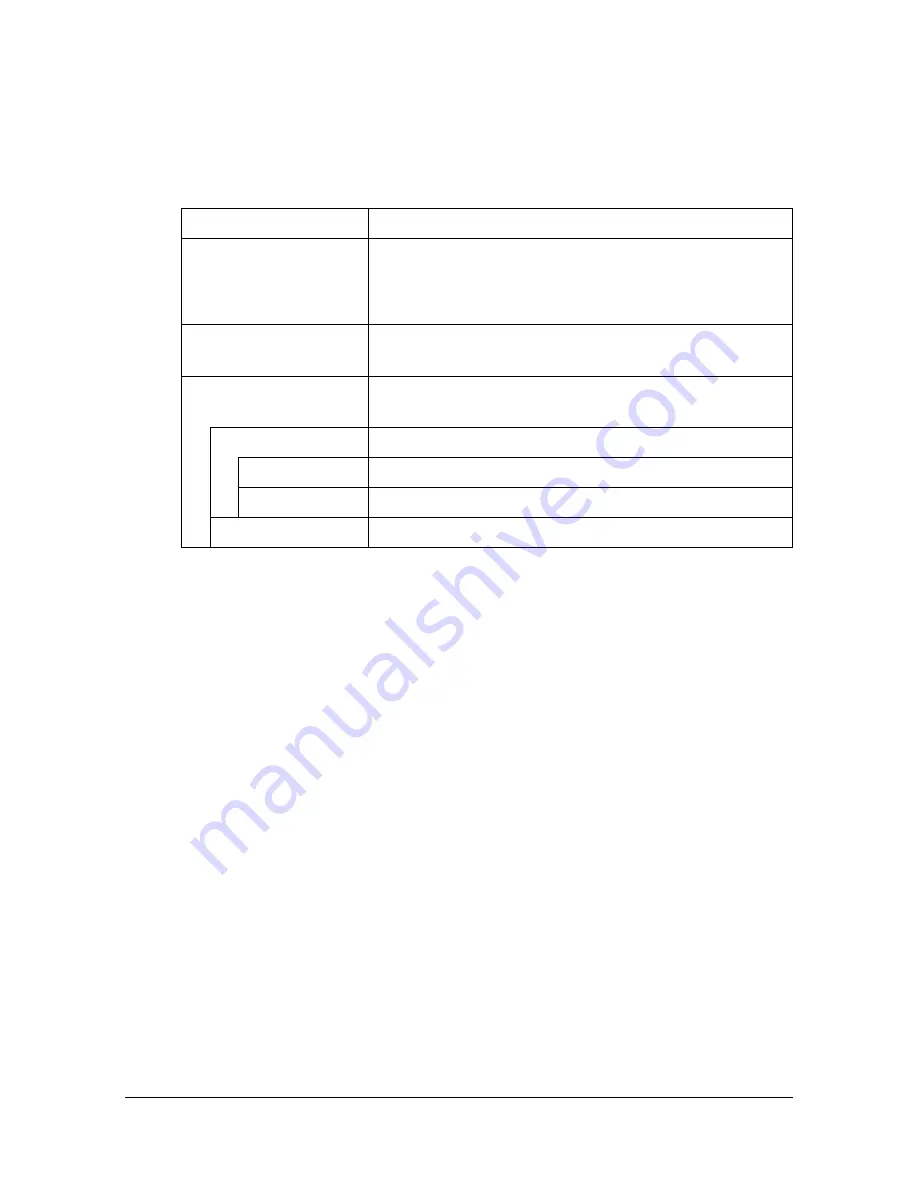
Item
Description
[1]-[4]
Manually select the paper tray.
[3] and [4] are available if the optional lower feeder
units have been installed.
[Auto]
The paper is selected automatically according to the
size of the original document.
[Change Tray Set]
Specify the type and size of the paper loaded in the
selected paper tray.
[Paper Size]
Specify the paper size.
[Standard Size] Select the paper size.
[Custom Size] Enter the size of the paper.
[Paper Type]
Select the paper type.
Содержание d-COLORMF3000
Страница 1: ...USER S GUIDE d COLORMF3000 Code 559911en GB...
Страница 8: ...x 6...
Страница 18: ...Contents x 16...
Страница 19: ...1Introduction...
Страница 32: ...Getting Acquainted with Your Machine 1 14...
Страница 33: ...2Control panel and touch panel screens...
Страница 49: ...3Utility Settings...
Страница 127: ...4Media Handling...
Страница 164: ...Loading a Document 4 38...
Страница 165: ...5Using the Printer Driver...
Страница 176: ...Using the Postscript PCL and XPS Printer Driver 5 12...
Страница 177: ...6Proof Print External memory and ID Print functions...
Страница 182: ...ID Print 6 6...
Страница 183: ...7Performing Copy mode operations...
Страница 198: ...Image Quality 7 16...
Страница 199: ...8Additional copy operations...
Страница 203: ...9Scanning From a Computer Application...
Страница 216: ...Using a Web Service 9 14...
Страница 217: ...10 1Scanning with the machine...
Страница 254: ...Registering destinations 10 38...
Страница 255: ...11 Replacing Consumables...
Страница 290: ...Replacing Consumables 11 36 7 Lift up the 2 levers 8 Remove the packing material 9 Push down the 2 levers...
Страница 294: ...Antistatic Protection 11 40...
Страница 295: ...12 Maintenance...
Страница 300: ...Cleaning the machine 12 6 3 Clean the media feed rollers by wiping them with a soft dry cloth 4 Close the tray...
Страница 308: ...Cleaning the machine 12 14...
Страница 309: ...13 Troubleshooting...
Страница 322: ...Clearing Media Misfeeds 13 14 4 Remove any misfed media 5 Close the ADF cover 6 Close the ADF feed cover...
Страница 327: ...Clearing Media Misfeeds 13 19 5 Close the fuser unit cover 6 Push down the 2 levers 7 Close the right door...
Страница 330: ...Clearing Media Misfeeds 13 22 3 Close the right door...
Страница 356: ...Status error and service messages 13 48...
Страница 357: ...14 Installing Accessories...
Страница 364: ...Working Table WT P01 14 8 2 Tighten the screws c tempo rarily 3 Install the working table c 1 a...
Страница 365: ...Working Table WT P01 14 9 4 Using a coin tighten the screws c 5 Using a coin tighten the screws d d...
Страница 366: ...Working Table WT P01 14 10...
Страница 367: ...15 Authentication device IC card type...
Страница 374: ...Logging in to this machine 15 8...
Страница 375: ...Appendix...
Страница 381: ...Technical specifications A 7 Service Replaceable Item Average Life Expectancy Media feed roller 300 000 pages...
Страница 384: ...Our Concern for Environmental Protection A 10...


