- 87 -
Scanning to Computer
4
Scanning
Connecting using wireless LAN
(MC342dw, MC362w, MC562w, MC562dw,
ES5462dw MFP, MPS2731mc only):
Use the WPS (push button) function to set the
wireless LAN. For details on other methods
for setting the wireless LAN, refer to the
Configuration Guide.
1
Press the <SETTING> key on the operator
panel.
2
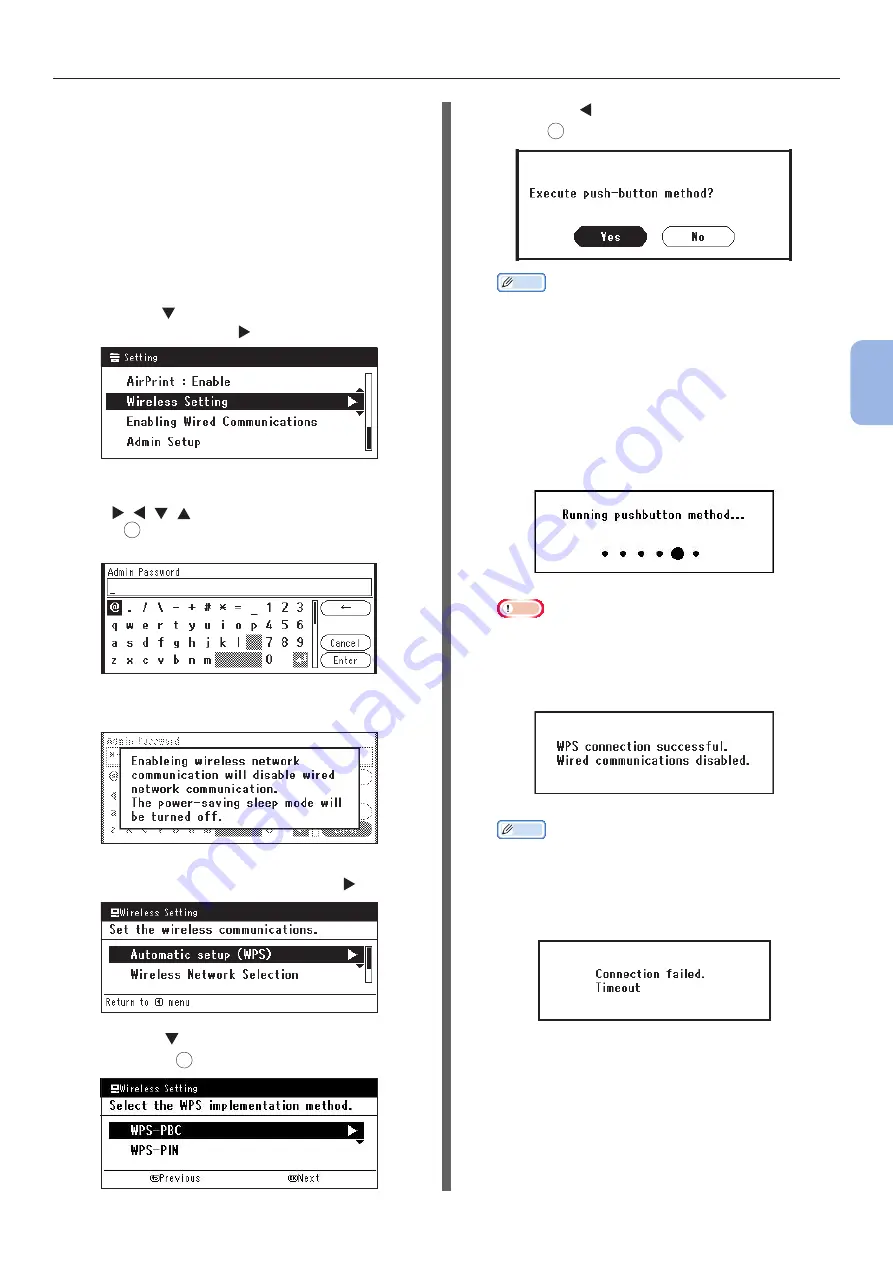
Press the to select [Wireless Setting],
and then press the .
3
Log in by entering administrator password
of the device.
Use
, , ,
key to select letter and then
press
OK
.
Default administrator password is “aaaaaa”.
The message below will be displayed for
about 5 seconds.
4
Check that [Automatic setup (WPS)]
is selected, and then press the .
5
Press the to select [WPS-PBC], and
then press
OK
.
6
Press the to select [Yes], and then
press
OK
.
Memo
● Start the WPS push button for wireless AP after clicking
[Yes] in the confirmation screen. Alternatively, if WPS
push button for wireless AP is started first, start the
WPS push button on this equipment.
● If [No] is selected, the screen returns to that from
step 5.
7
If [Yes] is selected in step 6, [Running
pushbutton method...] is displayed in
the screen.
Note
● Panel operations cannot be performed during WPS
execution.
● When [WPS connection successful] is displayed,
this equipment is connected to the wireless LAN.
Memo
● If [Connection failed Timeout] is displayed, it
is possible that the wireless AP of the connection
destination could not be found within the time limit.
Select [Yes] again in step 6 within 2 minutes of
starting WPS push button for wireless AP.
● If [Overlap] is displayed, WPS-push button is being
executed on 2 or more wireless AP. Please wait for a
short time and then retry.


