- 83 -
5. Maintenance
9
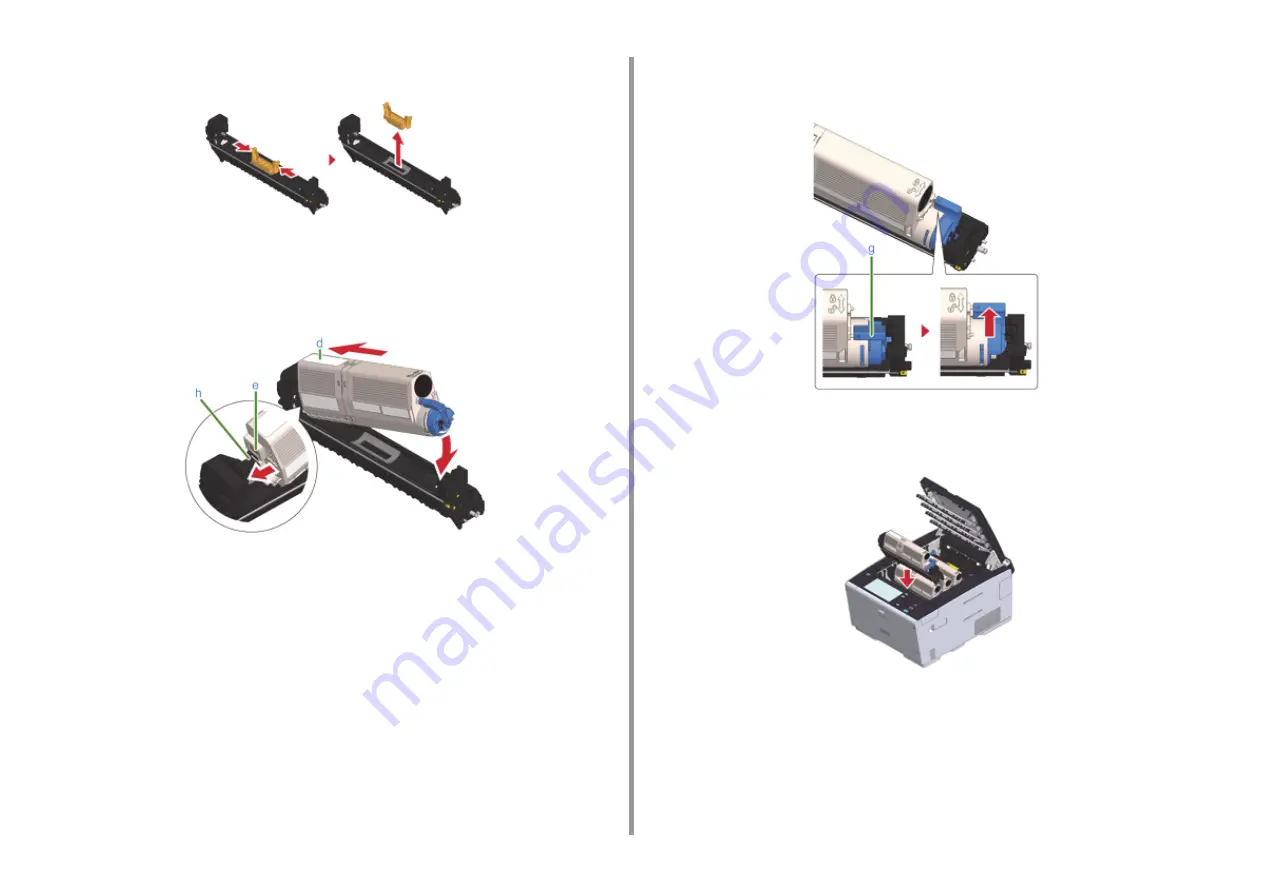
Remove the toner cover.
10
Insert the toner cartridge (d) removed in step 6 by aligning its left side
indentation (e) with the protrusion (h) on the image drum so that the toner
cartridge and image drum color label align. Then insert the right side gently
into place.
11
Hold the cartridge, pinch the tip of blue lever (g) of the toner cartridge, and turn
forward until the tip aligns on the lug of the cartridge.
12
Check the label color of the new image drum and place the drum into the
machine.
Содержание C542
Страница 1: ...C542 ES5442 User s Manual...
Страница 16: ...16 2 Setting Up Side view when the additional tray unit is installed...
Страница 27: ...27 2 Setting Up 1 Plug the power cord into the power connector 2 Plug the power cord into the outlet...
Страница 33: ...33 2 Setting Up 7 Replace the paper cassette into the machine Push the paper cassette until it stops...
Страница 37: ...37 2 Setting Up 9 Make sure that the software is successfully installed and then click Complete 10 Click Next...
Страница 62: ...62 4 Print 5 Change the settings in each tab to suit your needs 6 Click OK 7 Click Print on the Print screen...
Страница 74: ...74 4 Print Supply Levels Panel Item Description 1 Consumables Displays the remaining amount of consumables...
Страница 76: ...5 Maintenance Replacing Consumables Cleaning Each Part of the Machine...
Страница 89: ...6 Troubleshooting If Paper Jams Occur Print Problems If an Error Message is Displayed on the Operator Panel...
Страница 126: ...46472602EE Rev1...


