- 45 -
3. Basic Operations
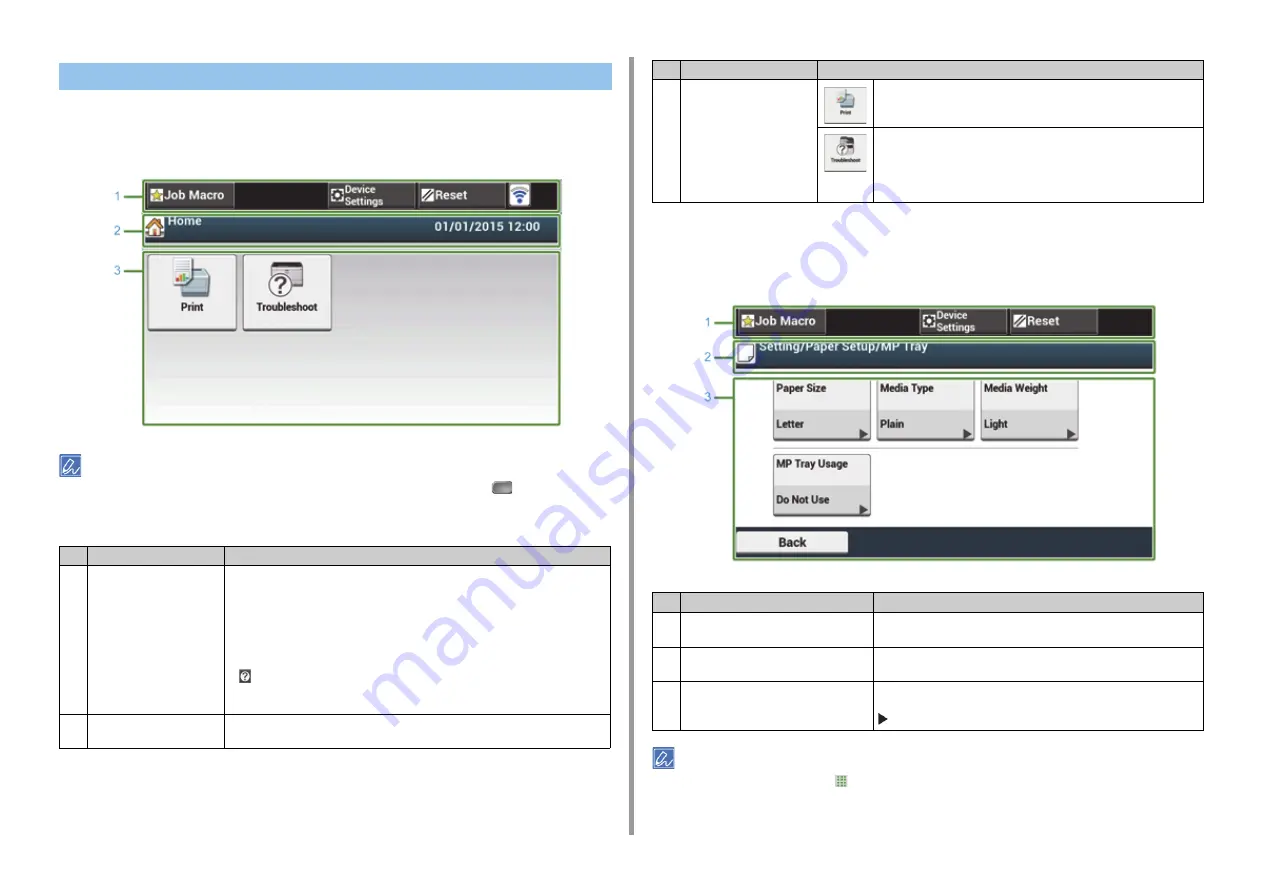
When this machine turns on, the home screen is displayed on the touch panel.
• Home Screen
The screen image shows the factory default setting. The screen that appears by pressing the
(HOME) button on
the operator panel can be changed from [Device Settings] > [Admin Setup] > [Management] > [Default Mode] on the
touch panel.
• Name and Function of the Device Settings Screen
[Basic] tab > [Paper Setup/MP Tray] screen is used as an example.
You can enter a value in the field with
displayed by using the numeric keypad.
About the top screen
Name and Functions on the Touch Panel
Item
Description
1
Stationary button area
Displays buttons that appear on the screen at all times.
Displays the following items.
• [Job Macro]
• [Function Settings]
• [Device Settings]
• [RESET]
• [Logout]
• Antenna mark: appears when the wireless LAN is enabled.
• [
]
Only available buttons are displayed on the selected menu.
2
Title and operation guide
area
Displays the title of the current screen and provides guide for possible operations.
3
Main area
Press to use the print functions.
The following steps and functions are displayed.
• Change Consumable & Maintain
(Toner cartridges, Image drams, Belt units, Fuser units)
• Maintain and Care for the Unit
(Feeder Rollers, LED head)
Item
Description
1
Stationary button area
Displays buttons that appear on the screen at all times.
Only available buttons are displayed on the selected menu.
2
Title and operation guide area
Displays the title of the current screen and provides guide for possible
operations.
3
Main area
The current setting is displayed on each button.
<About the mark on a button>
: Indicates that the next page exists.
Item
Description
Содержание C542
Страница 1: ...C542 ES5442 User s Manual...
Страница 16: ...16 2 Setting Up Side view when the additional tray unit is installed...
Страница 27: ...27 2 Setting Up 1 Plug the power cord into the power connector 2 Plug the power cord into the outlet...
Страница 33: ...33 2 Setting Up 7 Replace the paper cassette into the machine Push the paper cassette until it stops...
Страница 37: ...37 2 Setting Up 9 Make sure that the software is successfully installed and then click Complete 10 Click Next...
Страница 62: ...62 4 Print 5 Change the settings in each tab to suit your needs 6 Click OK 7 Click Print on the Print screen...
Страница 74: ...74 4 Print Supply Levels Panel Item Description 1 Consumables Displays the remaining amount of consumables...
Страница 76: ...5 Maintenance Replacing Consumables Cleaning Each Part of the Machine...
Страница 89: ...6 Troubleshooting If Paper Jams Occur Print Problems If an Error Message is Displayed on the Operator Panel...
Страница 126: ...46472602EE Rev1...


