B3c Installation
• Prepare the steering cylinder
i) Use the helm to extend the steering
cylinder to full hard over as shown in
Fig B13 (it may be necessary to run
the engine to do this).
ii) Remove the cotter and clevis pins that
connect the primary steering cable
rod end to the steering cylinder clevis
bracket.
iii) Ensure that the flats on the steering
cylinder are vertically aligned (it may
be necessary to crack the nut on the
primary steering cable to adjust this,
the nut should then be re-torqued to
175in-lb / 20Nm).
• Fit the drive collar and spacer bush
i) Use the helm to retract the primary
steering cable to full opposite hard
over so the rod end disengages from
the cylinder clevis bracket (Fig B14a).
ii) Slacken the clamp screw and lock nut
on the fitting kit drive collar.
iii) Fit the spacer bush on to the steering
cylinder sleeve, ensure it is correctly
oriented - refer to Fig B14b.
iv) Slide the drive collar on to the steering
cylinder and over the spacer bush as
shown in the diagram.
Do not tighten
the clamp screw at this stage .
v) Use the helm to extend the primary
steering cable back to full hard over
so that the rod end re-engages into
the cylinder clevis bracket.
13 of 44
Subject to change without notice
OC15269 REV F
www.octopusdrives.com
www.octopuseurope.com
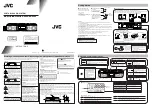
Fig B13 - Steering cylinder in fully extended posi-
tion
Clevis
bracket
Clevis
pin
Flat must
be vertical
Cotter pin
Steering cylinder
fully extended
Steering cable fully
retracted
Spacer
bush
Drive collar
Drive collar &
Spacer bush
Steering cable
fully extended
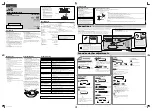
Fig B14 - Fitting the drive collar and bush to the
steering cable sleeve


