


Customizing Zones
Customizing OCR
65
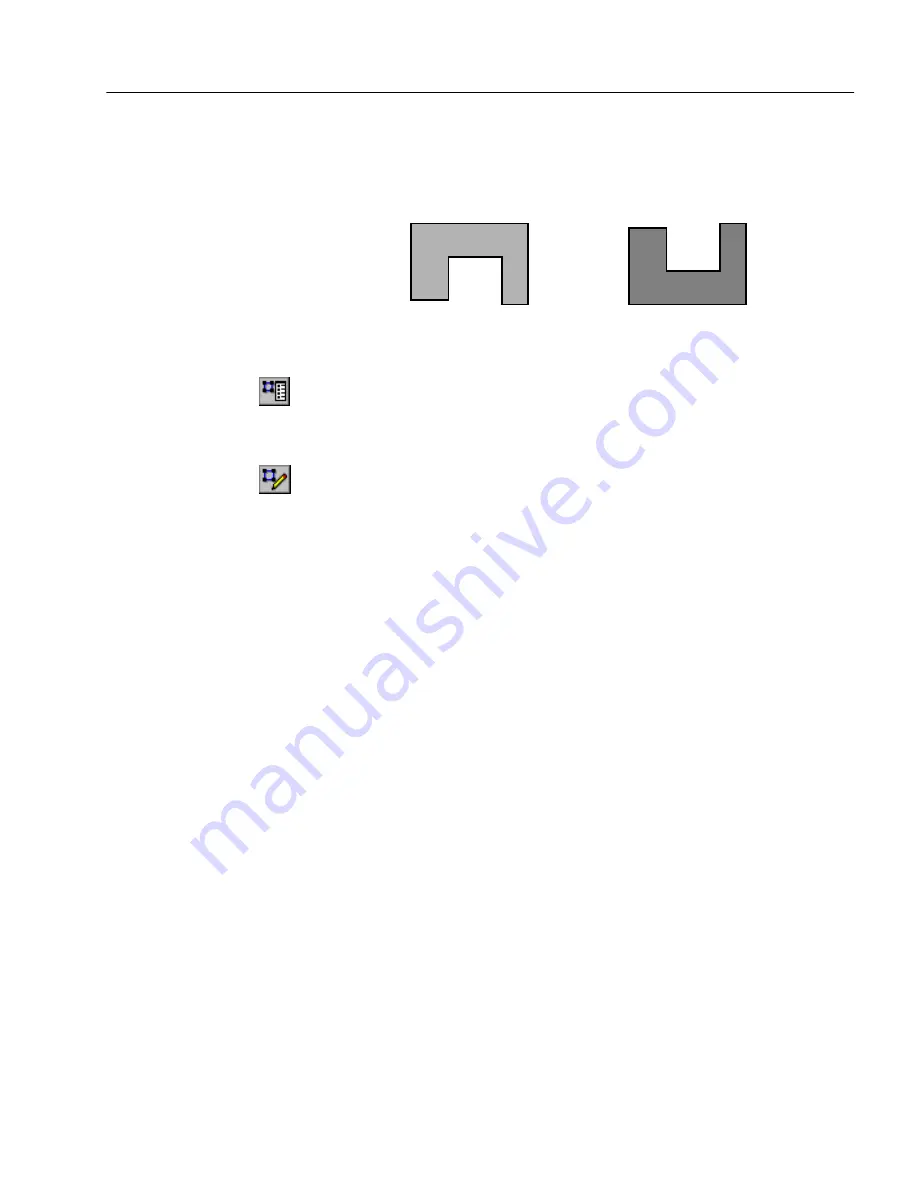
You will not be allowed to draw a line if it constitutes a
restricted shape. The following zone shapes are restricted:
To draw a table zone:
1
Click the Zone Properties button and select Table zone as the
zone type.
See “Changing Zone Properties” on page 71 for more
information.
2
Click the Draw Rectangular Zones button.
The mouse pointer in the image viewer becomes a drawing
tool.
3
Enclose an area of the image you want as a table zone by
holding down the mouse button and dragging the drawing
tool to form a rectangular or square box.
4
Release the mouse button when you are done.
Row and column dividers appear in the table zone. You can
adjust, add, or remove the dividers using other toolbar buttons.
5
Repeat steps 3 and 4 until you have finished drawing table
zones around the desired areas of the page.
Modifying Text and Graphic Zones
You can modify zones by moving, resizing, reordering, extending,
subtracting, connecting, or dividing them.
To move zones:
1
Deselect the buttons in the Zone toolbar.
(If one of the first two drawing buttons is selected, you do not
have to deselect it.)
2
Place the mouse pointer inside a zone.
3
Hold down the mouse button and drag the zone to the desired
location.
Indented along
the top
Indented along
the bottom
Содержание OMNIPAGE PRO 9
Страница 1: ...OmniPage Pro User s Manual CAERE CORPORATION 100 Cooper Court Los Gatos California 95032 7603 USA...
Страница 6: ...vi...
Страница 14: ...6 Chapter 1...
Страница 46: ...38 Chapter 3...
Страница 108: ...100 Chapter 6...
Страница 114: ...106 Index...


