background image

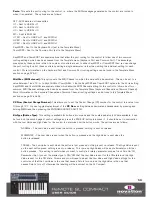
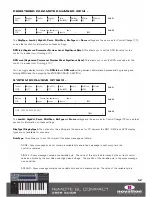
Ports:

This sets the port routing for the control, i.e. where the MIDI messages generated by the control are routed to

when it is operated.  The options are as follows:

OFF – MIDI data is not transmitted

U1 – Sent to USB Port 1 

U2 – Sent to USB Port 2 

U3 – Sent to USB Port 3 

M1 – Sent to MIDI Out

U1 M1 – Sent to USB Port 1 and MIDI Out

U2 M1 – Sent to USB Port 2 and MIDI Out

U3 M1 – Sent to USB Port 3 and MIDI Out

KeybPORT – Sent to the Keyboard Port (set in the Template Menu)

ComnPORT – Sent to the Common Port (set in the Template Menu)

KeybPORT and ComnPORT are special options that allow the port routing for the control to follow one of two common

routing settings, which can be accessed from the Template menu (Keyboard Port and Common Port). The advantage

presented by these options is that if a number of controls are set to either KeybPORT or ComnPORT then you can change

the port routing for all of those controls by editing a single parameter, rather than editing the individual setting for each

control.  More information on the Keyboard Port and Common Port routing settings can be found in the Template Menu

section on page 57-58.

MidiChan (MIDI channel):

This option sets the MIDI Channel on which the data will be transmitted.  This can be set to a

value between 1 and 16, or to KeybCHAN or ComnCHAN.  Like the KeybPORT and ComnPORT options for the Ports setting,

KeybCHAN and ComnCHAN are special options which allow the MIDI Channel setting for the control to follow one of two

common MIDI Channel settings which can be accessed from the Template Menu (Keyboard Channel and Common Channel).

More information on the Keyboard Channel and Common Channel routing settings can be found in the Template Menu

section on page 57 and 58.

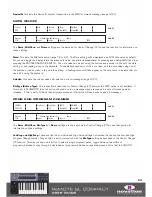
CC Num (Control Change Number): 

This allows you to set the Control Change (CC) number for the control to a value from

0 through 127. You can toggle display format of the 

CC Num

setting between decimal and hexadecimal by pressing and

holding MENU and then pressing the ENCODERS GROUP A SWITCH.  

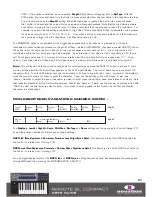
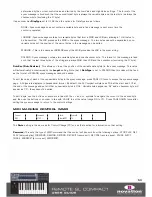
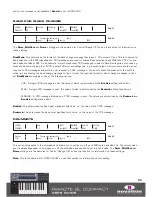
BtnType (Button Type):

This setting is available for buttons, drum pads and the sustain pedal only. Where available, it can

be found on the second page of control settings so press the PAGE UP button to access it.  It should be set in conjunction

with the Low Value and High Value for the control to determine how the button works. The options are as follows:

NORMAL – The Low Value is sent when the button is pressed, nothing is sent on release.

MOMENTRY – The Low Value is sent when the button is pressed and the High Value is sent when the 

button is released.

TOGGLE – The Low Value is sent when the button is first pressed, nothing is sent on release. The High Value is sent

on the next button press, nothing is sent on release.  The Low and High Values will be sent alternately on further 

button presses.  This setting is useful when you want to control a bi-state parameter such as Track Solo On/Off.  

Remember that if you set the display type to ON/OFF that the Low Value is sent for the ON state and the High 

Value is sent for the OFF state. This means you will need to adjust the Low Value and High Value settings for the 

control such that the Low Value is the one that causes Solo to turn on and the High Value is the one that 

causes Solo to turn off, otherwise the labelling will be incorrect on the SL Compact.

50

Содержание ReMOTE SL COMPACT

Страница 1: ...FA000 01...

Страница 2: ...that are not covered in this user guide If this is the case then additional documentation will be included with the update which should be read before installing the update Lastly you may notice that...

Страница 3: ...lects mixer sends and plug in presets in Automap Universal 2 Template up down buttons select templates 1 40 by ascending descending in single steps Pressing together activates Quick Jump mode where bu...

Страница 4: ...ding down in Automap Universal mode allows active plug ins to be viewed and selected with the next prev buttons 11 Button group select switches activate one of four button groups B1 4 12 Encoder group...

Страница 5: ...ot supplied to be connected 6 MIDI In Out two standard MIDI ports allow connection to additional MIDI equipment such as hardware synthesizers POWERING THE SL COMPACT The SL Compact can be powered in o...

Страница 6: ...hand corner of the display whilst it installs the device Please wait until the following message appears in the balloon before clicking OK to continue installation 3 The Automap Universal Plug in Man...

Страница 7: ...d the computer Port 2 is used for transferring Automap data between a sequencer program and the SL Compact Port 3 is used for transferring Automap data between the Automap Universal Server software an...

Страница 8: ...button to return to play mode so that the LED next to the button illuminates Template menu This menu allows access to settings that affect the currently selected template Press the TEMPLATE button to...

Страница 9: ...ol each synth you can simply switch between the two templates There is space for 40 templates on the SL Compact Templates 1 33 are pre programmed standard templates designed by Novation to work with p...

Страница 10: ...plug ins and sequencers using the SL Compact Certain templates on the SL Compact are reserved for use with Automap These are templates 34 and 37 40 To avoid problems when using Automap we suggest tha...

Страница 11: ...s to scroll to Cubase Mixer and Sonar your session name The mixer parameters will then be automatically mapped to the SL Compact controls Automap Universal mixer control support for other sequencers w...

Страница 12: ...o in the dock and then select the Settings menu The following options are available Enable Pot Pickup This option does not apply to the SL Compact and it will not make any difference if it is checked...

Страница 13: ...r a subfolder in your current VST plug ins folder provided that the plug in name is not the same as any other plug in on your system If you have two plug ins with the same name rename one of the origi...

Страница 14: ...deselect it from the menu or give Automap focus to a different plug in Load Select this to load a previously saved mapping for the selected plug in from a automap file or vstxml file Save Save the cu...

Страница 15: ...le controls for the currently selected plug in Also press and hold the DRUMPADS SHIFT button and then press the PAGE UP DOWN buttons to scroll through all available plug ins and select a different one...

Страница 16: ...ers for other soft synths especially if you intend to share the mapping file with other SL Compact users LEARNING CLEARING PARAMETERS The way in which software parameters are mapped to the SL Compact...

Страница 17: ...This may be useful where you have re mapped mixer parameters according to your needs in a particular project but do not want that mapping in any other project It is also useful for Native Instruments...

Страница 18: ...and Min values over so that the Min value is larger than the Max value This will cause encoders to have a reversed action i e rotating them to the right will decrease the parameter value and to the l...

Страница 19: ...Keyboards page of the Reason preferences 4 Click Auto detect surfaces the ReMOTE SL ompact will automatically be recognised and appear in the list of attached surfaces it will appear as Novation Remo...

Страница 20: ...fferent depending on whether you press F1 ENCODERS or F2 BUTTONS as follows F1 ENCODERS Document name currently selected device currently selected device parameter page song position and device name F...

Страница 21: ...and send settings To switch between controlling channels 1 7 and 8 14 use the PAGE UP DOWN buttons CUBASE AND NUENDO AUTOMAP Cubase and Nuendo use the Automap Universal template template 38 for mixer...

Страница 22: ...om left hand corner of the plug in window or selecting it from the SL Compact by pressing and holding SHIFT and using the PAGE UP DOWN buttons LOGIC PRO EXPRESS AUTOMAP To set up Logic Mixer Automap c...

Страница 23: ...may appear saying that some models cannot be interrogated click OK and then click Done 6 Click on the SL Compact in the Control Surface Setup window to view its settings on the left hand side of the...

Страница 24: ...time you subsequently start Logic Whilst using the SL Compact in Logic Automap mode you can switch to any other template on the unit for example to control hardware MIDI devices or Automap wrapped AU...

Страница 25: ...nds panning track faders Control solos record arming mutes and track selects Bank to other mixer tracks Switch between Mixer and Instrument modes Sends Panning Track faders Solos Records Mutes Track S...

Страница 26: ...should be set to SL Compact Port 2 3 Exit the preferences and start using Live The Live Automap template template 40 must be selected on the SL Compact when using it in Live Automap mode Once you hav...

Страница 27: ...the mixer use the F1 ENCODERS and F2 BUTTONS switches Insert Controls The encoders and buttons can also be used to control plug ins including Ableton s internal effects and instruments To switch to i...

Страница 28: ...correspond to the 8 samples in Impulse PRO TOOLS AUTOMAP To set up Pro Tools Automap on the SL Compact you must carry out the following steps 1 If prompted to perform a hardware update when running t...

Страница 29: ...ou can use the SL Compact to control the Pro Tools mixer as follows The encoders can control track levels panning as well as send levels and panning in FLIP Mode see below The ENCODERS GROUP SELECT SW...

Страница 30: ...lug ins Insert Select mode and Insert Edit mode You can switch between these two modes using BUTTON 5 In Insert Select mode you can select different plug ins and in Insert Edit mode you can edit plug...

Страница 31: ...ting in Insert Edit mode To switch to Insert Edit mode to control plug in parameters press BUTTON 5 If you want to select a different insert slot for editing in Insert Edit mode press the button above...

Страница 32: ...ress WRITE to save the global settings and PLAY to return to play mode 3 Make sure the SL Compact is connected to your computer and switched on then open Digital Performer 4 Select Bundles from the St...

Страница 33: ...1 When you run the SL Compact installer make sure you select Install Digital Performer HUI Support as shown 2 On the SL Compact press the GLOBAL button to enter the Global menu scroll up to the 3rd p...

Страница 34: ...6 Double click on the first new device to view its properties and rename it to SL Compact port 1 then click Apply and close the properties window Rename the second device to SL Compact port 2 and the...

Страница 35: ...transport controls on the SL Compact to control the transport in Digital Performer which supports ReWire Additionally ReWire allows tempo control over Digital Performer from the SL Compact regardless...

Страница 36: ...ugh insert slots or parameters ENCODERS 6 8 and BUTTONS 6 8 are not used in Insert mode In Insert Select mode the SL Compact display shows the insert slots of the currently selected track The plug in...

Страница 37: ...tly selected plug in will appear on the SL Compact display Use ENCODERS 1 4 to alter the parameters and ENCODER 5 to scroll through all other available parameters Press BUTTON 5 to return to Insert Se...

Страница 38: ...t and Output Port to None then click OK and close the Controllers Surfaces window Now run the Automap Universal Server software The SL Compact will automatically switch to the Automap Universal templa...

Страница 39: ...and holding SHIFT and using the PAGE UP DOWN buttons SPEED DIAL FUNCTION IN AUTOMAP MODE When using the SL Compact in Automap mode the SPEED DIAL can be used to control any on screen parameter that y...

Страница 40: ...e sequencer M1 Sent to SL Compact MIDI Out U1 M1 Sent to USB Port 1 and MIDI Out U2 M1 Sent to USB Port 2 and MIDI Out DispTime Display Timeout Set the length of time that temporarily displayed inform...

Страница 41: ...PEN Adjusts settings for a pedal that closes when pressed NormCLSD Adjusts settings for a pedal that opens when pressed MClk To MIDI Clock To This option sets where MIDI Clock is routed to set on the...

Страница 42: ...value under Pitch on the SL Compact display It should now reach 255 when the wheel reaches the top of its travel and 0 when it reaches the bottom of its travel To calibrate the mod wheel slowly move...

Страница 43: ...plate the unit starts up on simply select that template enter the Global Menu and press WRITE STANDARD TEMPLATES The majority of Templates on the SL Compact currently 1 33 35 and 36 are standard templ...

Страница 44: ...mber again then press and hold PLAY Additional information about each control in the currently selected row can be displayed in Play Mode by pressing the PAGE UP DOWN buttons Press PAGE UP once to see...

Страница 45: ...Bank MSB value is always set to 0 and the Bank LSB value is as displayed The MIDI channel and the MIDI ports on which the messages are sent are determined by the KeybChan and KeybPort settings in the...

Страница 46: ...quickly access any of the parameters assigned to ENCODERS GROUP A or B When you press the SPEED DIAL the control names for ENCODERS GROUP A appear on the top row of the display and those for ENCODERS...

Страница 47: ...efined in the MIDI Specification then we suggest doing some background reading on MIDI at this point so that you can better understand the options available in Edit Mode The available options for the...

Страница 48: ...ry number allowing a maximum value range of 0 127 The MIDI Specification allows for two MIDI control messages to be sent together where the data values form an MSB most significant byte and LSB least...

Страница 49: ...ing You can edit the control name by pressing PAGE UP when in Edit Mode See page 51 for further information on editing control names LowVal Low Value and HighVal High Value These options allow you to...

Страница 50: ...nel and Common Channel More information on the Keyboard Channel and Common Channel routing settings can be found in the Template Menu section on page 57 and 58 CC Num Control Change Number This allows...

Страница 51: ...d a hard hit will give 0 Name This setting can be found on the second page of control settings so press the PAGE UP button to access it Here you can set the name for the control that appears on the SL...

Страница 52: ...ns for this setting are the same as for CC however the REL1 REL2 and APOT display types are not available for encoders DataType This allows you to set the format of the sysex message as follows NONE S...

Страница 53: ...yte s in the sysex message This value will automatically be constrained by the Length setting Note that if DataType is set to ROLAND then this value will be fixed as the format of ROLAND sysex message...

Страница 54: ...for Control Change CC however the STEP option is not available If this is set to MOMENTRY then the button will send a note on message when pressed and a note off message when released If this is set t...

Страница 55: ...ed by the Banklsb setting see below MSB A single CC0 message is sent the value of which is determined by the Bankmsb setting see below MSB LSB A CC0 message followed by a CC32 message is sent The valu...

Страница 56: ...MIDI message Instead this option allows you to set any button drumpad or the sustain pedal to switch to another template on the SL Compact No MIDI message is sent when you operate a Template control...

Страница 57: ...VelCurve Velocity Curve This sets the velocity curve loudness response of the keyboard keys to either SOFT 1 2 MEDIUM 1 3 HARD 1 2 or a fixed velocity value between 8 and 127 AfterTch Aftertouch This...

Страница 58: ...ComnPort Common Port This sets the Common MIDI port s Any assignable controls that have Ports set to ComnPORT in Edit Mode will send messages on the MIDI ports set here If you change the Common Port s...

Страница 59: ...le this feature could allow you to set one half of the keyboard to trigger a soft synth running on your computer and the other half to trigger a hardware synth connected to the SL compact MIDI Out por...

Страница 60: ...e sent using the MIDI Channel and Ports setting for the current zone when the pitch wheel is operated ModWheel Modulation Wheel This sets whether or not modulation wheel CC1 messages will be sent usin...

Страница 61: ...re you want to enter the character Then use the buttons in line with Upper Lower and Punctu Number to select the type of character you want to enter upper case lower case punctuation or number Note th...

Страница 62: ...x 1 4 Jack Input CONTROLS Rotary Encoders 8 Infinite Rotation x4 with Group Select switches A D Buttons 8 x4 with Group Select switches B1 4 Trigger pads 8 Transport Controls Rewind Fast Forward Stop...

Страница 63: ...ects Template 37 Native Instruments FM7 Pro 53 Battery II Kontakt II B4 G Media Oddity ImpOSCar Minimonsta Steinberg Cubase Nuendo Automap Mixer Effects and VSTs Template 38 Halion Cakewalk Sonar Auto...

Страница 64: ...standard templates for soft synths follow a basic layout so that similar parameters are always assigned to the same controls on the SL Compact no matter what instrument is being controlled The genera...

Страница 65: ...and click Load in the Controller Define section Locate the file RemoteSL f7c in the FM7 resources folder on the SL Compact DVD and click Open Once you have done this click Pref to access the FM7 pref...

Страница 66: ...ers A H in the modulation section B4 Location Template 9 Title B4 ENCODERS GROUP A control Lower Manual with fully out on BUTTONS GROUP B1 ENCODERS GROUP C are for Upper Manual with fully out on BUTTO...

Страница 67: ...on Template 17 Title MS 20 This template follows the standard synth parameter layout BUTTONS GROUP B2 are assigned to Osc 2 parameters PolySix Location Template 18 Title Polysix This template mainly f...

Страница 68: ...2 A group of two standard templates is used for Albino Before using the Albino templates you must import a mapping file into the plug in To do this click on ECS in the plug in window and select Load...

Страница 69: ...udio follow these steps 1 Make sure you have FL Studio 7 or later 2 Connect the SL Compact to your computer switch it on select the FLStudio template template 33 and launch FL Studio 3 In FL Studio se...

Страница 70: ...s in FL Studio work in different ways as follows GROUP A ENCODERS 1 5 These are relative type controls with encoder acceleration When you assign a parameter to one of these controls the parameter valu...

Отзывы: