


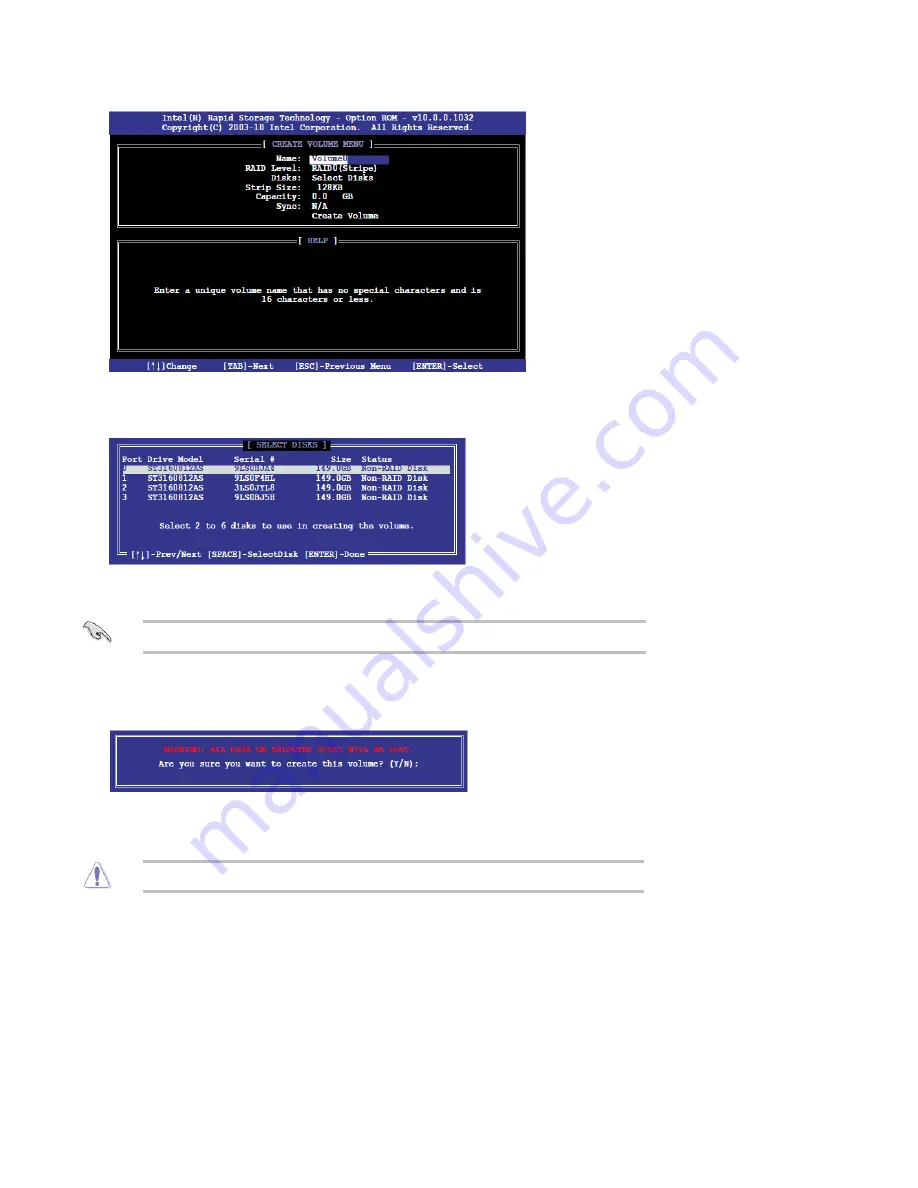
Volume and press
<Enter>
. Enter a volume name (using English alphanumeric ASCII
characters) and press
<Ente r>
.
Use the arrow keys to select
RAID
0 or
RAID
1 (if only two
SATA
drives are available),
RAID
5 or
RAID
10 (these options will only appear if three or four
SATA
drives are installed
respectively) in the
RAID
Level
field. Press
<Enter>
once you have selected the
RAID
LEVEL. Select the drives to be used in the
RAID
array (only if there are more than two
drives available) in the
Disks
field and press
<Enter>
.
3.
Select the stripe size, if necessary, and press
<Ente r>.
4.
We recommend a smaller stripe size for
server
systems and a higher stripe size for
multimedia
systems used mainly for audio and video editing.
▪
Enter the size of the volume (if you enter less than the maximum volume size, you can
then create a second RAID array on the remai ning portion of your volume) and press
<Enter> .
The default value indicates the maximum allowed capacity.
5.
Finally, press
<Enter>
to Create Volume .
The following warning message appears.
6.
Press
<Y>
to create the
RAID
volume to return to the main menu, or
<N>
to go back to the
Create Volume
menu.
7.
Deleting a RAID Set
Be cautious when deleting a
RAID
set. You will lose all data on the hard disk drives when you
delete a
RAID
set.
▪
From the
Intel Rapid
Storage
Manager Option
ROM
main menu, select
2.Delete
RAID
Volume
and press
<Enter>.
The following screen appears:
1.
Содержание Spirit P9X79-AS
Страница 1: ...Spirit P9X79 AS User Guide Revision 1 0 September 2013 ...
Страница 3: ...Template Image Important Image Caution Image Danger Ima Note ...
Страница 10: ......
Страница 18: ......
Страница 35: ......
Страница 39: ......
Страница 53: ......


