10
11
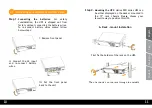
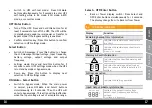
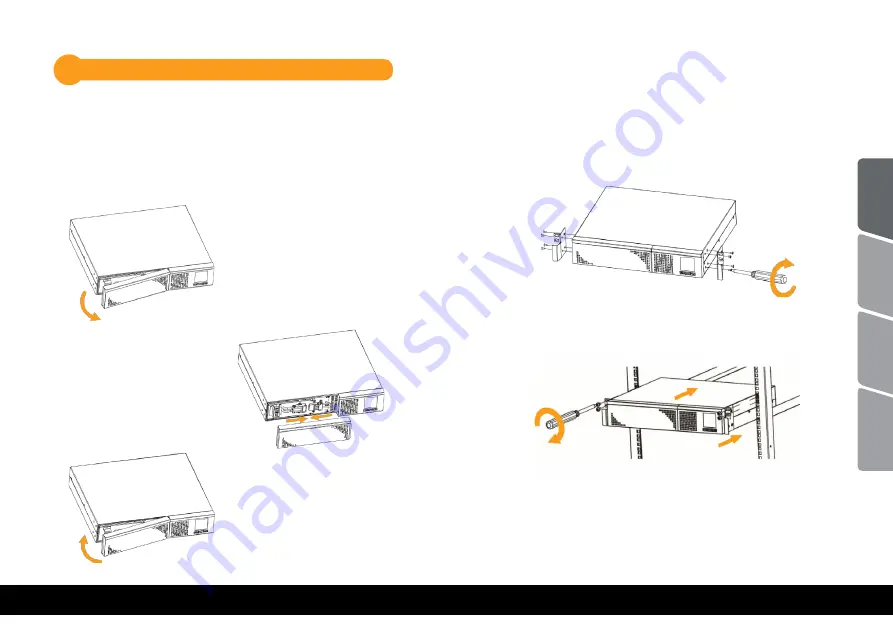
I. Remove front panel
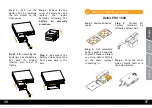
First fix the holders of the rack on the UPS.
Then fix the UPS on the rack through the holders
A. Rack - mount instalation
II. Connect the AC input
and re-connect battery
wires.
III. Put the front panel
back to the unit.
Step 1.
Connecting the batteries:
For safety
consideration, the UPS is shipped out from
factory without connecting the battery wires.
To re-connect battery wires please follow
below steps:
Step 2.
Mounting the UPS:
Helios PRO series UPS can
be either displayed on the desk or mounted in
the 19” rack chassis. Please choose your
favourite way to position this UPS.
Connecting your equipment and first usage
4.1
Engli
sh
Română
Srpski
български
Содержание Helios PRO 1500
Страница 42: ...82 83 UPS USB 19 1 2 LCD Helios PRO Helios PRO 1500 Helios PRO 3000 1500VA 3000VA UPS nJoy English Rom n Srpski...
Страница 45: ...88 89 4 UPS ON Mute UPS UPS on line UPS UPS UPS UPS UPS English Rom n Srpski...
Страница 46: ...90 91 I UPS UPS A II AC III 1 UPS 2 Helios PRO series UPS 19 UPS 4 1 English Rom n Srpski...
Страница 57: ...112 113 UPS LCD UPS Rack Tower 5 7 01 X 02 X 03 X 11 X 12 X 13 X 14 27 28 41 X 43 45 X English Rom n Srpski...
Страница 59: ...116 117 3 4 5 6 6 1 Helios PRO 1500 1 2 3 4 English Rom n Srpski...
Страница 60: ...118 119 Helios PRO 3000 5 6 7 8 7 AC AC UPS AC AC LCD EPO EPO LCD 180 UPS LCD 27 LCD English Rom n Srpski...
Страница 83: ......

