

36
37
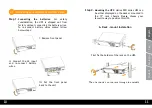
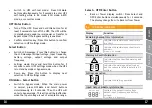
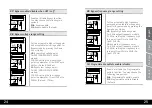
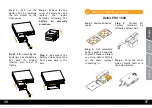
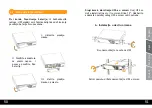
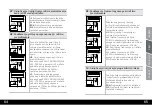
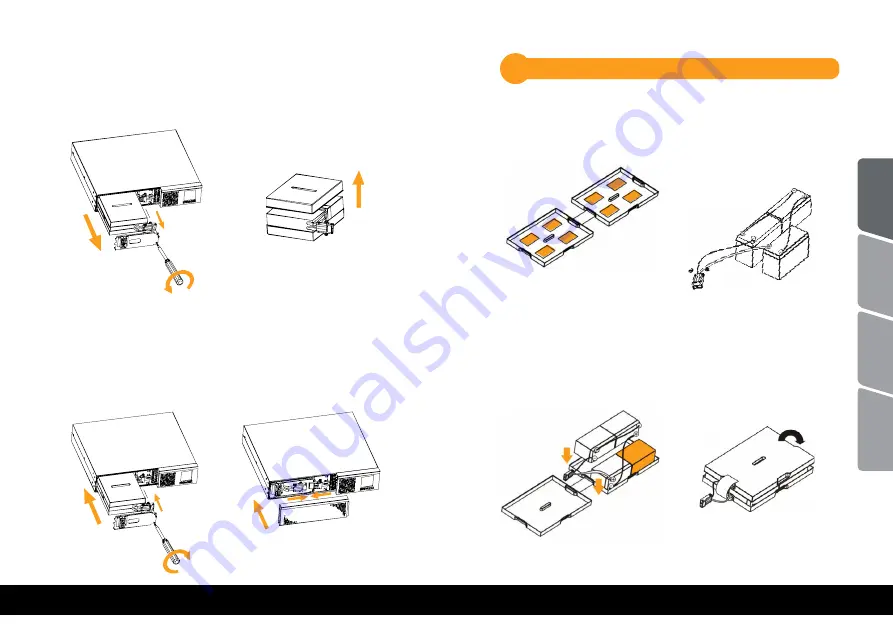
Step 3.
Pull out the
battery box by removing
the two screws on the
front panel.
Step 4.
Remove the top
cover of battery box and
replace
the
inside
batteries following the
battery kit assembly
procedure
.
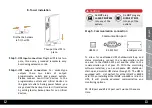
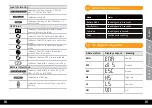
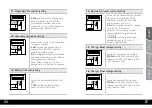
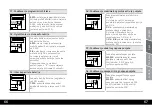
Step 5.
After replacing the
batteries, put the battery
box back to original
location and screw it
tightly.
Step 6.
Re-connect the
battery wires and put the
front panel back to the
unit.
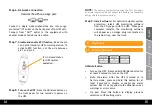
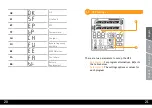
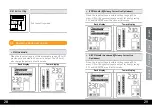
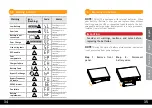
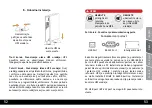
Battery kit assembly procedure
6.1
Helios PRO 1500
Step 1.
Remove adhesive
tapes.
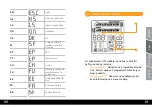
Step 2.
Connect all
battery
terminals
by
following below chart.
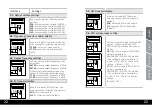
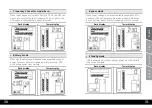
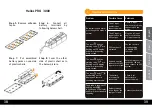
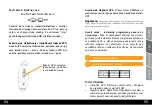
Step 3.
Put assembled
battery packs on one side
of plastic shells and insert
one more defect battery
on the space (without
connecting it).
Step 4.
Cover the other
side of plastic shell as in
the below picture.
Engli
sh
Română
Srpski
български
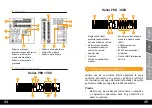
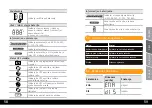
Содержание Helios PRO 1500
Страница 42: ...82 83 UPS USB 19 1 2 LCD Helios PRO Helios PRO 1500 Helios PRO 3000 1500VA 3000VA UPS nJoy English Rom n Srpski...
Страница 45: ...88 89 4 UPS ON Mute UPS UPS on line UPS UPS UPS UPS UPS English Rom n Srpski...
Страница 46: ...90 91 I UPS UPS A II AC III 1 UPS 2 Helios PRO series UPS 19 UPS 4 1 English Rom n Srpski...
Страница 57: ...112 113 UPS LCD UPS Rack Tower 5 7 01 X 02 X 03 X 11 X 12 X 13 X 14 27 28 41 X 43 45 X English Rom n Srpski...
Страница 59: ...116 117 3 4 5 6 6 1 Helios PRO 1500 1 2 3 4 English Rom n Srpski...
Страница 60: ...118 119 Helios PRO 3000 5 6 7 8 7 AC AC UPS AC AC LCD EPO EPO LCD 180 UPS LCD 27 LCD English Rom n Srpski...
Страница 83: ......