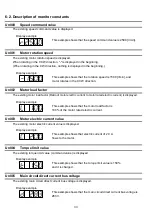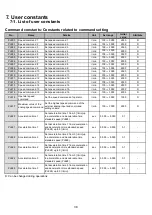
23
(9)
-
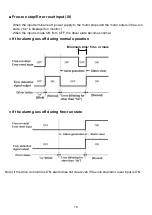
Press STOP to stop the motor.
(7)
Press the ENTER key to switch the rotation direction.
* The 7 segment LED display as shown on the left will
appear when the rotation direction is CCW.
(8)
Press the RUN key to rotate the motor at the
specified rotation speed.
* RUN lamp will turn on while driving.
Press [
∧
] key. The display will switch to the load
factor display.
*The 7 segment LED display as shown on the left will
appear when the load factor is 0%.
Press [
∧
] key. The display will switch to the monitor
selection display.
* The 7 segment LED display as shown on the left will
appear when the monitor number is Un000.
Press [
∧
] key. The display will switch to the rotation
direction switching display.
* The 7 segment LED display as shown on the left will
appear when the rotation direction is CW (default
value).
(5)
-
Press STOP to stop the motor.
(6)
Press [
∧
] key. The display will switch to the motor
speed display.
* The 7 segment LED display as shown on the left will
appear when the motor speed is 0 [r/min].
(3)
Turn the command setting volume to set the rotation
speed.
* The 7 segment LED display as shown on the left will
appear when the speed command is 500 [r/min].
(4)
Press the RUN key to rotate the motor in the CW
direction at the specified rotation speed.
* RUN lamp will turn on while driving.
(2)
-
It is a default display when the power supply is turned
on. If the display as shown on the left side appears, it
means wiring is done correctly.
* If nothing is displayed, check the wiring of the power
supply, and start again from (1).
-
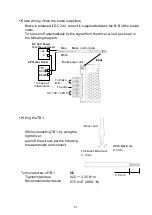
As shown on the left, if "bb" blinks, it means that TB1
is not wired correctly.
Try again from (1).
Press the LO/RE key to switch to local mode. LO/RE
lamp will turn on.
Procedure
No.
Operation
Display
Details
Содержание A-BLPQ010S2-V2
Страница 1: ...Instruction manual GTR AR Series APQ VER2 Driver...
Страница 27: ...27...
Страница 37: ...37...

