Wireless Notebook Adapter
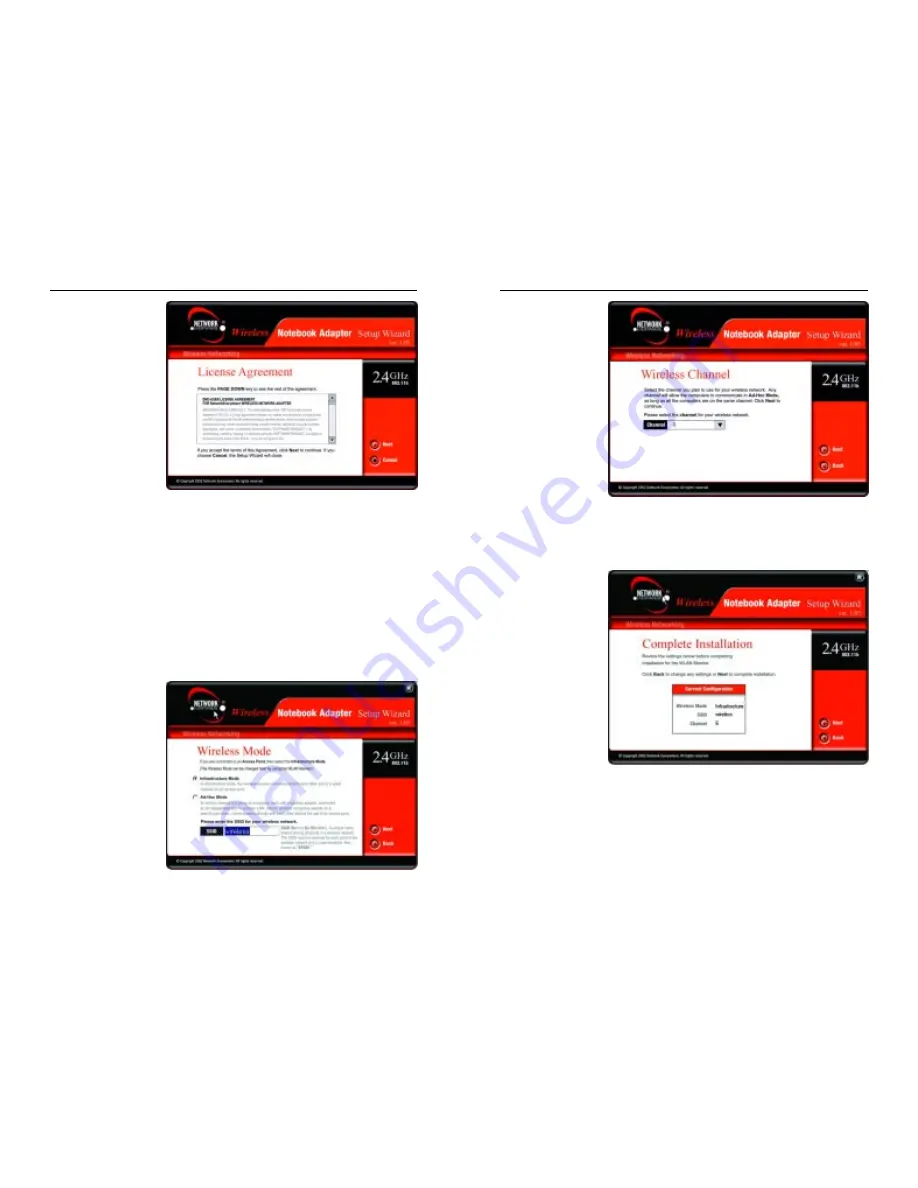
4. The Channel set-
ting that appears
on the next
screen, shown in
Figure 3-4, speci-
fies the channel
used in wireless
c o m m u n i c a t i o n
and should be set
to the same chan-
nel as the other
points in the wire-
less network. This
setting can only
be adjusted in Ad-
Hoc mode.
Once this setting is made, click the Next button to proceed or the Back but-
ton to return to the previous screen.
5. Review your set-
tings on the fol-
lowing screen,
shown in Figure
3-5. If they are
correct, click the
Next
button to
proceed or the
Back button to
change settings on
a previous screen.
6. Lastly, you will see the Congratulations screen, showing that installation of
the Adapter’s drivers and software has been installed. Click the Finish but-
ton to close the Setup Wizard.
7
2. The following
screen, shown in
Figure 3-2, will dis-
play the Network
Everywhere End-
User License
Agreement. Read
this and click the
Next button to pro-
ceed or the Cancel
button to close the
Setup Wizard.
3. When the screen shown in Figure 3-3 appears, you will choose your net-
work topology, as described in Chapter 2. Ad-Hoc mode is used for a sim-
ple peer-to-peer network and allows the sharing of local resources only
between Wireless Notebook Adapters without needing an access point or
wireless router. The Infrastructure mode allows a wireless network to be
integrated into an existed, wired network through an access point or wire-
less router
With your network topology selected, enter your wireless network’s SSID.
This is a type of network name and must be identical for all points in your
network. It is case sensitive and must not exceed 32 characters. Enter this
in the SSID field.
Once these settings
are made, click the
Next button to pro-
ceed or the Back
button to return to
the previous screen.
6
Figure 3-4
Figure 3-5
Network Everywhere
™
Series
Figure 3-2
Figure 3-3
Содержание NWP11B
Страница 1: ......
Страница 22: ...Copyright 2002 Network Everywhere All rights reserved http www NetworkEverywhere com...


