Hardware Setup
21
Trek N300 Travel Router and Range Extender PR2000
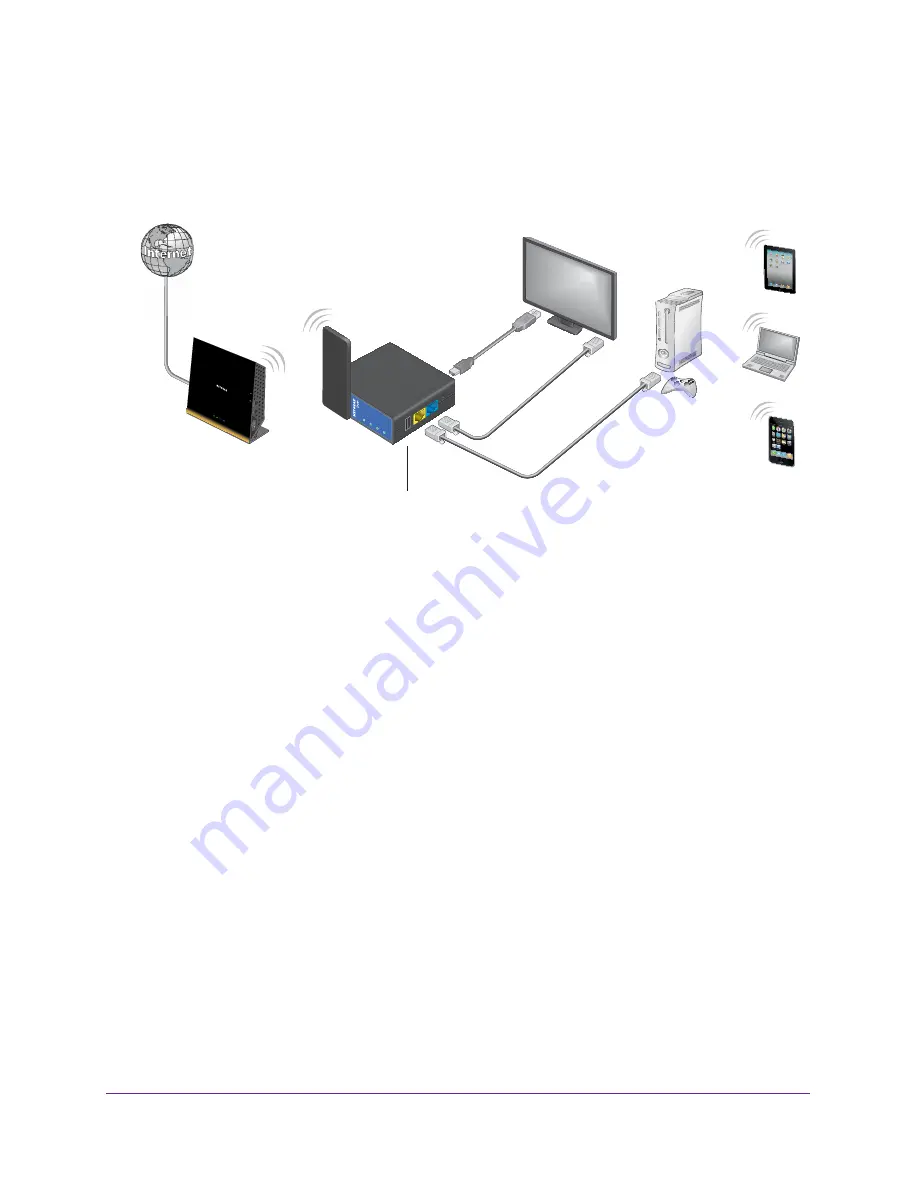
WiFi Bridge Setup
Use the Ethernet ports on your Trek to connect up to two Ethernet-enabled devices
wirelessly to your existing WiFi network. Examples of Ethernet-enabled devices include an
Internet-ready TV, Blu-ray player, gaming console, and desktop or laptop computer.
NETGEAR
LAN
Internet/LAN
Reset
USB
W
iFi
USB
Power
Internet
Existing
WiFi router
(Optional) Connect a USB device to the USB port
Figure 11. Two-port WiFi adapter
Plug the Ethernet cable from your Ethernet-enabled device (such as a connected TV, Blu-ray
player, or a gaming console) to one of the two Ethernet ports of the Trek and enjoy wireless
connectivity.
To use the Trek as a WiFi bridge:
1.
Connect the Trek to a power source.
For more information, see
Power Inputs
on page
13.
2.
Turn on power to the Trek by moving the
Internet via
switch from the
Power Off
position to
the
Wireless
position.
3.
Rotate the Trek’s cover clockwise to orient the antenna.
For more information, see
Antenna Orientation
on page
14.
4.
Connect your computer or wireless device to the Trek's SSID, or connect your computer or
wireless device to the Trek’s LAN port with an Ethernet cable.
5.
(Optional) Connect an Ethernet cable between the LAN port of the Trek and the Ethernet
port of another device.
6.
Open a web browser on your computer, type
www.routerlogin.net
in the address field, and
press the Enter key.
If a login screen displays, enter
admin
for your user name and
password
for your
password. The user name and password are case-sensitive. Then click the
OK
button.


