Operational Configuration
Once the network parameters have been configured, you can use the web server interface to modify the
settings of your SB72EX. To access the web page on your SB72EX, click on the
Launch Webpage
button
in IP Setup, or you can open your web browser, and enter the numeric IP Address in the address field (e.g.
http://10.1.1.79).
Note:
For the telnet example on page 19, I have set UART 1 as my Monitor Port.
Network Settings
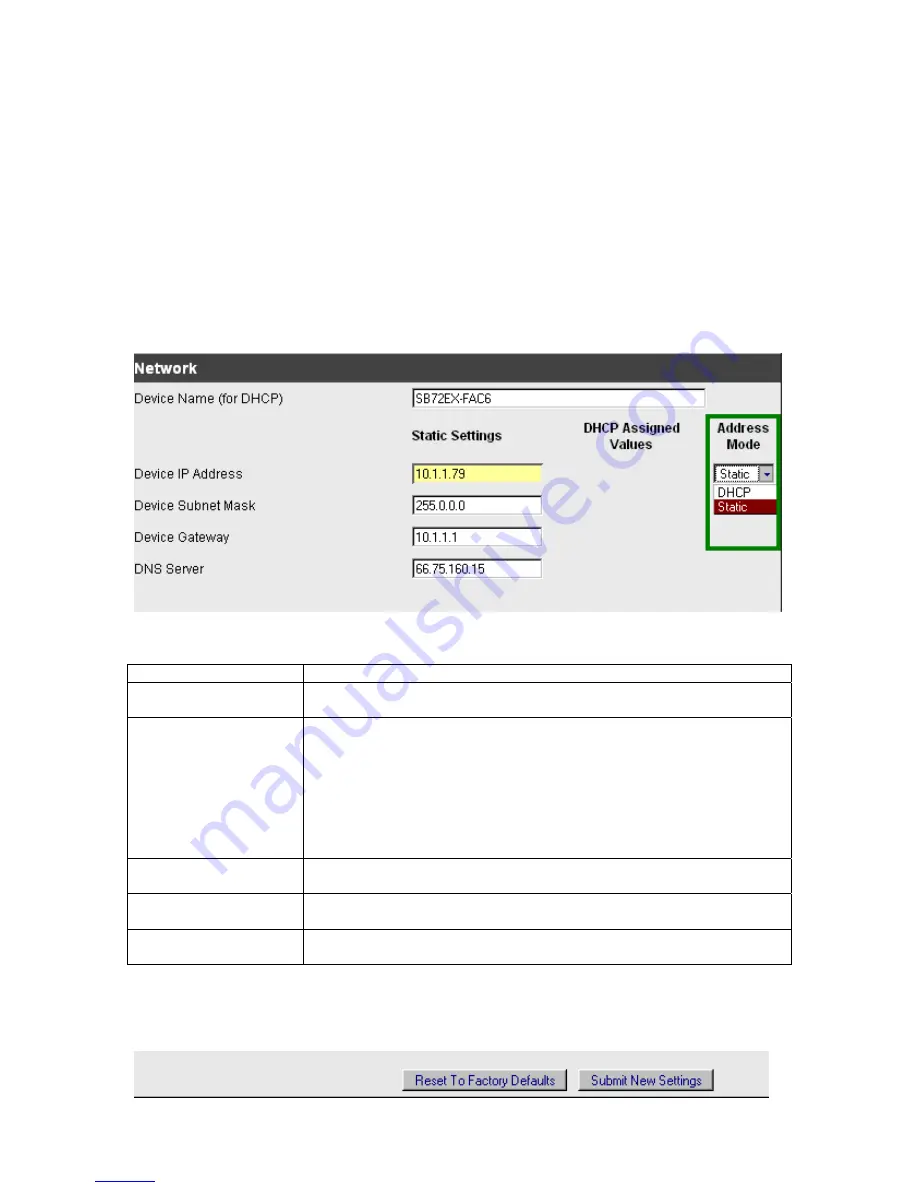
Below is a screen shot of the top section of the first page that you will see when your web browser opens.
Parameter Description
Device Name (for DHCP)
Your NetBurner SB72EX device. Note: The last four values (in the default
name) are the last four digits of the MAC address of your SB72EX.
Device IP Address
Displays the IP Address of your SB72EX device. There are two choices:
•
If DHCP (from the “Address Mode” drop down menu) is selected,
the SB72EX will obtain its IP Address information automatically,
including the Subnet Mask, Gateway, and DNS Server (if
applicable). This is the factory default.
•
If Static is selected (from the “Address Mode” drop down menu, as
shown), you will need to supply the Static IP Address in the edit text
box as shown in the screen shot above.
Device Subnet Mask
If you are using a Static IP Address, enter your IP Subnet mask in this text
box as shown in the example above.
Device Gateway
If you are using a Static IP Address, enter the IP Address of your Gateway in
this text box as shown in the example above.
DNS Server
If you are using a Static IP Address, enter the IP Address of your DNS Server
in this text box as shown in the example above.
Remember to click the
Submit New Settings
button on the bottom of this page to save your settings. If you
want the restore your SB72EX to its factory settings (DHCP), click the
Reset To Factory Defaults
button.
SB72EX User's Manual, 350030-001
Page 6
electronic components distributor


