Network Configuration
The Hardware configuration steps described above must be completed correctly before the software
configuration can take place.
1.
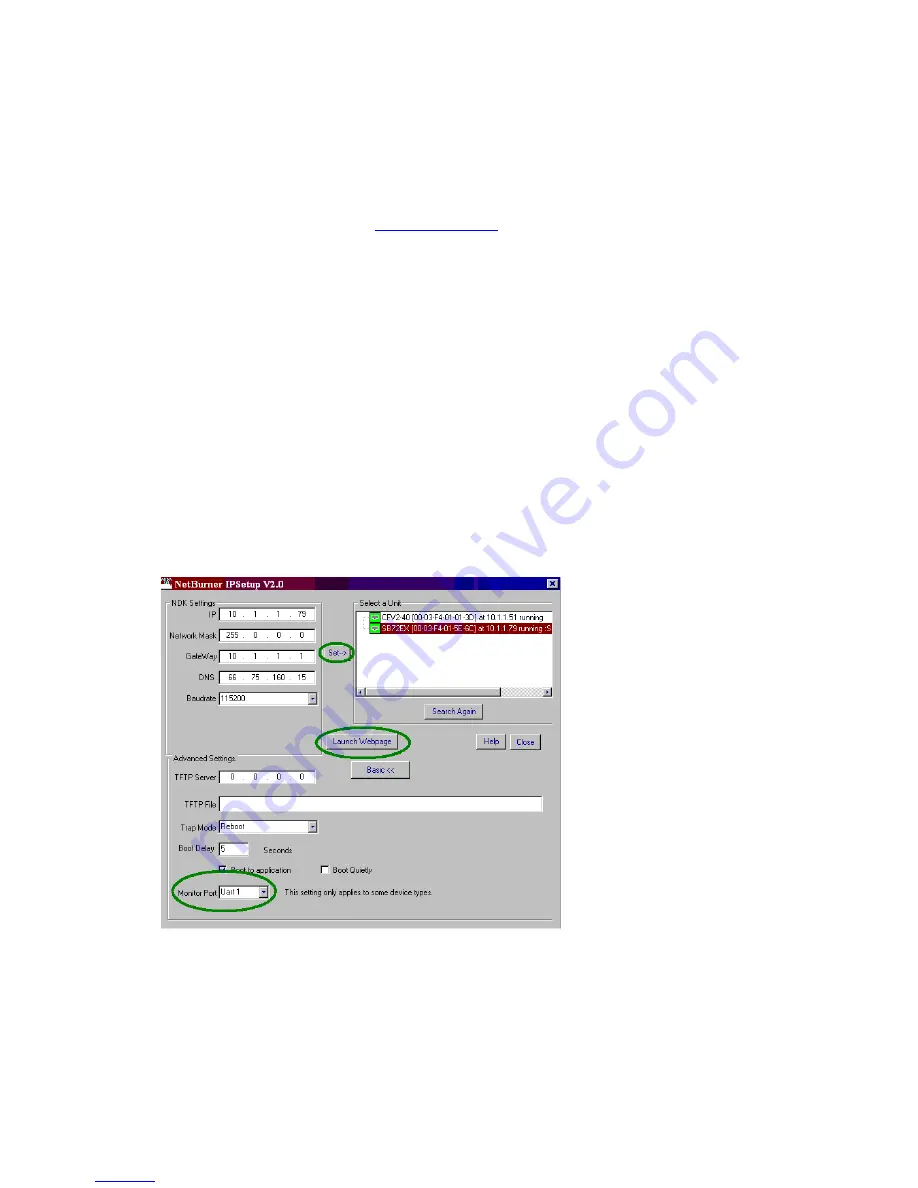
Run the IPSetup Tool (IPSetup.exe) by double clicking its icon. This application can be downloaded
from the SB72-EX product page at
www.netburner.com
. To view the Advance Settings, click on the
Advanced button (the button name will change to Basic). In this example, I am using Uart 1 as my
Monitor port (screen shot below).
2.
Locate your SB72EX in the "Select a Unit" pane by matching its MAC address. The MAC address is
located on the bottom of your SB72EX. If your SB72EX device does not appear in the list box, verify
the power, speed, and link LEDs are illuminated, and click the Search Again button. If you are still
unable to see your SB72EX, remove power, correct any cabling errors, reapply power, and click the
Search Again button. Note: IP Setup uses a UDP broadcast protocol similar to BOOTP and will not
operate through a router.
3.
If your network supports DHCP (factory default): The assigned IP Address will appear in the "Select a
Unit" pane. Write down this address. If your network does not support DHCP, configure the IP
Address and Network Mask fields as shown in the screen shot below. If you need help selecting
values, please read the "Selecting an IP Address" section at the end of this guide. After you have
entered all of your values, click the Set button in the center of the IP Setup window to configure your
SB72EX with its new parameters. Note: If you do not click the Set button, your values will not be
saved. If you have multiple NetBurner devices, make sure you selected your SB72EX in the "Select a
Unit" pane (as shown in the screen shot) before you input your information.
SB72EX User's Manual, 350030-001
Page 5
electronic components distributor


