background image

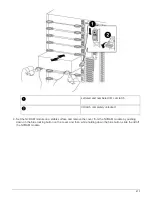
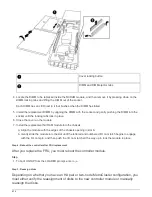
Lettered and numbered I/O cam latch

I/O latch completely unlocked

4. Set the NVRAM module on a stable surface and remove the cover from the NVRAM module by pushing

down on the blue locking button on the cover, and then, while holding down the blue button, slide the lid off
the NVRAM module.

673

Содержание FAS9000

Страница 1: ...AS systems ONTAP Systems NetApp April 04 2022 This PDF was generated from https docs netapp com us en ontap systems fas500f install setup html on April 04 2022 Always check docs netapp com for the latest ...

Страница 2: ...tems 1 FAS500f System Documentation 1 FAS2600 System Documentation 96 FAS2700 System Documentation 181 FAS8200 System Documentation 304 FAS8300 and FAS8700 System Documentation 424 AFF A700 and FAS9000 System Documentation 554 ...

Страница 3: ... graphic instructions for a typical installation of your system from racking and cabling through initial system bring up Use this guide if you are familiar with installing NetApp systems Access the Installation and Setup Instructions PDF poster English FAS500f Installation and Setup Instructions Japanese FAS500f Systems Installation and Setup Instructions Chinese FAS500f Systems Installation and S...

Страница 4: ...em You might also want to have access to the Release Notes for your version of ONTAP for more information about this system What you need You need to provide the following at your site Rack space for the storage system Phillips 2 screwdriver Additional networking cables to connect your system to your network switch and laptop or console with a Web browser Steps 1 Unpack the contents of all boxes 2...

Страница 5: ...42 2m X66250 5 112 00344 5m X66250 15 112 00346 15m X66250 30 112 00347 30m Micro USB console cable Not applicable Console connection during software setup Power cables Not applicable Powering up the system 1 Review the ONTAP Configuration Guide and collect the required information listed in that guide Step 2 Install the hardware You need to install your system in a 4 post rack or NetApp system ca...

Страница 6: ... to a cluster by using the two node switchless cluster method or by using the cluster interconnect network Option 1 Cable a two node switchless cluster The management Fibre Channel and data or host network ports on the controller modules are connected to switches The cluster interconnect ports are cabled on both controller modules Before you begin Contact your network administrator for information...

Страница 7: ...oint 2 To complete setting up your system see Step 4 Complete system setup and configuration Option 2 Cable a switched cluster All ports on the controllers are connected to switches cluster interconnect management Fibre Channel and data or host network switches Before you begin Contact your network administrator for information about connecting the system to the switches Be sure to check the illus...

Страница 8: ...able the wrench ports to the management network switches with the RJ45 cables DO NOT plug in the power cords at this point 2 To complete setting up your system see Step 4 Complete system setup and configuration Optional cabling Cable configuration dependent options You have configuration dependent optional cabling to the Fibre Channel or iSCSI host networks or direct attached storage This cabling ...

Страница 9: ...2d to the FC host switches 2 To perform other optional cabling choose from Option 2 Cable to a 25GbE data or host network Option 3 Cable the controllers to a single drive shelf 3 To complete setting up your system see Step 4 Complete system setup and configuration Option 2 Cable to a 25GbE data or host network 25GbE ports on the controllers are connected to 25GbE data or host network switches Befo...

Страница 10: ... host network Option 3 Cable the controllers to a single drive shelf 3 To complete setting up your system see Step 4 Complete system setup and configuration Option 3 Cable the controllers to a single drive shelf You must cable each controller to the NSM modules on the NS224 drive shelf Be sure to check the illustration arrow for the proper cable connector pull tab orientation As you insert the con...

Страница 11: ...stem setup and configuration Step 4 Complete system setup and configuration Complete the system setup and configuration using cluster discovery with only a connection to the switch and laptop or by connecting directly to a controller in the system and then connecting to the management switch Option 1 Complete system setup and configuration if network discovery is enabled If you have network discov...

Страница 12: ... certificates displayed on your screen XXXXX is the system serial number for the target node System Manager opens 5 Use System Manager guided setup to configure your system using the data you collected in the ONTAP Configuration Guide 6 Verify the health of your system by running Config Advisor 7 After you have completed the initial configuration go to the ONTAP ONTAP System Manager Documentation ...

Страница 13: ... new controllers Not configured a Open a console session using PuTTY a terminal server or the equivalent for your environment Check your laptop or console s online help if you do not know how to configure PuTTY b Enter the management IP address when prompted by the script 4 Using System Manager on your laptop or console configure your cluster a Point your browser to the node management IP address ...

Страница 14: ...n two nodes it must be in quorum If the cluster is not in quorum or a healthy controller shows false for eligibility and health you must correct the issue before shutting down the impaired controller see the NetApp Encryption overview with the CLI Steps 1 Check the status of the impaired controller If the impaired controller is at the login prompt log in as admin If the impaired controller is at t...

Страница 15: ...ion 1 Display the key IDs of the authentication keys that are stored on the key management servers security key manager key query After the ONTAP 9 6 release you may have additional key manager types The types are KMIP AKV and GCP The process for confirming these types is the same as confirming external or onboard key manager types If the Key Manager type displays external and the Restored column ...

Страница 16: ...er type shows onboard and then manually back up the OKM information d Go to advanced privilege mode and enter y when prompted to continue set priv advanced e Enter the command to display the key management backup information security key manager onboard show backup f Copy the contents of the backup information to a separate file or your log file You ll need it in disaster scenarios where you might...

Страница 17: ... key manager sync command security key manager external sync If the command fails contact NetApp Support mysupport netapp com b Verify that the Restored column equals yes for all authentication keys security key manager key query c You can safely shut down the controller 3 If the Key Manager type displays onboard and the Restored column displays anything other than yes a Enter the onboard security...

Страница 18: ...ting for giveback press Ctrl C and then respond y 1 From the LOADER prompt enter printenv to capture all boot environmental variables Save the output to your log file This command may not work if the boot device is corrupted or non functional Option 2 Controller is in a MetroCluster Do not use this procedure if your system is in a two node MetroCluster configuration To shut down the impaired contr...

Страница 19: ..._name When the impaired controller shows Waiting for giveback press Ctrl C and then respond y Replace the boot media FAS500f To replace the boot media you must remove the impaired controller module install the replacement boot media and transfer the boot image to a USB flash drive Step 1 Remove the controller module You must remove the controller module from the chassis when you replace a componen...

Страница 20: ... both hands grasp the controller module sides and gently pull it out of the chassis and set it on a flat stable surface 6 Turn the thumbscrew on the front of the controller module anti clockwise and open the controller module cover 18 ...

Страница 21: ...t media You need a 1 magnetic Phillips head screwdriver to remove the screw that holds the boot media in place Due to the space constraints within the controller module you should also have a magnet to transfer the screw on to so that you do not loose it You can use the following video or the tabulated steps to replace the boot media Replacing the boot media 1 Locate and replace the impaired boot ...

Страница 22: ...crewdriver insert and tighten the screw on the boot media Do not apply force when tightening the screw on the boot media you might crack it Step 3 Transfer the boot image to the boot media The replacement boot media that you installed is without a boot image so you need to transfer a boot image using a USB flash drive You must have a USB flash drive formatted to MBR FAT32 with at least 4GB capacit...

Страница 23: ... the USB flash drive 2 Download the service image to your work space on your laptop 3 Unzip the service image If you are extracting the contents using Windows do not use WinZip to extract the netboot image Use another extraction tool such as 7 Zip or WinRAR There are two folders in the unzipped service image file boot efi 4 Copy the efi folder to the top directory on the USB flash drive The USB fl...

Страница 24: ...7 Close the controller module cover and tighten the thumbscrew 22 ...

Страница 25: ...he latching mechanism and gently push the controller module over the stop 14 Release your thumbs from the top of the latching mechanisms and continue pushing until the latching mechanisms snap into place The controller module begins to boot as soon as it is fully seated in the chassis Be prepared to interrupt the boot process The controller module should be fully inserted and flush with the edges ...

Страница 26: ...ss impaired_node_IP_address d Return the controller to admin level set privilege admin e Press y when prompted to use the restored configuration f Press y when prompted to reboot the controller No network connection a Press n when prompted to restore the backup configuration b Reboot the system when prompted by the system c Select the Update flash from backup config sync flash option from the disp...

Страница 27: ...sion state is changed to Connected for the target iSCSI target type dr_auxiliary address ip address date and time node name iscsi session stateChanged notice iSCSI session state is changed to Connected for the target iSCSI target type dr_partner address ip address d Select the Update flash from backup config sync flash option from the displayed menu If you are prompted to continue with the update ...

Страница 28: ...rsions 11 Restore automatic giveback if you disabled it by using the storage failover modify node local auto giveback true command Restore OKM NSE and NVE as needed FAS500f Once environment variables are checked you must complete steps specific to systems that have Onboard Key Manager OKM NetApp Storage Encryption NSE or NetApp Volume Encryption NVE enabled 1 Determine which section you should use...

Страница 29: ...r security key manager onboard show backup command Example of backup data BEGIN BACKUP TmV0QXBwIEtleSBCbG9iAAEAAAAEAAAAcAEAAAAAAADuD byAAAAACEAAAAAAAAA QAAAAAAAAABvOlH0AAAAAMh7qDLRyH1DBz12piVdy9ATSFMT0C0TlYFss4PDjTaV dzRYkLd1PhQLxAWJwOIyqSr8qY1SEBgm1IWgE5DLRqkiAAAAAAAAACgAAAAAAAAA 3WTh7gAAAAAAAAAAAAAAAAIAAAAAAAgAZJEIWvdeHr5RCAvHGclo wAAAAAAAAAA IgAAAAAAAAAoAAAAAAAAAEOTcR0AAAAAAAAAAAAAAAACAAAAAAAJA...

Страница 30: ...ity key manager onboard sync b Run the security key manager onboard sync command and then enter the passphrase when prompted c Enter the security key manager key query command to see a detailed view of all keys stored in the onboard key manager and verify that the Restored column yes true for all authentication keys If the Restored column anything other than yes true contact Customer Support d Wai...

Страница 31: ...tner not ready wait 5 minutes for the NVMEMs to synchronize If the command fails because of an NDMP SnapMirror or SnapVault process disable the process See the appropriate Documentation Center for more information 5 Wait 3 minutes and check the failover status with the storage failover show command 6 At the clustershell prompt enter the net int show is home false command to list the logical interf...

Страница 32: ...ca 00 800 44 638277 Europe or 800 800 80 800 Asia Pacific if you need the RMA number or additional help with the replacement procedure Chassis Overview of chassis replacement FAS500f To replace the chassis you must move the bezel controller modules and NVMe drives from the impaired chassis to the replacement chassis and then remove the impaired chassis from the equipment rack or system cabinet and...

Страница 33: ...wing Warning This operation will cause controller node name to be marked as unhealthy Unhealthy nodes do not participate in quorum voting If the controller goes out of service and one more controller goes out of service there will be a data serving failure for the entire cluster This will cause a client disruption Use cluster show to verify cluster state If possible bring other nodes online to imp...

Страница 34: ...rounded properly ground yourself 2 Unplug the controller module power supplies from the source 3 Release the power cable retainers and then unplug the cables from the power supplies 4 Insert your forefinger into the latching mechanism on either side of the controller module press the lever with your thumb and gently pull the controller a few inches out of the chassis If you have difficulty removin...

Страница 35: ...er Be sure to close the cam handle slowly so that it aligns correctly with the front of the drive carrier It clicks when it is secure 6 Repeat the process for the remaining drives in the system Step 3 Replace a chassis from within the equipment rack or system cabinet You must remove the existing chassis from the equipment rack or system cabinet before you can install the replacement chassis 1 Remo...

Страница 36: ...ism and gently push the controller module over the stop e Release your thumbs from the top of the latching mechanisms and continue pushing until the latching mechanisms snap into place The controller module begins to boot as soon as it is fully seated in the chassis Be prepared to interrupt the boot process The controller module should be fully inserted and flush with the edges of the chassis 5 Re...

Страница 37: ...Test System from the displayed menu 5 Proceed based on the result of the preceding step If the test failed correct the failure and then rerun the test If the test reported no failures select Reboot from the menu to reboot the system Step 3 Return the failed part to NetApp After you replace the part you can return the failed part to NetApp as described in the RMA instructions shipped with the kit C...

Страница 38: ...ve reset the MSID using the instructions in the Returning SEDs to unprotected mode section of the ONTAP 9 NetApp Encryption Power Guide ONTAP 9 NetApp Encryption Power content If you have a SAN system you must have checked event messages event log show for impaired controller SCSI blade Each SCSI blade process should be in quorum with the other nodes in the cluster Any issues must be resolved befo...

Страница 39: ...us of the controller and if necessary take over the controller so that the healthy controller continues to serve data from the impaired controller storage If you have a cluster with more than two nodes it must be in quorum If the cluster is not in quorum or a healthy controller shows false for eligibility and health you must correct the issue before shutting down the impaired controller see the Ad...

Страница 40: ...o Maintenance mode Step 1 Remove the controller module You must remove the controller module from the chassis when you replace a component inside the controller module Make sure that you label the cables so that you know where they came from You can use the following video or the tabulated steps to replace a controller module Replacing a controller module 1 If you are not already grounded properly...

Страница 41: ... both hands grasp the controller module sides and gently pull it out of the chassis and set it on a flat stable surface 6 Turn the thumbscrew on the front of the controller module anti clockwise and open the controller module cover 39 ...

Страница 42: ...troller module 1 Disconnect the power supply 2 Open the power cable retainer and then unplug the power cable from the power supply 3 Unplug the power cable from the power source 4 Rotate the cam handle such that it can be used to pull power supply out of the controller module while pressing the locking tab Do not use excessive force when sliding the controller module into the chassis to avoid dama...

Страница 43: ...clicks into place The power supplies will only properly engage with the internal connector and lock in place one way To avoid damaging the internal connector do not use excessive force when sliding the power supply into the system Step 3 Move the fans You must move the fans from the impaired controller module to the replacement module when replacing a failed controller module 1 Remove the fan modu...

Страница 44: ...e AFF A250 under the air duct in the controller module You must move it from the impaired controller module to the replacement controller module You need a 1 magnetic Phillips head screwdriver to remove the screw that holds the boot media in place Due to the space constraints within the controller module you should also have a magnet to transfer the screw on to so that you do not lose it 1 Locate ...

Страница 45: ...nd align it into place in the replacement controller module c Using the 1 magnetic screwdriver insert and tighten the screw on the boot media Do not apply force when tightening the screw on the boot media you might crack it Step 5 Move the DIMMs To move the DIMMs locate and move them from the impaired controller into the replacement controller and follow the specific sequence of steps image media ...

Страница 46: ... The DIMMs fit tightly in the socket If not reinsert the DIMM to realign it with the socket 4 Visually inspect the DIMM to verify that it is evenly aligned and fully inserted into the socket 5 Repeat these steps for the remaining DIMM Step 6 Move a mezzanine card To move a mezzanine card you must remove the cabling and any QSFPs and SFPs from the ports move the mezzanine card to the replacement co...

Страница 47: ...controller d Gently align the mezzanine card into place in the replacement controller e Using the 1 magnetic screwdriver insert and tighten the screws on the face of the replacement controller module and on the mezzanine card Do not apply force when tightening the screw on the mezzanine card you might crack it 3 Repeat these steps if there is another mezzanine card in the impaired controller modul...

Страница 48: ...king tab marked PUSH and then lift the battery out of the holder and controller module 4 Locate the corresponding NV battery holder on the replacement controller module and align the NV battery to the battery holder 5 Insert the NV battery plug into the socket 6 Slide the battery pack down along the sheet metal side wall until the support tabs on the side wall hook into the slots on the battery pa...

Страница 49: ...dule you must install the replacement controller module into the chassis and then boot it to Maintenance mode You can use the following illustration or the written steps to install the replacement controller module in the chassis 1 If you have not already done so install the air duct 2 Close the controller module cover and tighten the thumbscrew 47 ...

Страница 50: ... cables to the controller module later in this procedure 5 Insert the controller module into the chassis 6 Ensure the latching mechanism arms are locked in the fully extended position 7 Using both hands align and gently slide the controller module into the latching mechanism arms until it stops 8 Place your index fingers through the finger holes from the inside of the latching mechanism 9 Press yo...

Страница 51: ...k It is important that you apply the commands in the steps on the correct systems The replacement node is the new node that replaced the impaired node as part of this procedure The healthy node is the HA partner of the replacement node Steps 1 If the replacement node is not at the LOADER prompt halt the system to the LOADER prompt 2 On the healthy node check the system time show date The date and ...

Страница 52: ... the LOADER prompt reboot the controller system node halt node node_name After you issue the command you should wait until the system stops at the LOADER prompt 2 At the LOADER prompt access the special drivers specifically designed for system level diagnostics to function properly boot_diags 3 Select Scan System from the displayed menu to enable running the diagnostics tests 4 Select Test System ...

Страница 53: ...re applies only to systems running ONTAP in an HA pair 1 If the replacement controller is in Maintenance mode showing the prompt exit Maintenance mode and go to the LOADER prompt halt 2 From the LOADER prompt on the replacement controller boot the controller entering y if you are prompted to override the system ID due to a system ID mismatch 3 Wait until the Waiting for giveback message is display...

Страница 54: ...he giveback is vetoed you can consider overriding the vetoes Find the High Availability Configuration content for your version of ONTAP 9 b After the giveback has been completed confirm that the HA pair is healthy and that takeover is possible storage failover show The output from the storage failover show command should not include the System ID changed on partner message 6 Verify that the disks ...

Страница 55: ... metrocluster node show fields configuration state node1_siteA metrocluster node show fields configuration state dr group id cluster node configuration state 1 node1_siteA node1mcc 001 configured 1 node1_siteA node1mcc 002 configured 1 node1_siteB node1mcc 003 configured 1 node1_siteB node1mcc 004 configured 4 entries were displayed 10 Verify that the expected volumes are present for each controll...

Страница 56: ...h license key system license add license code license key license key 3 Remove the old licenses if desired a Check for unused licenses license clean up unused simulate b If the list looks correct remove the unused licenses license clean up unused Step 2 Restore Storage and Volume Encryption functionality After replacing the controller module or NVRAM module for a storage system that you previously...

Страница 57: ...replace the failed component with a replacement FRU component you received from your provider Step 1 Shut down the impaired controller Shut down or take over the impaired controller using the appropriate procedure for your configuration Option 1 Most configurations To shut down the impaired controller you must determine the status of the controller and if necessary take over the controller so that...

Страница 58: ... quorum or a healthy controller shows false for eligibility and health you must correct the issue before shutting down the impaired controller see the Administration overview with the CLI If you have a MetroCluster configuration you must have confirmed that the MetroCluster Configuration State is configured and that the nodes are in an enabled and normal state metrocluster node show Steps 1 If Aut...

Страница 59: ... where they came from 1 If you are not already grounded properly ground yourself 2 Unplug the controller module power supplies from the source 3 Release the power cable retainers and then unplug the cables from the power supplies 4 Insert your forefinger into the latching mechanism on either side of the controller module press the lever with your thumb and gently pull the controller a few inches o...

Страница 60: ...6 Turn the thumbscrew on the front of the controller module anti clockwise and open the controller module cover Thumbscrew Controller module cover 7 Lift out the air duct cover 58 ...

Страница 61: ...e it following the specific sequence of steps You can use the following video or the tabulated steps to replace a DIMM Replacing a DIMM 1 Replace the impaired DIMM on your controller module The DIMMs are in slot 3 or 1 on the motherboard Slot 2 and 4 are left empty Do not attempt to install DIMMs into these slots The fault LED located on the board next to each DIMM blinks every two seconds 59 ...

Страница 62: ...he components on the DIMM circuit board 6 Insert the replacement DIMM squarely into the slot The DIMMs fit tightly in the socket If not reinsert the DIMM to realign it with the socket 7 Visually inspect the DIMM to verify that it is evenly aligned and fully inserted into the socket Step 4 Install the controller module After you have replaced the component in the controller module you must reinstal...

Страница 63: ...2 Close the controller module cover and tighten the thumbscrew 61 ...

Страница 64: ...e system to perform the tasks in the following sections You will connect the rest of the cables to the controller module later in this procedure Step 5 Run diagnostics After you have replaced a component in your system you should run diagnostic tests on that component Your system must be at the LOADER prompt to start diagnostics All commands in the diagnostic procedures are issued from the control...

Страница 65: ...ves If it does not you should wait and then run the command again Depending on the drive type and capacity it can take up to several hours for the drive to appear in the list of failed drives Determine whether SED authentication is enabled How you replace the disk depends on how the disk drive is being used If SED authentication is enabled you must use the SED replacement instructions in the ONTAP...

Страница 66: ...ED on the drive shelf operator display panel and the failed drive illuminate The activity green LED on a failed drive can be illuminated solid which indicates that the drive has power but should not be blinking which indicates I O activity A failed drive has no I O activity 4 Remove the failed drive a Press the release button on the drive face to open the cam handle b Slide the drive out of the sh...

Страница 67: ... support at NetApp Support 888 463 8277 North America 00 800 44 638277 Europe or 800 800 80 800 Asia Pacific if you need the RMA number or additional help with the replacement procedure Option 2 Replace HDD 1 If you want to manually assign drive ownership for the replacement drive you need to disable automatic drive assignment replacement drive if it is enabled You manually assign drive ownership ...

Страница 68: ...replacement drive into the same drive bay from which you removed the failed drive Use two hands when inserting the disk drive but do not place hands on the disk drive boards that are exposed on the underside of the disk carrier 9 Close the cam handle so that the disk drive is fully seated into the midplane and the handle clicks into place Be sure to close the cam handle slowly so that it aligns co...

Страница 69: ...r shows false for eligibility and health you must correct the issue before shutting down the impaired controller see the Administration overview with the CLI Steps 1 If AutoSupport is enabled suppress automatic case creation by invoking an AutoSupport message system node autosupport invoke node type all message MAINT number_of_hours_downh The following AutoSupport message suppresses automatic case...

Страница 70: ... suppresses automatic case creation for two hours cluster1 system node autosupport invoke node type all message MAINT 2h 2 Disable automatic giveback from the console of the healthy controller storage failover modify node local auto giveback false 3 Take the impaired controller to the LOADER prompt If the impaired controller is displaying Then The LOADER prompt Go to Remove controller module Waiti...

Страница 71: ... index fingers through the finger holes from the inside by crossing your arms Lever Latching mechanism 5 Using both hands grasp the controller module sides and gently pull it out of the chassis and set it on a flat stable surface 6 Turn the thumbscrew on the front of the controller module anti clockwise and open the controller module cover 69 ...

Страница 72: ...ollowing video or the tabulated steps to replace a fan Replacing a fan 1 Identify the fan module that you must replace by checking the console error messages or by locating the lit LED for the fan module on the motherboard 2 Remove the fan module by pinching the side of the fan module and then lifting the fan module straight out of the controller module 70 ...

Страница 73: ...d then slide the replacement fan module into the controller module Step 4 Reinstall the controller module After you replace a component within the controller module you must reinstall the controller module in the system chassis and boot it 1 Close the controller module cover and tighten the thumbscrew 71 ...

Страница 74: ...the orange tabs on top of the latching mechanism and gently push the controller module over the stop e Release your thumbs from the top of the latching mechanisms and continue pushing until the latching mechanisms snap into place The controller module begins to boot as soon as it is fully seated in the chassis Be prepared to interrupt the boot process The controller module should be fully inserted...

Страница 75: ...aired controller using the appropriate procedure for your configuration Option 1 Most configurations To shut down the impaired controller you must determine the status of the controller and if necessary take over the controller so that the healthy controller continues to serve data from the impaired controller storage About this task If you have a cluster with more than two nodes it must be in quo...

Страница 76: ...ler shows false for eligibility and health you must correct the issue before shutting down the impaired controller see the Administration overview with the CLI If you have a MetroCluster configuration you must have confirmed that the MetroCluster Configuration State is configured and that the nodes are in an enabled and normal state metrocluster node show Steps 1 If AutoSupport is enabled suppress...

Страница 77: ... where they came from 1 If you are not already grounded properly ground yourself 2 Unplug the controller module power supplies from the source 3 Release the power cable retainers and then unplug the cables from the power supplies 4 Insert your forefinger into the latching mechanism on either side of the controller module press the lever with your thumb and gently pull the controller a few inches o...

Страница 78: ...eplace a mezzanine card you must remove the impaired card and install the replacement card to install a mezzanine card you must remove the faceplate and install the new card You can use the following video or the tabulated steps to replace a mezzanine card Replacing a mezzanine card Option 1 Replace a mezzanine card 1 Locate and replace the impaired mezzanine card on your controller module 76 ...

Страница 79: ...rews from the face of the controller module and set them aside safely on the magnet 5 Using the 1 magnetic screwdriver loosen the screw on the impaired mezzanine card 6 Using the 1 magnetic screwdriver gently lift the impaired mezzanine card directly out of the socket and set it aside 7 Remove the replacement mezzanine card from the antistatic shipping bag and align it to the inside face of the co...

Страница 80: ... set them aside safely on the magnet Remove the mezzanine card from the antistatic shipping bag and align it to the inside face of the controller module Gently align the mezzanine card into place Using the 1 magnetic screwdriver insert and tighten the screws on the face of the controller module and on the mezzanine card NOTE Do not apply force when tightening the screw on the mezzanine card you mi...

Страница 81: ...node_name 5 If automatic giveback was disabled reenable it storage failover modify node local auto giveback true Step 5 Return the failed part to NetApp After you replace the part you can return the failed part to NetApp as described in the RMA instructions shipped with the kit Contact technical support at NetApp Support 888 463 8277 North America 00 800 44 638277 Europe or 800 800 80 800 Asia Pac...

Страница 82: ...sword Take over or halt the impaired controller from the healthy controller storage failover takeover ofnode impaired_node_name When the impaired controller shows Waiting for giveback press Ctrl C and then respond y Option 2 Controller is in a MetroCluster Do not use this procedure if your system is in a two node MetroCluster configuration To shut down the impaired controller you must determine th...

Страница 83: ..._node_name When the impaired controller shows Waiting for giveback press Ctrl C and then respond y Step 2 Remove the controller module You must remove the controller module from the chassis when you replace a component inside the controller module Make sure that you label the cables so that you know where they came from 1 If you are not already grounded properly ground yourself 2 Unplug the contro...

Страница 84: ... both hands grasp the controller module sides and gently pull it out of the chassis and set it on a flat stable surface 6 Turn the thumbscrew on the front of the controller module anti clockwise and open the controller module cover 82 ...

Страница 85: ...ery into the controller module You can use the following video or the tabulated steps to replace the NVMEM battery Replacing the NVMEM battery 1 Locate and replace the impaired NVMEM battery on your controller module It is recommended that you follow the illustrated instructions in the order listed Squeeze the clip on the face of the battery plug Unplug the battery cable from the socket 83 ...

Страница 86: ...battery plug into the socket 6 Slide the battery pack down along the sheet metal side wall until the support tabs on the side wall hook into the slots on the battery pack and the battery pack latch engages and clicks into the opening on the side wall 7 Press firmly down on the battery pack to make sure that it is locked into place Step 4 Install the controller module After you have replaced the co...

Страница 87: ...humbs down on the orange tabs on top of the latching mechanism and gently push the controller module over the stop e Release your thumbs from the top of the latching mechanisms and continue pushing until the latching mechanisms snap into place The controller module begins to boot as soon as it is fully seated in the chassis Be prepared to interrupt the boot process The controller module should be ...

Страница 88: ...erun the scan If the scan reported no failures select Reboot from the menu to reboot the system Step 6 Return the failed part to NetApp After you replace the part you can return the failed part to NetApp as described in the RMA instructions shipped with the kit Contact technical support at NetApp Support 888 463 8277 North America 00 800 44 638277 Europe or 800 800 80 800 Asia Pacific if you need ...

Страница 89: ...r supply out of the controller module while pressing the locking tab The power supply is short Always use two hands to support it when removing it from the controller module so that it does not suddenly swing free from the controller module and injure you Blue power supply locking tab Power supply 5 Using both hands support and align the edges of the power supply with the opening in the controller...

Страница 90: ...properly if not you must contact technical support Step 1 Shut down the impaired controller Shut down or take over the impaired controller using the appropriate procedure for your configuration Option 1 Most configurations To shut down the impaired controller you must determine the status of the controller and if necessary take over the controller so that the healthy controller continues to serve ...

Страница 91: ... quorum or a healthy controller shows false for eligibility and health you must correct the issue before shutting down the impaired controller see the Administration overview with the CLI If you have a MetroCluster configuration you must have confirmed that the MetroCluster Configuration State is configured and that the nodes are in an enabled and normal state metrocluster node show Steps 1 If Aut...

Страница 92: ... where they came from 1 If you are not already grounded properly ground yourself 2 Unplug the controller module power supplies from the source 3 Release the power cable retainers and then unplug the cables from the power supplies 4 Insert your forefinger into the latching mechanism on either side of the controller module press the lever with your thumb and gently pull the controller a few inches o...

Страница 93: ...6 Turn the thumbscrew on the front of the controller module anti clockwise and open the controller module cover Thumbscrew Controller module cover 7 Lift out the air duct cover 91 ...

Страница 94: ...the controller and follow the specific sequence of steps You can use the following video or the tabulated steps to replace the RTC battery Replacing the RTC battery 1 Locate the RTC battery between the heatsink and the midplane and remove it exactly as shown in the graphic 92 ...

Страница 95: ...ft the battery up Make a note of the polarity of the battery The battery should eject out The battery will be ejected out 2 Remove the replacement battery from the antistatic shipping bag 3 Locate the RTC battery holder between the heatsink and the midplane and insert it exactly as shown in the graphic 93 ...

Страница 96: ...lled into the holder and that the polarity is correct Step 4 Reinstall the controller module and set time date after RTC battery replacement After you replace a component within the controller module you must reinstall the controller module in the system chassis reset the time and date on the controller and then boot it Steps 1 If you have not already done so close the air duct or controller modul...

Страница 97: ...errupt the boot process f Halt the controller at the LOADER prompt The controller module should be fully inserted and flush with the edges of the chassis 6 Reset the time and date on the controller a Check the date and time on the healthy controller with the show date command b At the LOADER prompt on the target controller check the time and date c If necessary modify the date with the set date mm...

Страница 98: ...AFF FAS2600 Installation and Setup Instructions provides step by step instructions with live links to additional content Installation and setup video FAS2600 The following video shows end to end software configuration for systems running ONTAP 9 2 AFF FAS2600 Setup Video Maintain Boot media Overview of boot media replacement FAS2600 The boot media stores a primary and secondary set of system boot ...

Страница 99: ...ller see the NetApp Encryption overview with the CLI Steps 1 Check the status of the impaired controller If the impaired controller is at the login prompt log in as admin If the impaired controller is at the LOADER prompt and is part of HA configuration log in as admin on the healthy controller If the impaired controller is in a standalone configuration and at LOADER prompt contact mysupport netap...

Страница 100: ...are stored on the key management servers security key manager query If the Restored column displays yes and all key managers display available it s safe to shut down the impaired controller If the Restored column displays anything other than yes or if any key manager displays unavailable you need to complete some additional steps If you see the message This command is not supported when onboard ke...

Страница 101: ...on to a separate file or your log file You ll need it in disaster scenarios where you might need to manually recover OKM Return to admin mode set priv admin You can safely shutdown the controller Verify NSE configuration Steps 1 Display the key IDs of the authentication keys that are stored on the key management servers security key manager query If the Restored column displays yes and all key man...

Страница 102: ...w detail Go to advanced privilege mode and enter y when prompted to continue set priv advanced Enter the command to back up the OKM information security key manager backup show Make sure that OKM information is saved in your log file This information will be needed in disaster scenarios where OKM might need to be manually recovered Copy the contents of the backup information to a separate file or ...

Страница 103: ... you need to complete some additional steps 1 If the Key Manager type displays onboard and the Restored column displays yes manually back up the OKM information a Go to advanced privilege mode and enter y when prompted to continue set priv advanced b Enter the command to display the key management information security key manager onboard show backup c Copy the contents of the backup information to...

Страница 104: ...pes The types are KMIP AKV and GCP The process for confirming these types is the same as confirming external or onboard key manager types If the Key Manager type displays external and the Restored column displays yes it s safe to shut down the impaired controller If the Key Manager type displays onboard and the Restored column displays yes you need to complete some additional steps If the Key Mana...

Страница 105: ...pp com b Verify the Restored column shows yes for all authentication keys security key manager key query c Verify that the Key Manager type shows onboard and then manually back up the OKM information d Go to advanced privilege mode and enter y when prompted to continue set priv advanced e Enter the command to display the key management backup information security key manager onboard show backup f ...

Страница 106: ...mage to a USB flash drive Step 1 Remove the controller module To access components inside the controller you must first remove the controller module from the system and then remove the cover on the controller module 1 If you are not already grounded properly ground yourself 2 Loosen the hook and loop strap binding the cables to the cable management device and then unplug the system cables and SFPs...

Страница 107: ...e cover by sliding in the blue tabs to release the cover and then swing the cover up and open Step 2 Replace the boot media 1 If you are not already grounded properly ground yourself 2 Locate the boot media using the following illustration or the FRU map on the controller module 105 ...

Страница 108: ... boot media You can install the system image to the replacement boot media using a USB flash drive with the image installed on it However you must restore the var file system during this procedure You must have a USB flash drive formatted to FAT32 with at least 4GB capacity A copy of the same image version of ONTAP as what the impaired controller was running You can download the appropriate image ...

Страница 109: ...tenance mode and then halt the controller to boot to LOADER 6 For systems with one controller in the chassis reconnect the power and turn on the power supplies The system begins to boot and stops at the LOADER prompt 7 Set your network connection type at the LOADER prompt If you are configuring DHCP ifconfig e0a auto The target port you configure is the target port you use to communicate with the ...

Страница 110: ...ge admin e Press y when prompted to use the restored configuration f Press y when prompted to reboot the controller No network connection a Press n when prompted to restore the backup configuration b Reboot the system when prompted by the system c Select the Update flash from backup config sync flash option from the displayed menu If you are prompted to continue with the update press y 4 Ensure th...

Страница 111: ... command Restore OKM NSE and NVE as needed FAS2600 Once environment variables are checked you must complete steps specific to systems that have Onboard Key Manager OKM NetApp Storage Encryption NSE or NetApp Volume Encryption NVE enabled Determine which section you should use to restore your OKM NSE or NVE configurations If NSE or NVE are enabled along with Onboard Key Manager you must restore set...

Страница 112: ...w or security key manager onboard show backup command Example of backup data BEGIN BACKUP TmV0QXBwIEtleSBCbG9iAAEAAAAEAAAAcAEAAAAAAADuD byAAAAACEAAAAAAAAA QAAAAAAAAABvOlH0AAAAAMh7qDLRyH1DBz12piVdy9ATSFMT0C0TlYFss4PDjTaV dzRYkLd1PhQLxAWJwOIyqSr8qY1SEBgm1IWgE5DLRqkiAAAAAAAAACgAAAAAAAAA 3WTh7gAAAAAAAAAAAAAAAAIAAAAAAAgAZJEIWvdeHr5RCAvHGclo wAAAAAAAAAA IgAAAAAAAAAoAAAAAAAAAEOTcR0AAAAAAAAAAAAAAAACAAAAAA...

Страница 113: ...running ONTAP 9 5 and earlier run the key manager setup wizard a Start the wizard using the security key manager setup nodenodename command and then enter the passphrase for onboard key management when prompted b Enter the key manager key show detail command to see a detailed view of all keys stored in the onboard key manager and verify that the Restored column yes for all authentication keys If t...

Страница 114: ...troller is ready for giveback with the storage failover show command 4 Move the console cable to the partner controller and give back the target controller storage using the storage failover giveback fromnode local only cfo aggregates true local command If the command fails because of a failed disk physically disengage the failed disk but leave the disk in the slot until a replacement is received ...

Страница 115: ...ity key manager query again to ensure that the Restored column yes and all key managers report in an available state 11 If the Onboard Key Management is enabled a Use the security key manager key show detail to see a detailed view of all keys stored in the onboard key manager b Use the security key manager key show detail command and verify that the Restored column yes for all authentication keys ...

Страница 116: ...3 minutes and check the failover status with the storage failover show command 6 At the clustershell prompt enter the net int show is home false command to list the logical interfaces that are not on their home controller and port If any interfaces are listed as false revert those interfaces back to their home port using the net int revert command 7 Move the console cable to the target controller ...

Страница 117: ...your system registers a single AutoSupport ASUP message that the module has gone offline failure to do so results in performance degradation You must replace the failed component with a replacement FRU component you received from your provider AFF FAS2600 caching module replacement video Step 1 Shut down the impaired controller You can shut down or take over the impaired controller using different...

Страница 118: ...d then respond y For a stand alone system system node halt impaired_node_name 4 If the system has only one controller module in the chassis turn off the power supplies and then unplug the impaired controller s power cords from the power source Step 2 Remove controller module To access components inside the controller you must first remove the controller module from the system and then remove the c...

Страница 119: ...se the controller module from the midplane and then using two hands pull the controller module out of the chassis 5 Turn the controller module over and place it on a flat stable surface 6 Open the cover by sliding in the blue tabs to release the cover and then swing the cover up and open 117 ...

Страница 120: ...the caching capacity All other components in the storage system must be functioning properly if not you must contact technical support 1 Locate the caching module at the rear of the controller module and remove it a Press the release tab b Remove the heatsink 1 Gently pull the caching module straight out of the housing 2 Align the edges of the caching module with the socket in the housing and then...

Страница 121: ...eady done so replace the cover on the controller module 2 Align the end of the controller module with the opening in the chassis and then gently push the controller module halfway into the system Do not completely insert the controller module in the chassis until instructed to do so 3 Recable the system as needed If you removed the media converters QSFPs or SFPs remember to reinstall them if you a...

Страница 122: ... into the chassis to avoid damaging the connectors The controller begins to boot as soon as it is seated in the chassis b If you have not already done so reinstall the cable management device c Bind the cables to the cable management device with the hook and loop strap d When you see the message Press Ctrl C for Boot Menu press Ctrl C to interrupt the boot process If you miss the prompt and the co...

Страница 123: ...ontap press Ctrl C when prompted and then boot to Maintenance mode e From the boot menu select the option for Maintenance mode Step 5 Run system level diagnostics After installing a new caching module you should run diagnostics Your system must be at the LOADER prompt to start System Level Diagnostics All commands in the diagnostic procedures are issued from the controller where the component is b...

Страница 124: ...lear the status logs sldiag device clearstatus b Verify that the log was cleared sldiag device status The following default response is displayed SLDIAG No log messages are present c Exit Maintenance mode halt The controller displays the LOADER prompt d Boot the controller from the LOADER prompt bye e Return the controller to normal operation If your controller is in an HA pair perform a give back...

Страница 125: ...odules in the chassis fully seat the controller module you are servicing in the chassis The controller module boots up when fully seated If you have one controller module in the chassis connect the power supplies and then turn them on e Select Boot to maintenance mode from the menu f Exit Maintenance mode by entering the following command halt After you issue the command wait until the system stop...

Страница 126: ...er is not in quorum or a healthy controller shows false for eligibility and health you must correct the issue before shutting down the impaired controller see the Administration overview with the CLI If AutoSupport is enabled suppress automatic case creation by invoking an AutoSupport message system node autosupport invoke node type all message MAINT number_of_hours_downh The following AutoSupport...

Страница 127: ...ir configuration system node halt node second_node_name ignore quorum warnings true skip lif migration before shutdown true Answer y when prompted Move and replace hardware FAS2600 Move the power supplies hard drives and controller module or modules from the impaired chassis to the new chassis and swap out the impaired chassis from the equipment rack or system cabinet with the new chassis of the s...

Страница 128: ...er cable to the power supply Do not connect the power cable to a power source at this time Step 2 Remove the controller module Remove the controller module or modules from the old chassis 1 Loosen the hook and loop strap binding the cables to the cable management device and then unplug the system cables and SFPs if needed from the controller module keeping track of where the cables were connected ...

Страница 129: ...e drive should disengage from the chassis allowing it to slide free of the chassis When removing a drive always use two hands to support its weight Drives are fragile Handle them as little as possible to prevent damage to them 3 Align the drive from the old chassis with the same bay opening in the new chassis 4 Gently push the drive into the chassis as far as it will go The cam handle engages and ...

Страница 130: ... or system cabinet using the screws you removed from the old chassis 7 If you have not already done so install the bezel Step 5 Install the controller After you install the controller module and any other components into the new chassis boot it to a state where you can run the interconnect diagnostic test For HA pairs with two controller modules in the same chassis the sequence in which you instal...

Страница 131: ...xcessive force when sliding the controller module into the chassis to avoid damaging the connectors b If you have not already done so reinstall the cable management device c Bind the cables to the cable management device with the hook and loop strap d Reinstall the blanking panel and then go to the next step 5 Connect the power supplies to different power sources and then turn them on 6 Boot each ...

Страница 132: ... Then A stand alone configuration a Exit Maintenance mode halt b Go to Completing the replacement process An HA pair with a second controller module Exit Maintenance mode halt The LOADER prompt appears Step 2 Run system level diagnostics After installing a new chassis you should run interconnect diagnostics Your system must be at the LOADER prompt to start System Level Diagnostics All commands in ...

Страница 133: ...6 Verify that no hardware problems resulted from the replacement of the chassis sldiag device status dev interconnect long state failed System level diagnostics returns you to the prompt if there are no test failures or lists the full status of failures resulting from testing the component 7 Proceed based on the result of the preceding step If the system level diagnostics tests Then Were completed...

Страница 134: ... e Rerun the system level diagnostics test Step 3 Return the failed part to NetApp After you replace the part you can return the failed part to NetApp as described in the RMA instructions shipped with the kit Contact technical support at NetApp Support 888 463 8277 North America 00 800 44 638277 Europe or 800 800 80 800 Asia Pacific if you need the RMA number or additional help with the replacemen...

Страница 135: ... process Shut down the controller FAS2600 To shut down the impaired controller you must determine the status of the controller and if necessary take over the controller so that the healthy controller continues to serve data from the impaired controller storage About this task If you have a cluster with more than two nodes it must be in quorum If the cluster is not in quorum or a healthy controller...

Страница 136: ...r replacement video Step 1 Remove controller module To replace the controller module you must first remove the old controller module from the chassis Steps 1 If you are not already grounded properly ground yourself 2 Loosen the hook and loop strap binding the cables to the cable management device and then unplug the system cables and SFPs if needed from the controller module keeping track of where...

Страница 137: ...Open the cover by sliding in the blue tabs to release the cover and then swing the cover up and open Step 2 Move the boot media You must locate the boot media and follow the directions to remove it from the old controller module and insert it in the new controller module 135 ...

Страница 138: ... then gently push it into the socket 4 Check the boot media to make sure that it is seated squarely and completely in the socket If necessary remove the boot media and reseat it into the socket 5 Push the boot media down to engage the locking button on the boot media housing Step 3 Move the NVMEM battery To move the NVMEM battery from the old controller module to the new controller module you must...

Страница 139: ...he face of the battery plug to release the plug from the socket and then unplug the battery cable from the socket 4 Grasp the battery and press the blue locking tab marked PUSH and then lift the battery out of the holder and controller module 5 Move the battery to the replacement controller module 6 Loop the battery cable around the cable channel on the side of the battery holder 7 Position the ba...

Страница 140: ...lowly pushing apart the two DIMM ejector tabs on either side of the DIMM and then slide the DIMM out of the slot Carefully hold the DIMM by the edges to avoid pressure on the components on the DIMM circuit board The number and placement of system DIMMs depends on the model of your system The following illustration shows the location of system DIMMs 4 Repeat these steps to remove additional DIMMs a...

Страница 141: ...erred to as the M 2 PCIe card on the label on your controller locate and move it from the old controller into the replacement controller and follow the specific sequence of steps You must have the new controller module ready so that you can move the caching module directly from the old controller module to the corresponding slot in the new one All other components in the storage system must be fun...

Страница 142: ...t because it attempts to reboot as soon as you completely seat it in the chassis The system might update system firmware when it boots Do not abort this process The procedure requires you to interrupt the boot process which you can typically do at any time after prompted to do so However if the system updates the system firmware when it boots you must wait until after the update is complete before...

Страница 143: ... into the chassis to avoid damaging the connectors The controller begins to boot as soon as it is seated in the chassis b If you have not already done so reinstall the cable management device c Bind the cables to the cable management device with the hook and loop strap d When you see the message Press Ctrl C for Boot Menu press Ctrl C to interrupt the boot process If you miss the prompt and the co...

Страница 144: ... select the option for Maintenance mode Important During the boot process you might see the following prompts A prompt warning of a system ID mismatch and asking to override the system ID A prompt warning that when entering Maintenance mode in an HA configuration you must ensure that the healthy controller remains down You can safely respond y to these prompts Restore and verify the system configu...

Страница 145: ...date the state to match your system configuration 1 In Maintenance mode from the new controller module verify that all components display the same HA state ha config show The HA state should be the same for all components 2 If the displayed system state of the controller module does not match your system configuration set the HA state for the controller module ha config modify controller ha state ...

Страница 146: ... sldiag device show dev mb The controller module devices and ports displayed can be any one or more of the following bootmedia is the system booting device cna is a Converged Network Adapter or interface not connected to a network or storage device fcal is a Fibre Channel Arbitrated Loop device not connected to a Fibre Channel network env is motherboard environmentals mem is system memory nic is a...

Страница 147: ...sts that you want to run sldiag device modify dev dev_name selection only selection only disables all other tests that you do not want to run for the device d Run the selected tests sldiag device run dev dev_name After the test is complete the following message is displayed SLDIAG _ALL_TESTS_COMPLETED e Verify that no tests failed sldiag device status dev dev_name long state failed System level di...

Страница 148: ... to run for the device d Verify that the tests were modified sldiag device show e Repeat these substeps for each device that you want to run concurrently f Run diagnostics on all of the devices sldiag device run Do not add to or modify your entries after you start running diagnostics After the test is complete the following message is displayed SLDIAG _ALL_TESTS_COMPLETED g Verify that there are n...

Страница 149: ...re securely connected and that hardware components are properly installed in the storage system d Reconnect the power supplies and then power on the storage system e Rerun the system level diagnostics test Recable the system and reassign disks FAS2600 Continue the replacement procedure by recabling the storage and confirming disk reassignment Step 1 Recable the system After running diagnostics you...

Страница 150: ...to override the system ID due to a system ID mismatch boot_ontap 3 Wait until the Waiting for giveback message is displayed on the replacement controller console and then from the healthy controller verify that the new partner system ID has been automatically assigned storage failover show In the command output you should see a message that the system ID has changed on the impaired controller show...

Страница 151: ... the HA pair is healthy and that takeover is possible storage failover show The output from the storage failover show command should not include the System ID changed on partner message 6 Verify that the disks were assigned correctly storage disk show ownership The disks belonging to the replacement controller should show the new system ID In the following example the disks owned by node1 now show...

Страница 152: ...stem ID mismatch 3 View the system IDs disk show a 4 You should make a note of the old system ID which is displayed as part of the disk owner column The following example shows the old system ID of 118073209 disk show a Local System ID 118065481 DISK OWNER POOL SERIAL NUMBER HOME disk_name system 1 118073209 Pool0 J8XJE9LC system 1 118073209 disk_name system 1 118073209 Pool0 J8Y478RC system 1 118...

Страница 153: ...ring standard licenses continue to be available to the replacement node However if the impaired node was the only node in the cluster with a license for the feature no configuration changes to the feature are allowed Also using unlicensed features on the node might put you out of compliance with your license agreement so you should install the replacement license key or keys on the replacement nod...

Страница 154: ... service you should verify that the LIFs are on their home ports and register the serial number of the replacement node if AutoSupport is enabled and reset automatic giveback Steps 1 Verify that the logical interfaces are reporting to their home server and ports network interface show is home false If any LIFs are listed as false revert them to their home ports network interface revert 2 Register ...

Страница 155: ...ew with the CLI Steps 1 If AutoSupport is enabled suppress automatic case creation by invoking an AutoSupport message system node autosupport invoke node type all message MAINT number_of_hours_downh The following AutoSupport message suppresses automatic case creation for two hours cluster1 system node autosupport invoke node type all message MAINT 2h 2 Disable automatic giveback from the console o...

Страница 156: ...ables were connected Leave the cables in the cable management device so that when you reinstall the cable management device the cables are organized 3 Remove and set aside the cable management devices from the left and right sides of the controller module 4 Squeeze the latch on the cam handle until it releases open the cam handle fully to release the controller module from the midplane and then us...

Страница 157: ...oid losing unwritten data in the nonvolatile memory NVMEM The LED is located on the back of the controller module Look for the following icon 2 If the NVMEM LED is not flashing there is no content in the NVMEM you can skip the following steps and proceed to the next task in this procedure 3 If the NVMEM LED is flashing there is data in the NVMEM and you must disconnect the battery to clear the mem...

Страница 158: ...ntation of the DIMM in the socket so that you can insert the replacement DIMM in the proper orientation 7 Eject the DIMM from its slot by slowly pushing apart the two DIMM ejector tabs on either side of the DIMM and then slide the DIMM out of the slot Carefully hold the DIMM by the edges to avoid pressure on the components on the DIMM circuit board The number and placement of system DIMMs depends ...

Страница 159: ...he top edge of the DIMM until the ejector tabs snap into place over the notches at the ends of the DIMM 11 Locate the NVMEM battery plug socket and then squeeze the clip on the face of the battery cable plug to insert it into the socket Make sure that the plug locks down onto the controller module 12 Close the controller module cover Step 4 Reinstall the controller module After you replace compone...

Страница 160: ...the cam handle to the locked position Do not use excessive force when sliding the controller module into the chassis to avoid damaging the connectors The controller begins to boot as soon as it is seated in the chassis b If you have not already done so reinstall the cable management device c Bind the cables to the cable management device with the hook and loop strap d When you see the message Pres...

Страница 161: ...ss Ctrl C when prompted and then boot to Maintenance mode e From the boot menu select the option for Maintenance mode Step 5 Run system level diagnostics After installing a new DIMM you should run diagnostics Your system must be at the LOADER prompt to start System Level Diagnostics All commands in the diagnostic procedures are issued from the controller where the component is being replaced 1 If ...

Страница 162: ...ostics tests Then Were completed without any failures a Clear the status logs sldiag device clearstatus b Verify that the log was cleared sldiag device status The following default response is displayed SLDIAG No log messages are present c Exit Maintenance mode halt The controller displays the LOADER prompt d Boot the controller from the LOADER prompt bye e Return the controller to normal operatio...

Страница 163: ...ve two controller modules in the chassis fully seat the controller module you are servicing in the chassis The controller module boots up when fully seated If you have one controller module in the chassis connect the power supplies and then turn them on e Select Boot to maintenance mode from the menu f Exit Maintenance mode by entering the following command halt After you issue the command wait un...

Страница 164: ...If SED authentication is enabled you must use the SED replacement instructions in the ONTAP 9 NetApp Encryption Power Guide These Instructions describe additional steps you must perform before and after replacing an SED Make sure the replacement drive is supported by your platform See the NetApp Hardware Universe Make sure all other components in the system are functioning properly if not you must...

Страница 165: ...D on the drive shelf operator display panel and the failed drive illuminate The activity green LED on a failed drive can be illuminated solid which indicates that the drive has power but should not be blinking which indicates I O activity A failed drive has no I O activity 4 Remove the failed drive a Press the release button on the drive face to open the cam handle b Slide the drive out of the she...

Страница 166: ... support at NetApp Support 888 463 8277 North America 00 800 44 638277 Europe or 800 800 80 800 Asia Pacific if you need the RMA number or additional help with the replacement procedure Option 2 Replace HDD 1 If you want to manually assign drive ownership for the replacement drive you need to disable automatic drive assignment replacement drive if it is enabled You manually assign drive ownership ...

Страница 167: ...replacement drive into the same drive bay from which you removed the failed drive Use two hands when inserting the disk drive but do not place hands on the disk drive boards that are exposed on the underside of the disk carrier 9 Close the cam handle so that the disk drive is fully seated into the midplane and the handle clicks into place Be sure to close the cam handle slowly so that it aligns co...

Страница 168: ... and if necessary take over the controller so that the healthy controller continues to serve data from the impaired controller storage About this task If you have a cluster with more than two nodes it must be in quorum If the cluster is not in quorum or a healthy controller shows false for eligibility and health you must correct the issue before shutting down the impaired controller see the Admini...

Страница 169: ...r module from the system and then remove the cover on the controller module 1 If you are not already grounded properly ground yourself 2 Loosen the hook and loop strap binding the cables to the cable management device and then unplug the system cables and SFPs if needed from the controller module keeping track of where the cables were connected Leave the cables in the cable management device so th...

Страница 170: ...pen the cover by sliding in the blue tabs to release the cover and then swing the cover up and open Step 3 Replace the NVMEM battery To replace the NVMEM battery in your system you must remove the failed NVMEM battery from the system and replace it with a new NVMEM battery 168 ...

Страница 171: ...f the LED is on and power is on unwritten data is stored on NVMEM This typically occurs during an uncontrolled shutdown after ONTAP has successfully booted 2 Locate the NVMEM battery in the controller module 3 Locate the battery plug and squeeze the clip on the face of the battery plug to release the plug from the socket and then unplug the battery cable from the socket 4 Remove the battery from t...

Страница 172: ...controller module reinstall it into the chassis 1 If you have not already done so replace the cover on the controller module 2 Align the end of the controller module with the opening in the chassis and then gently push the controller module halfway into the system Do not completely insert the controller module in the chassis until instructed to do so 3 Recable the system as needed If you removed t...

Страница 173: ... into the chassis to avoid damaging the connectors The controller begins to boot as soon as it is seated in the chassis b If you have not already done so reinstall the cable management device c Bind the cables to the cable management device with the hook and loop strap d When you see the message Press Ctrl C for Boot Menu press Ctrl C to interrupt the boot process If you miss the prompt and the co...

Страница 174: ...trl C when prompted and then boot to Maintenance mode e From the boot menu select the option for Maintenance mode Step 5 Run system level diagnostics After installing a new NVMEM battery you should run diagnostics Your system must be at the LOADER prompt to start System Level Diagnostics All commands in the diagnostic procedures are issued from the controller where the component is being replaced ...

Страница 175: ... diagnostics tests Then Were completed without any failures a Clear the status logs sldiag device clearstatus b Verify that the log was cleared sldiag device status The following default response is displayed SLDIAG No log messages are present c Exit Maintenance mode halt The controller displays the LOADER prompt d Boot the controller from the LOADER prompt bye e Return the controller to normal op...

Страница 176: ... the Boot menu If you have two controller modules in the chassis fully seat the controller module you are servicing in the chassis The controller module boots up when fully seated If you have one controller module in the chassis connect the power supplies and then turn them on e Select Boot to maintenance mode from the menu f Exit Maintenance mode by entering the following command halt After you i...

Страница 177: ... sure that both power supplies are inserted turn both off for 30 seconds and then turn both on The number of power supplies in the system depends on the model Power supplies are auto ranging AFF FAS2600 power supply replacement video 1 Identify the power supply you want to replace based on console error messages or through the LEDs on the power supplies 2 If you are not already grounded properly g...

Страница 178: ...d one way Do not use excessive force when sliding the power supply into the system You can damage the connector 8 Close the cam handle so that the latch clicks into the locked position and the power supply is fully seated 9 Reconnect the power supply cabling a Reconnect the power cable to the power supply and the power source b Secure the power cable to the power supply using the power cable retai...

Страница 179: ... if necessary take over the controller so that the healthy controller continues to serve data from the impaired controller storage About this task If you have a cluster with more than two nodes it must be in quorum If the cluster is not in quorum or a healthy controller shows false for eligibility and health you must correct the issue before shutting down the impaired controller see the Administra...

Страница 180: ...r module from the system and then remove the cover on the controller module 1 If you are not already grounded properly ground yourself 2 Loosen the hook and loop strap binding the cables to the cable management device and then unplug the system cables and SFPs if needed from the controller module keeping track of where the cables were connected Leave the cables in the cable management device so th...

Страница 181: ...at stable surface 6 Open the cover by sliding in the blue tabs to release the cover and then swing the cover up and open Step 3 Replace the RTC battery To replace the RTC battery locate it inside the controller and follow the specific sequence of steps 179 ...

Страница 182: ...lder by tilting the battery at an angle and pushing down 6 Visually inspect the battery to make sure that it is completely installed into the holder and that the polarity is correct Step 4 Reinstall the controller module and set time date after RTC battery replacement After you replace a component within the controller module you must reinstall the controller module in the system chassis reset the...

Страница 183: ...thy controller with the show date command b At the LOADER prompt on the target controller check the time and date c If necessary modify the date with the set date mm dd yyyy command d If necessary set the time in GMT using the set time hh mm ss command e Confirm the date and time on the target controller 7 At the LOADER prompt enter bye to reinitialize the PCIe cards and other components and let t...

Страница 184: ...of using the System Manager Guided Setup to perform initial system configuration Video one of two Hardware installation and cabling The following video shows how to install and cable your new system NetApp video AFF A220 and FAS2700 Systems Installation and Setup Instructions Video two of two Performing end to end software configuration The following video shows end to end software configuration f...

Страница 185: ... an RJ 45 connection and access to a Web browser Steps 1 Unpack the contents of all boxes 2 Record the system serial number from the controllers 3 Set up your account a Log in to your existing account or create an account b Register your system NetApp Product Registration 4 Download and install Config Advisor on your laptop NetApp Downloads Config Advisor 5 Inventory and make a note of the number ...

Страница 186: ...2 00435 0 5m X66031A 112 00436 1m X66032A 112 00437 2m X66033A 112 00438 3m Storage Micro USB console cable Not applicable Console connection during software setup on non Windows or Mac laptop console Power cables Not applicable Powering up the system 6 Download and complete the Cluster configuration worksheet Cluster Configuration Worksheet Step 2 Install the hardware You need to install your sys...

Страница 187: ...gement ports on the controllers are connected to switches The cluster interconnect ports are cabled on both controllers You must have contacted your network administrator for information about connecting the system to the switches Be sure to check the illustration arrow for the proper cable connector pull tab orientation As you insert the connector you should feel it click into place if you do not...

Страница 188: ...Step Perform on each controller Cable the cluster interconnect ports to each other with the cluster interconnect cable e0a to e0a e0b to e0b 186 ...

Страница 189: ...An FC host 0c and 0d or 0e and 0f A 10GbE e0c and e0d or e0e and e0f You can connect one port pair as CNA and one port pair as FC or you can connect both port pairs as CNA or both port pairs as FC Cable the e0M ports to the management network switches with the RJ45 cables DO NOT plug in the power cords at this point 187 ...

Страница 190: ... interconnect switches You must have contacted your network administrator for information about connecting the system to the switches Be sure to check the illustration arrow for the proper cable connector pull tab orientation As you insert the connector you should feel it click into place if you do not feel it click remove it turn it around and try again Steps 1 You can use the graphic or the step...

Страница 191: ...er interconnect cable Use one of the following cable types to cable the UTA2 data ports to your host network An FC host 0c and 0d or 0e and 0f A 10GbE e0c and e0d or e0e and e0f You can connect one port pair as CNA and one port pair as FC or you can connect both port pairs as CNA or both port pairs as FC 189 ...

Страница 192: ... controllers are connected to switches The cluster interconnect ports are cabled on both controllers You must have contacted your network administrator for information about connecting the system to the switches Be sure to check the illustration arrow for the proper cable connector pull tab orientation As you insert the connector you should feel it click into place if you do not feel it click remo...

Страница 193: ... on each controller Cable the cluster interconnect ports to each other with the cluster interconnect cable e0a to e0a e0b to e0b Use the Cat 6 RJ45 cable to cable the e0c through e0f ports to your host network 191 ...

Страница 194: ... connected to switches The cluster interconnect ports are cabled to the cluster interconnect switches You must have contacted your network administrator for information about connecting the system to the switches Be sure to check the illustration arrow for the proper cable connector pull tab orientation As you insert the connector you should feel it click into place if you do not feel it click rem...

Страница 195: ...erform on each controller module Cable e0a and e0b to the cluster interconnect switches with the cluster interconnect cable Use the Cat 6 RJ45 cable to cable the e0c through e0f ports to your host network 193 ...

Страница 196: ...ernal storage If you have a SAS tape drive you can use single path cabling If you have no external shelves MP HA cabling to internal drives is optional not shown if the SAS cables are ordered with the system Option 1 Cable storage on an HA pair with external drive shelves You must cable the shelf to shelf connections and then cable both controllers to the drive shelves Be sure to check the illustr...

Страница 197: ...ntroller 2 port 0a to IOM A port 1 on the first drive shelf in the stack mini SAS HD to mini SAS HD cables Connect each node to IOM B in the stack Controller 1 port 0a to IOM B port 1 on first drive shelf in the stack Controller 2 port 0b to IOM B port 3 on the last drive shelf in the stack mini SAS HD to mini SAS HD cables If you have more than one drive shelf stack see the Installation and Cabli...

Страница 198: ...iguration using automatic cluster discovery Steps 1 Use the following animation to set one or more drive shelf IDs Setting drive shelf IDs 2 Plug the power cords into the controller power supplies and then connect them to power sources on different circuits 3 Turn on the power switches to both nodes Initial booting may take up to eight minutes 4 Make sure that your laptop has network discovery ena...

Страница 199: ... configuration go to the ONTAP ONTAP System Manager Documentation Resources page for information about configuring additional features in ONTAP Option 2 Completing system setup and configuration if network discovery is not enabled If network discovery is not enabled on your laptop you must complete the configuration and setup using this task Steps 1 Cable and configure your laptop or console a Set...

Страница 200: ...ve shelf IDs Setting drive shelf IDs 3 Plug the power cords into the controller power supplies and then connect them to power sources on different circuits 4 Turn on the power switches to both nodes Initial booting may take up to eight minutes 5 Assign an initial node management IP address to one of the nodes If the management network has DHCP Then Configured Record the IP address assigned to the ...

Страница 201: ... additional features in ONTAP Maintain Boot media Overview of boot media replacement AFF A220 and FAS2700 The boot media stores a primary and secondary set of system boot image files that the system uses when it boots Depending on your network configuration you can perform either a nondisruptive or disruptive replacement You must have a USB flash drive formatted to FAT32 with the appropriate amoun...

Страница 202: ...port message system node autosupport invoke node type all message MAINT number_of_hours_downh The following AutoSupport message suppresses automatic case creation for two hours cluster1 system node autosupport invoke node type all message MAINT 2h 3 Check the version of ONTAP the system is running on the impaired controller if up or on the partner controller if the impaired controller is down usin...

Страница 203: ...s not supported when onboard key management is enabled you need to complete some other additional steps 2 If the Restored column displayed anything other than yes or if any key manager displayed unavailable a Retrieve and restore all authentication keys and associated key IDs security key manager restore address If the command fails contact NetApp Support mysupport netapp com b Verify that the Res...

Страница 204: ...s and all key managers display available it s safe to shut down the impaired controller If the Restored column displays anything other than yes or if any key manager displays unavailable you need to complete some additional steps If you see the message This command is not supported when onboard key management is enabled you need to complete some other additional steps 2 If the Restored column disp...

Страница 205: ... need to be manually recovered Copy the contents of the backup information to a separate file or your log You ll need it in disaster scenarios where you might need to manually recover OKM Return to admin mode set priv admin You can safely shut down the controller Option 2 Check NVE or NSE on systems running ONTAP 9 6 and later Before shutting down the impaired controller you need to verify whether...

Страница 206: ...n a Go to advanced privilege mode and enter y when prompted to continue set priv advanced b Enter the command to display the key management information security key manager onboard show backup c Copy the contents of the backup information to a separate file or your log file You ll need it in disaster scenarios where you might need to manually recover OKM d Return to admin mode set priv admin e Shu...

Страница 207: ...xternal and the Restored column displays yes it s safe to shut down the impaired controller If the Key Manager type displays onboard and the Restored column displays yes you need to complete some additional steps If the Key Manager type displays external and the Restored column displays anything other than yes you need to complete some additional steps If the Key Manager type displays external and...

Страница 208: ...ally back up the OKM information d Go to advanced privilege mode and enter y when prompted to continue set priv advanced e Enter the command to display the key management backup information security key manager onboard show backup f Copy the contents of the backup information to a separate file or your log file You ll need it in disaster scenarios where you might need to manually recover OKM g Ret...

Страница 209: ...the controller so that the healthy controller continues to serve data from the impaired controller storage If you have a cluster with more than two nodes it must be in quorum If the cluster is not in quorum or a healthy controller shows false for eligibility and health you must correct the issue before shutting down the impaired controller see the Administration overview with the CLI If you have a...

Страница 210: ...o access components inside the controller you must first remove the controller module from the system and then remove the cover on the controller module 1 If you are not already grounded properly ground yourself 2 Loosen the hook and loop strap binding the cables to the cable management device and then unplug the system cables and SFPs if needed from the controller module keeping track of where th...

Страница 211: ...n a flat stable surface 6 Open the cover by sliding in the blue tabs to release the cover and then swing the cover up and open Step 2 Replace the boot media You must locate the boot media in the controller and follow the directions to replace it 209 ...

Страница 212: ...ompletely in the socket If necessary remove the boot media and reseat it into the socket 6 Push the boot media down to engage the locking button on the boot media housing 7 Close the controller module cover Step 3 Transfer the boot image to the boot media You can install the system image to the replacement boot media using a USB flash drive with the image installed on it However you must restore t...

Страница 213: ...umbscrew The controller begins to boot as soon as it is completely installed into the chassis 5 Interrupt the boot process to stop at the LOADER prompt by pressing Ctrl C when you see Starting AUTOBOOT press Ctrl C to abort If you miss this message press Ctrl C select the option to boot to Maintenance mode and then halt the controller to boot to LOADER 6 For systems with one controller in the chas...

Страница 214: ...prompted to restore the backup configuration b Set the healthy controller to advanced privilege level set privilege advanced c Run the restore backup command system node restore backup node local target address impaired_node_IP_address d Return the controller to admin level set privilege admin e Press y when prompted to use the restored configuration f Press y when prompted to reboot the controlle...

Страница 215: ... the net int revert command 10 Move the console cable to the repaired controller and run the version v command to check the ONTAP versions 11 Restore automatic giveback if you disabled it by using the storage failover modify node local auto giveback true command Restore OKM NSE and NVE as needed AFF A220 and FAS2700 Once environment variables are checked you must complete steps specific to systems...

Страница 216: ...enter y c At the LOADER prompt enter the boot_ontap menu command 4 At the Boot Menu enter the hidden command recover_onboard_keymanager and reply y at the prompt 5 Enter the passphrase for the onboard key manager you obtained from the customer at the beginning of this procedure 6 When prompted to enter the backup data paste the backup data you captured at the beginning of this procedure when asked...

Страница 217: ...er show command 10 Give back only the CFO aggregates with the storage failover giveback fromnode local only cfo aggregates true command If the command fails because of a failed disk physically disengage the failed disk but leave the disk in the slot until a replacement is received If the command fails because of an open CIFS session check with the customer on how to close out CIFS sessions Termina...

Страница 218: ...back the target controller using the storage failover giveback fromnode local command 17 Check the giveback status 3 minutes after it reports complete using the storage failover show command If giveback is not complete after 20 minutes contact Customer Support 18 At the clustershell prompt enter the net int show is home false command to list the logical interfaces that are not on their home contro...

Страница 219: ... list the logical interfaces that are not on their home controller and port If any interfaces are listed as false revert those interfaces back to their home port using the net int revert command 7 Move the console cable to the target controller and run the version v command to check the ONTAP versions 8 Restore automatic giveback if you disabled it by using the storage failover modify node local a...

Страница 220: ... Connect the console cable to the target controller 2 Use the boot_ontap command at the LOADER prompt to boot the controller 3 Check the console output If the console displays Then The login prompt Go to Step 7 Waiting for giveback a Log into the partner controller b Confirm the target controller is ready for giveback with the storage failover show command 4 Move the console cable to the partner c...

Страница 221: ...the key IDs of the authentication keys If the command fails contact Customer Support If the Key Manager type onboard and the Restored column anything other than yes true use the security key manager onboard sync command to re sync the Key Manager type Use the security key manager key query to verify that the Restored column yes true for all authentication keys 11 Connect the console cable to the p...

Страница 222: ... ONTAP 9 System Administration Reference You might want to erase the contents of your caching module before replacing it Steps 1 Although data on the caching module is encrypted you might want to erase any data from the impaired caching module and verify that the caching module has no data a Erase the data on the caching module system controller flash cache secure erase run b Verify that the data ...

Страница 223: ... cluster with more than two nodes it must be in quorum If the cluster is not in quorum or a healthy controller shows false for eligibility and health you must correct the issue before shutting down the impaired controller see the Administration overview with the CLI If you have a MetroCluster configuration you must have confirmed that the MetroCluster Configuration State is configured and that the...

Страница 224: ... you are not already grounded properly ground yourself 2 Loosen the hook and loop strap binding the cables to the cable management device and then unplug the system cables and SFPs if needed from the controller module keeping track of where the cables were connected Leave the cables in the cable management device so that when you reinstall the cable management device the cables are organized 3 Rem...

Страница 225: ... sliding in the blue tabs to release the cover and then swing the cover up and open Step 3 Replace a caching module To replace a caching module referred to as the M 2 PCIe card on the label on your controller locate the slot inside the controller and follow the specific sequence of steps 223 ...

Страница 226: ...y ground yourself 2 Locate the caching module at the rear of the controller module and remove it a Press the release tab b Remove the heatsink 3 Gently pull the caching module straight out of the housing 4 Align the edges of the caching module with the socket in the housing and then gently push it into the socket 5 Verify that the caching module is seated squarely and completely in the socket If n...

Страница 227: ...place the cover on the controller module 3 Align the end of the controller module with the opening in the chassis and then gently push the controller module halfway into the system Do not completely insert the controller module in the chassis until instructed to do so 4 Recable the system as needed If you removed the media converters QSFPs or SFPs remember to reinstall them if you are using fiber ...

Страница 228: ... into the chassis to avoid damaging the connectors The controller begins to boot as soon as it is seated in the chassis b If you have not already done so reinstall the cable management device c Bind the cables to the cable management device with the hook and loop strap d When you see the message Press Ctrl C for Boot Menu press Ctrl C to interrupt the boot process If you miss the prompt and the co...

Страница 229: ..._ontap press Ctrl C when prompted and then boot to Maintenance mode e From the boot menu select the option for Maintenance mode Step 5 Run system level diagnostics After installing a new caching module you should run diagnostics Your system must be at the LOADER prompt to start System Level Diagnostics All commands in the diagnostic procedures are issued from the controller where the component is ...

Страница 230: ... a Clear the status logs sldiag device clearstatus b Verify that the log was cleared sldiag device status The following default response is displayed SLDIAG No log messages are present c Exit Maintenance mode halt The controller displays the LOADER prompt d Boot the controller from the LOADER prompt bye e Return the controller to normal operation If your controller is in an HA pair perform a give ...

Страница 231: ...ompted to get to the Boot menu If you have two controller modules in the chassis fully seat the controller module you are servicing in the chassis The controller module boots up when fully seated If you have one controller module in the chassis connect the power supplies and then turn them on e Select Boot to maintenance mode from the menu f Exit Maintenance mode by entering the following command ...

Страница 232: ...surviving cluster 5 Verify that the switchback operation has completed metrocluster show The switchback operation is still running when a cluster is in the waiting for switchback state cluster_B metrocluster show Cluster Configuration State Mode Local cluster_B configured switchover Remote cluster_A configured waiting for switchback The switchback operation is complete when the clusters are in the...

Страница 233: ...dules to the new chassis and that the chassis is a new component from NetApp This procedure is disruptive For a two controller cluster you will have a complete service outage and a partial outage in a multi node cluster Shut down the controllers AFF A220 and FAS2700 Shut down or take over the impaired controller using the appropriate procedure for your configuration Option 1 Most configurations Yo...

Страница 234: ...ding on your system if the NVMEM NVRAM LED is flashing there is content in the NVMEM NVRAM that has not been saved to disk You need to reboot the controller and start from the beginning of this procedure If repeated attempts to cleanly shut down the controller fail be aware that you might lose any data that was not saved to disk 3 Where applicable halt the second controller to avoid a possible quo...

Страница 235: ...the impaired controller from the healthy controller storage failover takeover ofnode impaired_node_name When the impaired controller shows Waiting for giveback press Ctrl C and then respond y Move and replace hardware AFF A220 and FAS2700 Move the power supplies hard drives and controller module or modules from the impaired chassis to the new chassis and swap out the impaired chassis from the equi...

Страница 236: ...r supply using the power cable locking mechanism Only connect the power cable to the power supply Do not connect the power cable to a power source at this time Step 2 Remove the controller module Remove the controller module or modules from the old chassis 1 Loosen the hook and loop strap binding the cables to the cable management device and then unplug the system cables and SFPs if needed from th...

Страница 237: ...sis The drive should disengage from the chassis allowing it to slide free of the chassis When removing a drive always use two hands to support its weight Drives are fragile Handle them as little as possible to prevent damage to them 3 Align the drive from the old chassis with the same bay opening in the new chassis 4 Gently push the drive into the chassis as far as it will go The cam handle engage...

Страница 238: ...rack or system cabinet using the screws you removed from the old chassis 7 If you have not already done so install the bezel Step 5 Install the controller After you install the controller module and any other components into the new chassis boot it to a state where you can run the interconnect diagnostic test For HA pairs with two controller modules in the same chassis the sequence in which you in...

Страница 239: ... the controller module into the chassis to avoid damaging the connectors b If you have not already done so reinstall the cable management device c Bind the cables to the cable management device with the hook and loop strap d Reinstall the blanking panel and then go to the next step 5 Connect the power supplies to different power sources and then turn them on 6 Boot each controller to Maintenance m...

Страница 240: ...r system 4 The next step depends on your system configuration If your system is in Then A stand alone configuration a Exit Maintenance mode halt b Go to Completing the replacement process An HA pair with a second controller module Exit Maintenance mode halt The LOADER prompt appears Step 2 Run system level diagnostics After installing a new chassis you should run interconnect diagnostics Your syst...

Страница 241: ...ics tests from the Maintenance mode prompt sldiag device modify dev interconnect sel enable The interconnect tests are disabled by default and must be enabled to run separately 5 Run the interconnect diagnostics test from the Maintenance mode prompt sldiag device run dev interconnect You only need to run the interconnect test from one controller 6 Verify that no hardware problems resulted from the...

Страница 242: ...n both controllers at the LOADER prompt bye e Return the controller to normal operation If your system is running ONTAP Then With two nodes in the cluster Issue these commands node cluster ha modify configured true node storage failover modify node node0 enabled true With more than two nodes in the cluster Issue this command node storage failover modify node node0 enabled true In a two node MetroC...

Страница 243: ...n you can perform the MetroCluster switchback operation This returns the configuration to its normal operating state with the sync source storage virtual machines SVMs on the formerly impaired site now active and serving data from the local disk pools This task only applies to two node MetroCluster configurations Steps 1 Verify that all nodes are in the enabled state metrocluster node show cluster...

Страница 244: ...e part you can return the failed part to NetApp as described in the RMA instructions shipped with the kit Contact technical support at NetApp Support 888 463 8277 North America 00 800 44 638277 Europe or 800 800 80 800 Asia Pacific if you need the RMA number or additional help with the replacement procedure Controller Overview of controller module replacement AFF A220 and FAS2700 You must review t...

Страница 245: ...troller You must always capture the controller s console output to a text file This provides you a record of the procedure so that you can troubleshoot any issues that you might encounter during the replacement process Shut down the impaired controller AFF A220 and FAS2700 Shut down or take over the impaired controller using the appropriate procedure for your configuration Option 1 Most systems To...

Страница 246: ... cluster is not in quorum or a healthy controller shows false for eligibility and health you must correct the issue before shutting down the impaired controller see the Administration overview with the CLI If you have a MetroCluster configuration you must have confirmed that the MetroCluster Configuration State is configured and that the nodes are in an enabled and normal state metrocluster node s...

Страница 247: ...must first remove the old controller module from the chassis 1 If you are not already grounded properly ground yourself 2 Loosen the hook and loop strap binding the cables to the cable management device and then unplug the system cables and SFPs if needed from the controller module keeping track of where the cables were connected Leave the cables in the cable management device so that when you rei...

Страница 248: ...ce 7 Open the cover by sliding in the blue tabs to release the cover and then swing the cover up and open Step 2 Move the NVMEM battery To move the NVMEM battery from the old controller module to the new controller module you must perform a specific sequence of steps 246 ...

Страница 249: ...en the LED turns off If the LED is on and power is on unwritten data is stored on NVMEM This typically occurs during an uncontrolled shutdown after ONTAP has successfully booted 2 Locate the NVMEM battery in the controller module 3 Locate the battery plug and squeeze the clip on the face of the battery plug to release the plug from the socket and then unplug the battery cable from the socket 4 Gra...

Страница 250: ...ease the boot media from its housing and then gently pull it straight out of the boot media socket Do not twist or pull the boot media straight up because this could damage the socket or the boot media 3 Move the boot media to the new controller module align the edges of the boot media with the socket housing and then gently push it into the socket 4 Check the boot media to make sure that it is se...

Страница 251: ...of your system The following illustration shows the location of system DIMMs 4 Repeat these steps to remove additional DIMMs as needed 5 Verify that the NVMEM battery is not plugged into the new controller module 6 Locate the slot where you are installing the DIMM 7 Make sure that the DIMM ejector tabs on the connector are in the open position and then insert the DIMM squarely into the slot The DI...

Страница 252: ...er module to the corresponding slot in the new one All other components in the storage system must be functioning properly if not you must contact technical support 1 Locate the caching module at the rear of the controller module and remove it a Press the release tab b Remove the heatsink 2 Gently pull the caching module straight out of the housing 3 Move the caching module to the new controller m...

Страница 253: ... you to interrupt the boot process which you can typically do at any time after prompted to do so However if the system updates the system firmware when it boots you must wait until after the update is complete before interrupting the boot process 1 If you are not already grounded properly ground yourself 2 If you have not already done so replace the cover on the controller module 3 Align the end ...

Страница 254: ...e hook and loop strap d Interrupt the boot process only after determining the correct timing You must look for an Automatic firmware update console message If the update message appears do not press Ctrl C to interrupt the boot process until after you see a message confirming that the update is complete Only press Ctrl C when you see the message Press Ctrl C for Boot Menu If the firmware update is...

Страница 255: ...ppears do not press Ctrl C to interrupt the boot process until after you see a message confirming that the update is complete Only press Ctrl C after you see the Press Ctrl C for Boot Menu message If the firmware update is aborted the boot process exits to the LOADER prompt You must run the update_flash command and then exit LOADER and boot to Maintenance mode by pressing Ctrl C when you see Start...

Страница 256: ...he replacement node is not at the LOADER prompt halt the system to the LOADER prompt 2 On the healthy node check the system time show date The date and time are given in GMT 3 At the LOADER prompt check the date and time on the replacement node show date The date and time are given in GMT 4 If necessary set the date in GMT on the replacement node set date mm dd yyyy 5 If necessary set the time in ...

Страница 257: ...stem level diagnostics to function properly boot_diags During the boot process you can safely respond y to the prompts until the Maintenance mode prompt appears 3 Display and note the available devices on the controller module sldiag device show dev mb The controller module devices and ports displayed can be any one or more of the following bootmedia is the system booting device cna is a Converged...

Страница 258: ...sts that you want to run sldiag device modify dev dev_name selection only selection only disables all other tests that you do not want to run for the device d Run the selected tests sldiag device run dev dev_name After the test is complete the following message is displayed SLDIAG _ALL_TESTS_COMPLETED e Verify that no tests failed sldiag device status dev dev_name long state failed System level di...

Страница 259: ... to run for the device d Verify that the tests were modified sldiag device show e Repeat these substeps for each device that you want to run concurrently f Run diagnostics on all of the devices sldiag device run Do not add to or modify your entries after you start running diagnostics After the test is complete the following message is displayed SLDIAG _ALL_TESTS_COMPLETED g Verify that there are n...

Страница 260: ...re components are properly installed in the storage system d Reconnect the power supplies and then power on the storage system e Rerun the system level diagnostics test Recable the system and reassign disks AFF A220 and FAS2700 To complete the replacement procedure and restore your system to full operation you must recable the storage confirm disk reassignment restore the NetApp Storage Encryption...

Страница 261: ...ystems in a two node MetroCluster configuration Option 1 Verify the system ID change on an HA system You must confirm the system ID change when you boot the replacement controller and then verify that the change was implemented This procedure applies only to systems running ONTAP in an HA pair 1 If the replacement controller is in Maintenance mode showing the prompt exit Maintenance mode and go to...

Страница 262: ... privilege admin 5 Give back the controller a From the healthy controller give back the replaced controller s storage storage failover giveback ofnode replacement_node_name The replacement controller takes back its storage and completes booting If you are prompted to override the system ID due to a system ID mismatch you should enter y If the giveback is vetoed you can consider overriding the veto...

Страница 263: ...ems that are in a stand alone configuration Steps 1 If you have not already done so reboot the replacement node interrupt the boot process by pressing Ctrl C and then select the option to boot to Maintenance mode from the displayed menu 2 You must enter Y when prompted to override the system ID due to a system ID mismatch 3 View the system IDs disk show a 4 You should make a note of the old system...

Страница 264: ...sks to the new controller s system ID before you return the system to normal operating condition About this task This procedure applies only to systems in a two node MetroCluster configuration running ONTAP You must be sure to issue the commands in this procedure on the correct node The impaired node is the node on which you are performing maintenance The replacement node is the new node that repl...

Страница 265: ...k reassign s old system ID In the case of the preceding example the command is disk reassign s 118073209 You can respond Y when prompted to continue 5 Verify that the disks or FlexArray LUNs were assigned correctly disk show a Verify that the disks belonging to the replacement node show the new system ID for the replacement node In the following example the disks owned by system 1 now show the new...

Страница 266: ...de show fields configuration state node1_siteA metrocluster node show fields configuration state dr group id cluster node configuration state 1 node1_siteA node1mcc 001 configured 1 node1_siteA node1mcc 002 configured 1 node1_siteB node1mcc 003 configured 1 node1_siteB node1mcc 004 configured 4 entries were displayed 11 Verify the operation of the MetroCluster configuration in Data ONTAP a Check f...

Страница 267: ...ures on the node might put you out of compliance with your license agreement so you should install the replacement license key or keys on the replacement node as soon as possible Before you begin The licenses keys must be in the 28 character format You have a 90 day grace period in which to install the license keys After the grace period all old licenses are invalidated After a valid license key i...

Страница 268: ...s network interface show is home false If any LIFs are listed as false revert them to their home ports network interface revert 2 Register the system serial number with NetApp Support If AutoSupport is enabled send an AutoSupport message to register the serial number If AutoSupport is not enabled call NetApp Support to register the serial number 3 If automatic giveback was disabled reenable it sto...

Страница 269: ...surviving cluster 5 Verify that the switchback operation has completed metrocluster show The switchback operation is still running when a cluster is in the waiting for switchback state cluster_B metrocluster show Cluster Configuration State Mode Local cluster_B configured switchover Remote cluster_A configured waiting for switchback The switchback operation is complete when the clusters are in the...

Страница 270: ...st configurations To shut down the impaired controller you must determine the status of the controller and if necessary take over the controller so that the healthy controller continues to serve data from the impaired controller storage About this task If you have a cluster with more than two nodes it must be in quorum If the cluster is not in quorum or a healthy controller shows false for eligibi...

Страница 271: ...n HA pair take over the impaired controller from the healthy controller storage failover takeover ofnode impaired_node_name When the impaired controller shows Waiting for giveback press Ctrl C and then respond y For a stand alone system system node halt impaired_node_name 3 If the system has only one controller module in the chassis turn off the power supplies and then unplug the impaired controll...

Страница 272: ... giveback Press Ctrl C and then respond y when prompted System prompt or password prompt enter system password Take over or halt the impaired controller from the healthy controller storage failover takeover ofnode impaired_node_name When the impaired controller shows Waiting for giveback press Ctrl C and then respond y Step 2 Remove controller module To access components inside the controller you ...

Страница 273: ...se the controller module from the midplane and then using two hands pull the controller module out of the chassis 5 Turn the controller module over and place it on a flat stable surface 6 Open the cover by sliding in the blue tabs to release the cover and then swing the cover up and open 271 ...

Страница 274: ...VMEM LED on the controller module You must perform a clean system shutdown before replacing system components to avoid losing unwritten data in the nonvolatile memory NVMEM The LED is located on the back of the controller module Look for the following icon 3 If the NVMEM LED is not flashing there is no content in the NVMEM you can skip the following steps and proceed to the next task in this proce...

Страница 275: ...ocated on the board next to each DIMM slot The LED for the faulty blinks every two seconds 7 Note the orientation of the DIMM in the socket so that you can insert the replacement DIMM in the proper orientation 8 Eject the DIMM from its slot by slowly pushing apart the two DIMM ejector tabs on either side of the DIMM and then slide the DIMM out of the slot Carefully hold the DIMM by the edges to av...

Страница 276: ... firmly on the top edge of the DIMM until the ejector tabs snap into place over the notches at the ends of the DIMM 12 Locate the NVMEM battery plug socket and then squeeze the clip on the face of the battery cable plug to insert it into the socket Make sure that the plug locks down onto the controller module 13 Close the controller module cover Step 4 Reinstall the controller module After you rep...

Страница 277: ...midplane and is fully seated and then close the cam handle to the locked position Do not use excessive force when sliding the controller module into the chassis to avoid damaging the connectors The controller begins to boot as soon as it is seated in the chassis b If you have not already done so reinstall the cable management device c Bind the cables to the cable management device with the hook an...

Страница 278: ...ot_ontap press Ctrl C when prompted and then boot to Maintenance mode e From the boot menu select the option for Maintenance mode Step 5 Run system level diagnostics After installing a new DIMM you should run diagnostics Your system must be at the LOADER prompt to start System Level Diagnostics All commands in the diagnostic procedures are issued from the controller where the component is being re...

Страница 279: ...the status logs sldiag device clearstatus b Verify that the log was cleared sldiag device status The following default response is displayed SLDIAG No log messages are present c Exit Maintenance mode halt The controller displays the LOADER prompt d Boot the controller from the LOADER prompt bye e Return the controller to normal operation If your controller is in Then An HA pair Perform a give back...

Страница 280: ...oot by pressing Ctrl C when prompted to get to the Boot menu If you have two controller modules in the chassis fully seat the controller module you are servicing in the chassis The controller module boots up when fully seated If you have one controller module in the chassis connect the power supplies and then turn them on e Select Boot to maintenance mode from the menu f Exit Maintenance mode by e...

Страница 281: ...chback command from any node in the surviving cluster 5 Verify that the switchback operation has completed metrocluster show The switchback operation is still running when a cluster is in the waiting for switchback state cluster_B metrocluster show Cluster Configuration State Mode Local cluster_B configured switchover Remote cluster_A configured waiting for switchback The switchback operation is c...

Страница 282: ...the system console The failed drive appears in the list of failed drives If it does not you should wait and then run the command again Depending on the drive type and capacity it can take up to several hours for the drive to appear in the list of failed drives Determine whether SED authentication is enabled How you replace the disk depends on how the disk drive is being used If SED authentication ...

Страница 283: ...You may also choose to watch the Replace failed drive video that shows an overview of the embedded drive replacement procedure 281 ...

Страница 284: ...D on the drive shelf operator display panel and the failed drive illuminate The activity green LED on a failed drive can be illuminated solid which indicates that the drive has power but should not be blinking which indicates I O activity A failed drive has no I O activity 4 Remove the failed drive a Press the release button on the drive face to open the cam handle b Slide the drive out of the she...

Страница 285: ... support at NetApp Support 888 463 8277 North America 00 800 44 638277 Europe or 800 800 80 800 Asia Pacific if you need the RMA number or additional help with the replacement procedure Option 2 Replace HDD 1 If you want to manually assign drive ownership for the replacement drive you need to disable automatic drive assignment replacement drive if it is enabled You manually assign drive ownership ...

Страница 286: ...replacement drive into the same drive bay from which you removed the failed drive Use two hands when inserting the disk drive but do not place hands on the disk drive boards that are exposed on the underside of the disk carrier 9 Close the cam handle so that the disk drive is fully seated into the midplane and the handle clicks into place Be sure to close the cam handle slowly so that it aligns co...

Страница 287: ...and if necessary take over the controller so that the healthy controller continues to serve data from the impaired controller storage About this task If you have a cluster with more than two nodes it must be in quorum If the cluster is not in quorum or a healthy controller shows false for eligibility and health you must correct the issue before shutting down the impaired controller see the Adminis...

Страница 288: ...ed controller shows Waiting for giveback press Ctrl C and then respond y For a stand alone system system node halt impaired_node_name 6 If the system has only one controller module in the chassis turn off the power supplies and then unplug the impaired controller s power cords from the power source Option 2 Controller is in a MetroCluster Do not use this procedure if your system is in a two node M...

Страница 289: ...m the healthy controller storage failover takeover ofnode impaired_node_name When the impaired controller shows Waiting for giveback press Ctrl C and then respond y Step 2 Remove controller module To access components inside the controller you must first remove the controller module from the system and then remove the cover on the controller module Steps 1 If you are not already grounded properly ...

Страница 290: ...ounded properly ground yourself 2 Check the NVMEM LED If your system is in an HA configuration go to the next step If your system is in a stand alone configuration cleanly shut down the controller module and then check the NVRAM LED identified by the NV icon The NVRAM LED blinks while destaging contents to the flash memory when you halt the system After the destage is complete the LED turns off If...

Страница 291: ...he sheet metal side wall until the support tabs on the side wall hook into the slots on the battery pack and the battery pack latch engages and clicks into the opening on the side wall 10 Plug the battery plug back into the controller module Step 4 Reinstall the controller module After you replace components in the controller module reinstall it into the chassis Steps 1 If you are not already grou...

Страница 292: ...to the locked position Do not use excessive force when sliding the controller module into the chassis to avoid damaging the connectors The controller begins to boot as soon as it is seated in the chassis b If you have not already done so reinstall the cable management device c Bind the cables to the cable management device with the hook and loop strap d When you see the message Press Ctrl C for Bo...

Страница 293: ...tap press Ctrl C when prompted and then boot to Maintenance mode e From the boot menu select the option for Maintenance mode Step 5 Run system level diagnostics After installing a new NVMEM battery you should run diagnostics Your system must be at the LOADER prompt to start System Level Diagnostics All commands in the diagnostic procedures are issued from the controller where the component is bein...

Страница 294: ...Clear the status logs sldiag device clearstatus b Verify that the log was cleared sldiag device status The following default response is displayed SLDIAG No log messages are present c Exit Maintenance mode halt The controller displays the LOADER prompt d Boot the controller from the LOADER prompt bye e Return the controller to normal operation If your controller is in Then An HA pair Perform a giv...

Страница 295: ...oot by pressing Ctrl C when prompted to get to the Boot menu If you have two controller modules in the chassis fully seat the controller module you are servicing in the chassis The controller module boots up when fully seated If you have one controller module in the chassis connect the power supplies and then turn them on e Select Boot to maintenance mode from the menu f Exit Maintenance mode by e...

Страница 296: ...chback command from any node in the surviving cluster 5 Verify that the switchback operation has completed metrocluster show The switchback operation is still running when a cluster is in the waiting for switchback state cluster_B metrocluster show Cluster Configuration State Mode Local cluster_B configured switchover Remote cluster_A configured waiting for switchback The switchback operation is c...

Страница 297: ... the power supply so you must replace the power supply within two minutes of removal to prevent overheating due to reduced airflow Because the chassis provides a shared cooling configuration for the two HA nodes a delay longer than two minutes will shut down all controller modules in the chassis If both controller modules do shut down make sure that both power supplies are inserted turn both off f...

Страница 298: ...d one way Do not use excessive force when sliding the power supply into the system You can damage the connector 8 Close the cam handle so that the latch clicks into the locked position and the power supply is fully seated 9 Reconnect the power supply cabling a Reconnect the power cable to the power supply and the power source b Secure the power cable to the power supply using the power cable retai...

Страница 299: ...controller you must determine the status of the controller and if necessary take over the controller so that the healthy controller continues to serve data from the impaired controller storage About this task If you have a cluster with more than two nodes it must be in quorum If the cluster is not in quorum or a healthy controller shows false for eligibility and health you must correct the issue b...

Страница 300: ... If you have a MetroCluster configuration you must have confirmed that the MetroCluster Configuration State is configured and that the nodes are in an enabled and normal state metrocluster node show Steps 1 If AutoSupport is enabled suppress automatic case creation by invoking an AutoSupport message system node autosupport invoke node type all message MAINT number_of_hours_downh The following Auto...

Страница 301: ...ables were connected Leave the cables in the cable management device so that when you reinstall the cable management device the cables are organized 3 Remove and set aside the cable management devices from the left and right sides of the controller module 4 Squeeze the latch on the cam handle until it releases open the cam handle fully to release the controller module from the midplane and then us...

Страница 302: ...place the RTC battery To replace the RTC battery locate it inside the controller and follow the specific sequence of steps 1 If you are not already grounded properly ground yourself 2 Locate the RTC battery 300 ...

Страница 303: ...ng the battery at an angle and pushing down 7 Visually inspect the battery to make sure that it is completely installed into the holder and that the polarity is correct Step 4 Reinstall the controller module and set time date after RTC battery replacement After you replace a component within the controller module you must reinstall the controller module in the system chassis reset the time and dat...

Страница 304: ...y controller with the show date command b At the LOADER prompt on the target controller check the time and date c If necessary modify the date with the set date mm dd yyyy command d If necessary set the time in GMT using the set time hh mm ss command e Confirm the date and time on the target controller 7 At the LOADER prompt enter bye to reinitialize the PCIe cards and other components and let the...

Страница 305: ...surviving cluster 5 Verify that the switchback operation has completed metrocluster show The switchback operation is still running when a cluster is in the waiting for switchback state cluster_B metrocluster show Cluster Configuration State Mode Local cluster_B configured switchover Remote cluster_A configured waiting for switchback The switchback operation is complete when the clusters are in the...

Страница 306: ...P cluster Start here Choose your installation and setup experience For most configurations you can choose from different content formats Quick steps A printable PDF of step by step instructions with live links to additional content Video steps Video step by step instructions For MetroCluster configurations see either Install MetroCluster IP configuration Install MetroCluster Fabric Attached config...

Страница 307: ...mpaired node Check onboard encryption FAS8200 Prior to shutting down the impaired controller and checking the status of the onboard encryption keys you must check the status of the impaired controller disable automatic giveback and check what version of ONTAP the system is running Prior to shutting down the impaired controller and checking the status of the onboard encryption keys you must check t...

Страница 308: ...e Encryption NSE enabled If so you need to verify the configuration Steps 1 Connect the console cable to the impaired controller 2 Check whether NVE is configured for any volumes in the cluster volume show is encrypted true If any volumes are listed in the output NVE is configured and you need to verify the NVE configuration If no volumes are listed check whether NSE is configured 3 Check whether ...

Страница 309: ...r than yes Run the key manager setup wizard security key manager setup node target impaired node name Enter the customer s onboard key management passphrase at the prompt If the passphrase cannot be provided contact mysupport netapp com Verify that the Restored column displays yes for all authentication key security key manager key show detail Go to advanced privilege mode and enter y when prompte...

Страница 310: ...formation security key manager backup show Copy the contents of the backup information to a separate file or your log file You ll need it in disaster scenarios where you might need to manually recover OKM Return to admin mode set priv admin Shut down the impaired controller b If the Restored column displays anything other than yes Run the key manager setup wizard security key manager setup node ta...

Страница 311: ...he process for confirming these types is the same as confirming external or onboard key manager types If the Key Manager type displays external and the Restored column displays yes it s safe to shut down the impaired controller If the Key Manager type displays onboard and the Restored column displays yes you need to complete some additional steps If the Key Manager type displays external and the R...

Страница 312: ... backup f Copy the contents of the backup information to a separate file or your log file You ll need it in disaster scenarios where you might need to manually recover OKM g Return to admin mode set priv admin h You can safely shut down the controller Verify NSE configuration 1 Display the key IDs of the authentication keys that are stored on the key management servers security key manager key que...

Страница 313: ...entication keys security key manager key query c You can safely shut down the controller 3 If the Key Manager type displays onboard and the Restored column displays anything other than yes a Enter the onboard security key manager sync command security key manager onboard sync Enter the customer s onboard key management passphrase at the prompt If the passphrase cannot be provided contact NetApp Su...

Страница 314: ...t work if the boot device is corrupted or non functional Option 2 Controller is in a MetroCluster configuration Do not use this procedure if your system is in a two node MetroCluster configuration To shut down the impaired controller you must determine the status of the controller and if necessary take over the controller so that the healthy controller continues to serve data from the impaired con...

Страница 315: ...wn the impaired controller you must determine the status of the controller and if necessary switch over the controller so that the healthy controller continues to serve data from the impaired controller storage About this task If you are using NetApp Storage Encryption you must have reset the MSID using the instructions in the Return a FIPS drive or SED to unprotected mode section of NetApp Encryp...

Страница 316: ...he override vetoes parameter If you use this optional parameter the system overrides any soft vetoes that prevent the healing operation 4 Verify that the operation has been completed by using the metrocluster operation show command controller_A_1 metrocluster operation show Operation heal aggregates State successful Start Time 7 25 2016 18 45 55 End Time 7 25 2016 18 45 56 Errors 5 Check the state...

Страница 317: ...oller module install the replacement boot media and transfer the boot image to a USB flash drive Step 1 Remove the controller To access components inside the controller you must first remove the controller module from the system and then remove the cover on the controller module 1 If you are not already grounded properly ground yourself 2 Loosen the hook and loop strap binding the cables to the ca...

Страница 318: ...bottom of the controller module as you slide it out of the chassis Step 2 Replace the boot media You must locate the boot media in the controller and follow the directions to replace it 1 If you are not already grounded properly ground yourself 2 Locate the boot media using the following illustration or the FRU map on the controller module 316 ...

Страница 319: ...the boot media to make sure that it is seated squarely and completely in the socket If necessary remove the boot media and reseat it into the socket 6 Push the boot media down to engage the locking button on the boot media housing 7 Close the controller module cover Step 3 Transfer the boot image to the boot media You can install the system image to the replacement boot media using a USB flash dri...

Страница 320: ...em making sure that the cam handle clears the USB flash drive firmly push the cam handle to finish seating the controller module push the cam handle to the closed position and then tighten the thumbscrew The controller begins to boot as soon as it is completely installed into the chassis 5 Interrupt the boot process to stop at the LOADER prompt by pressing Ctrl C when you see Starting AUTOBOOT pre...

Страница 321: ...apter_name c Halt to return to Maintenance mode halt The changes will be implemented when the system is booted Boot the recovery image FAS8200 The procedure for booting the impaired controller from the recovery image depends on whether the system is in a two node MetroCluster configuration Option 1 Most systems You must boot the ONTAP image from the USB drive restore the file system and verify the...

Страница 322: ...pdate press y 4 Ensure that the environmental variables are set as expected a Take the controller to the LOADER prompt b Check the environment variable settings with the printenv command c If an environment variable is not set as expected modify it with the setenv environment variable name changed value command d Save your changes using the savenv command 5 The next depends on your system configur...

Страница 323: ...kets on your screen 3 After the image is installed start the restoration process a Press n when prompted to restore the backup configuration b Press y when prompted to reboot to start using the newly installed software You should be prepared to interrupt the boot process when prompted 4 As the system boots press Ctrl C after you see the Press Ctrl C for Boot Menu message and when the Boot Menu is ...

Страница 324: ...ccessfully metrocluster check lif show 4 Perform the switchback by using the metrocluster switchback command from any node in the surviving cluster 5 Verify that the switchback operation has completed metrocluster show The switchback operation is still running when a cluster is in the waiting for switchback state cluster_B metrocluster show Cluster Configuration State Mode Local cluster_B configur...

Страница 325: ...r ONTAP 9 6 go to Option 3 Restore NSE NVE on systems running ONTAP 9 6 and later Option 1 Restore NVE or NSE when Onboard Key Manager is enabled Steps 1 Connect the console cable to the target controller 2 Use the boot_ontap command at the LOADER prompt to boot the controller 3 Check the console output If the console displays Then The LOADER prompt Boot the controller to the boot menu boot_ontap ...

Страница 326: ...Normal Boot The system boots to Waiting for giveback prompt 8 Move the console cable to the partner controller and login as admin 9 Confirm the target controller is ready for giveback with the storage failover show command 10 Give back only the CFO aggregates with the storage failover giveback fromnode local only cfo aggregates true command If the command fails because of a failed disk physically ...

Страница 327: ...ther than yes true contact Customer Support c Wait 10 minutes for the key to synchronize across the cluster 15 Move the console cable to the partner controller 16 Give back the target controller using the storage failover giveback fromnode local command 17 Check the giveback status 3 minutes after it reports complete using the storage failover show command If giveback is not complete after 20 minu...

Страница 328: ...how command 6 At the clustershell prompt enter the net int show is home false command to list the logical interfaces that are not on their home controller and port If any interfaces are listed as false revert those interfaces back to their home port using the net int revert command 7 Move the console cable to the target controller and run the version v command to check the ONTAP versions 8 Restore...

Страница 329: ... it by using the storage failover modify node local auto giveback true command Option 3 Restore NSE NVE on systems running ONTAP 9 6 and later Steps 1 Connect the console cable to the target controller 2 Use the boot_ontap command at the LOADER prompt to boot the controller 3 Check the console output If the console displays Then The login prompt Go to Step 7 Waiting for giveback a Log into the par...

Страница 330: ...he Restored column anything other than yes true use the security key manager external restore command to restore the key IDs of the authentication keys If the command fails contact Customer Support If the Key Manager type onboard and the Restored column anything other than yes true use the security key manager onboard sync command to re sync the Key Manager type Use the security key manager key qu...

Страница 331: ...us of the controller and if necessary take over the controller so that the healthy controller continues to serve data from the impaired controller storage About this task If you have a cluster with more than two nodes it must be in quorum If the cluster is not in quorum or a healthy controller shows false for eligibility and health you must correct the issue before shutting down the impaired contr...

Страница 332: ...you have a MetroCluster configuration you must have confirmed that the MetroCluster Configuration State is configured and that the nodes are in an enabled and normal state metrocluster node show Steps 1 If AutoSupport is enabled suppress automatic case creation by invoking an AutoSupport message system node autosupport invoke node type all message MAINT number_of_hours_downh The following AutoSupp...

Страница 333: ...r Proceed to the next step Has not automatically switched over Perform a planned switchover operation from the healthy controller metrocluster switchover Has not automatically switched over you attempted switchover with the metrocluster switchover command and the switchover was vetoed Review the veto messages and if possible resolve the issue and try again If you are unable to resolve the issue co...

Страница 334: ...how command on the destination cluster mcc1A metrocluster operation show Operation heal root aggregates State successful Start Time 7 29 2016 20 54 41 End Time 7 29 2016 20 54 42 Errors 8 On the impaired controller module disconnect the power supplies Step 2 Open the controller module To access components inside the controller you must first remove the controller module from the system and then re...

Страница 335: ...e M 2 PCIe card on the label on your controller locate the slots inside the controller and follow the specific sequence of steps Your storage system must meet certain criteria depending on your situation It must have the appropriate operating system for the caching module you are installing It must support the caching capacity All other components in the storage system must be functioning properly...

Страница 336: ...t If necessary remove the caching module and reseat it into the socket 5 Reseat and push the heatsink down to engage the locking button on the caching module housing 6 Repeat the steps if you have a second caching module Close the controller module cover as needed Step 4 Reinstall the controller After you replace a component within the controller module you must reinstall the controller module in ...

Страница 337: ...rts the booting press Ctrl C to interrupt the boot process when you see the message Press Ctrl C for Boot Menu f Select the option to boot to Maintenance mode from the displayed menu Step 5 Run system level diagnostics After installing a new caching module you should run diagnostics Your system must be at the LOADER prompt to start System Level Diagnostics All commands in the diagnostic procedures...

Страница 338: ...us The following default response is displayed SLDIAG No log messages are present c Exit Maintenance mode halt The controller displays the LOADER prompt d Boot the controller from the LOADER prompt bye e Return the controller to normal operation If your controller is in Then An HA pair Perform a give back storage failover giveback ofnode replacement_node_name If you disabled automatic giveback re ...

Страница 339: ... to get to the Boot menu If you have two controller modules in the chassis fully seat the controller module you are servicing in the chassis The controller module boots up when fully seated If you have one controller module in the chassis connect the power supplies and then turn them on e Select Boot to maintenance mode from the menu f Exit Maintenance mode by entering the following command halt A...

Страница 340: ...surviving cluster 5 Verify that the switchback operation has completed metrocluster show The switchback operation is still running when a cluster is in the waiting for switchback state cluster_B metrocluster show Cluster Configuration State Mode Local cluster_B configured switchover Remote cluster_A configured waiting for switchback The switchback operation is complete when the clusters are in the...

Страница 341: ...ule or modules to the new chassis and that the chassis is a new component from NetApp This procedure is disruptive For a two controller cluster you will have a complete service outage and a partial outage in a multi node cluster Shut down the controllers FAS8200 To replace the chassis you must shutdown the controllers Option 1 Most configurations You must shut down the controller or controller in ...

Страница 342: ...NVRAM Depending on your system if the NVMEM NVRAM LED is flashing there is content in the NVMEM NVRAM that has not been saved to disk You need to reboot the controller and start from the beginning of this procedure If repeated attempts to cleanly shut down the controller fail be aware that you might lose any data that was not saved to disk 3 Where applicable halt the second controller to avoid a p...

Страница 343: ...ue and try again If you are unable to resolve the issue contact technical support 3 Resynchronize the data aggregates by running the metrocluster heal phase aggregates command from the surviving cluster controller_A_1 metrocluster heal phase aggregates Job 130 Job succeeded Heal Aggregates is successful If the healing is vetoed you have the option of reissuing the metrocluster heal command with th...

Страница 344: ...destination cluster mcc1A metrocluster operation show Operation heal root aggregates State successful Start Time 7 29 2016 20 54 41 End Time 7 29 2016 20 54 42 Errors 8 On the impaired controller module disconnect the power supplies Replace hardware FAS8200 Move the power supplies fans and controller modules from the impaired chassis to the new chassis and swap out the impaired chassis from the eq...

Страница 345: ...the power supply c Unplug the power cable from the power source 3 Press down the release latch on the power supply cam handle and then lower the cam handle to the fully open position to release the power supply from the mid plane Power supply Cam handle release latch 343 ...

Страница 346: ...andle to seat it all the way into the chassis and then push the cam handle to the closed position making sure that the cam handle release latch clicks into its locked position 8 Reconnect the power cable and secure it to the power supply using the power cable locking mechanism Only connect the power cable to the power supply Do not connect the power cable to a power source at this time Step 2 Move...

Страница 347: ...epeat the preceding steps for any remaining fan modules 6 Insert the fan module into the replacement chassis by aligning it with the opening and then sliding it into the chassis 7 Push firmly on the fan module cam handle so that it is seated all the way into the chassis The cam handle raises slightly when the fan module is completely seated 8 Swing the cam handle up to its closed position making s...

Страница 348: ... the cables in the cable management device so that when you reinstall the cable management device the cables are organized 2 Remove and set aside the cable management devices from the left and right sides of the controller module 3 Loosen the thumbscrew on the cam handle on the controller module Thumbscrew Cam handle 4 Pull the cam handle downward and begin to slide the controller module out of th...

Страница 349: ...e the front of the chassis to the equipment rack or system cabinet using the screws you removed from the old chassis 7 If you have not already done so install the bezel Step 5 Install the controller After you install the controller module and any other components into the new chassis boot it to a state where you can run the interconnect diagnostic test For HA pairs with two controller modules in t...

Страница 350: ...mbscrew on the cam handle on back of the controller module Do not use excessive force when sliding the controller module into the chassis to avoid damaging the connectors b If you have not already done so reinstall the cable management device c Bind the cables to the cable management device with the hook and loop strap d Reinstall the blanking panel and then go to the next step 5 Connect the power...

Страница 351: ...e the rest of your system 4 The next step depends on your system configuration If your system is in Then A stand alone configuration a Exit Maintenance mode halt b Go to Completing the replacement process An HA pair with a second controller module Exit Maintenance mode halt The LOADER prompt appears Step 2 Run system level diagnostics After installing a new chassis you should run interconnect diag...

Страница 352: ...ics tests from the Maintenance mode prompt sldiag device modify dev interconnect sel enable The interconnect tests are disabled by default and must be enabled to run separately 5 Run the interconnect diagnostics test from the Maintenance mode prompt sldiag device run dev interconnect You only need to run the interconnect test from one controller 6 Verify that no hardware problems resulted from the...

Страница 353: ...n both controllers at the LOADER prompt bye e Return the controller to normal operation If your system is running ONTAP Then With two nodes in the cluster Issue these commands node cluster ha modify configured true node storage failover modify node node0 enabled true With more than two nodes in the cluster Issue this command node storage failover modify node node0 enabled true In a two node MetroC...

Страница 354: ...n you can perform the MetroCluster switchback operation This returns the configuration to its normal operating state with the sync source storage virtual machines SVMs on the formerly impaired site now active and serving data from the local disk pools This task only applies to two node MetroCluster configurations Steps 1 Verify that all nodes are in the enabled state metrocluster node show cluster...

Страница 355: ...led part to NetApp After you replace the part you can return the failed part to NetApp as described in the RMA instructions shipped with the kit Contact technical support at NetApp Support 888 463 8277 North America 00 800 44 638277 Europe or 800 800 80 800 Asia Pacific if you need the RMA number or additional help with the replacement procedure Controller Overiew of controller module replacement ...

Страница 356: ...stomer site inventory must be supported by the replacement controller module NetApp Hardware Universe It is important that you apply the commands in these steps on the correct systems The impaired controller is the controller that is being replaced The replacement controller is the new controller that is replacing the impaired controller The healthy controller is the surviving controller You must ...

Страница 357: ...ller you must determine the status of the controller and if necessary take over the controller so that the healthy controller continues to serve data from the impaired controller storage If you have a cluster with more than two nodes it must be in quorum If the cluster is not in quorum or a healthy controller shows false for eligibility and health you must correct the issue before shutting down th...

Страница 358: ...rotected mode section of NetApp Encryption overview with the CLI You must leave the power supplies turned on at the end of this procedure to provide power to the healthy controller Steps 1 Check the MetroCluster status to determine whether the impaired controller has automatically switched over to the healthy controller metrocluster show 2 Depending on whether an automatic switchover has occurred ...

Страница 359: ...eck the state of the aggregates by using the storage aggregate show command controller_A_1 storage aggregate show Aggregate Size Available Used State Vols Nodes RAID Status aggr_b2 227 1GB 227 1GB 0 online 0 mcc1 a2 raid_dp mirrored normal 6 Heal the root aggregates by using the metrocluster heal phase root aggregates command mcc1A metrocluster heal phase root aggregates Job 137 Job succeeded Heal...

Страница 360: ...er module you must first remove the old controller module from the chassis 1 If you are not already grounded properly ground yourself 2 Loosen the hook and loop strap binding the cables to the cable management device and then unplug the system cables and SFPs if needed from the controller module keeping track of where the cables were connected Leave the cables in the cable management device so tha...

Страница 361: ...pport the bottom of the controller module as you slide it out of the chassis Step 2 Move the boot device You must locate the boot media and follow the directions to remove it from the old controller and insert it in the new controller 1 Locate the boot media using the following illustration or the FRU map on the controller module 359 ...

Страница 362: ...h the socket housing and then gently push it into the socket 4 Check the boot media to make sure that it is seated squarely and completely in the socket If necessary remove the boot media and reseat it into the socket 5 Push the boot media down to engage the locking button on the boot media housing Step 3 Move the NVMEM battery To move the NVMEM battery from the old controller module to the new co...

Страница 363: ...ry when you halt the system After the destage is complete the LED turns off If power is lost without a clean shutdown the NVMEM LED flashes until the destage is complete and then the LED turns off If the LED is on and power is on unwritten data is stored on NVMEM This typically occurs during an uncontrolled shutdown after ONTAP has successfully booted 2 Open the CPU air duct and locate the NVMEM b...

Страница 364: ...steps 1 Locate the DIMMs on your controller module 2 Note the orientation of the DIMM in the socket so that you can insert the DIMM in the replacement controller module in the proper orientation 3 Eject the DIMM from its slot by slowly pushing apart the two DIMM ejector tabs on either side of the DIMM and then slide the DIMM out of the slot Carefully hold the DIMM by the edges to avoid pressure on...

Страница 365: ...teps for the remaining DIMMs 7 Move the NVMEM battery to the replacement controller module 8 Align the tab or tabs on the battery holder with the notches in the controller module side and then gently push down on the battery housing until the battery housing clicks into place Step 5 Move a PCIe card To move PCIe cards locate and move them from the old controller into the replacement controller and...

Страница 366: ...eat the preceding step for the remaining PCIe cards in the old controller module 5 Open the new controller module side panel if necessary slide off the PCIe card filler plate as needed and carefully install the PCIe card Be sure that you properly align the card in the slot and exert even pressure on the card when seating it in the socket The card must be fully and evenly seated in the slot 6 Repea...

Страница 367: ...o slots available for the caching module and only one slot is occupied by default 2 Move the caching module to the new controller module and then align the edges of the caching module with the socket housing and gently push it into the socket 3 Verify that the caching module is seated squarely and completely in the socket If necessary remove the caching module and reseat it into the socket 4 Resea...

Страница 368: ...o at any time after prompted to do so However if the system updates the system firmware when it boots you must wait until after the update is complete before interrupting the boot process 1 If you are not already grounded properly ground yourself 2 If you have not already done so close the CPU air duct 3 Align the end of the controller module with the opening in the chassis and then gently push th...

Страница 369: ...ce when sliding the controller module into the chassis to avoid damaging the connectors The controller begins to boot as soon as it is seated in the chassis b If you have not already done so reinstall the cable management device c Bind the cables to the cable management device with the hook and loop strap d When you see the message Press Ctrl C for Boot Menu press Ctrl C to interrupt the boot proc...

Страница 370: ...Maintenance mode e From the boot menu select the option for Maintenance mode Important During the boot process you might see the following prompts A prompt warning of a system ID mismatch and asking to override the system ID A prompt warning that when entering Maintenance mode in an HA configuration you must ensure that the healthy controller remains down You can safely respond y to these prompts ...

Страница 371: ... controller module You must verify the HA state of the controller module and if necessary update the state to match your system configuration 1 In Maintenance mode from the new controller module verify that all components display the same HA state ha config show The HA state should be the same for all components 2 If the displayed system state of the controller module does not match your system co...

Страница 372: ...the Maintenance mode prompt appears 3 Display and note the available devices on the controller module sldiag device show dev mb The controller module devices and ports displayed can be any one or more of the following bootmedia is the system booting device cna is a Converged Network Adapter or interface not connected to a network or storage device fcal is a Fibre Channel Arbitrated Loop device not...

Страница 373: ...sts that you want to run sldiag device modify dev dev_name selection only selection only disables all other tests that you do not want to run for the device d Run the selected tests sldiag device run dev dev_name After the test is complete the following message is displayed SLDIAG _ALL_TESTS_COMPLETED e Verify that no tests failed sldiag device status dev dev_name long state failed System level di...

Страница 374: ... to run for the device d Verify that the tests were modified sldiag device show e Repeat these substeps for each device that you want to run concurrently f Run diagnostics on all of the devices sldiag device run Do not add to or modify your entries after you start running diagnostics After the test is complete the following message is displayed SLDIAG _ALL_TESTS_COMPLETED g Verify that there are n...

Страница 375: ...re securely connected and that hardware components are properly installed in the storage system d Reconnect the power supplies and then power on the storage system e Rerun the system level diagnostics test Recable the system and reassign disks FAS8200 Continue the replacement procedure by recabling the storage and confirming disk reassignment Step 1 Recable the system After running diagnostics you...

Страница 376: ...a system ID mismatch boot_ontap 3 Wait until the Waiting for giveback message is displayed on the replacement controller console and then from the healthy controller verify that the new partner system ID has been automatically assigned storage failover show In the command output you should see a message that the system ID has changed on the impaired controller showing the correct old and new IDs I...

Страница 377: ...show The output from the storage failover show command should not include the System ID changed on partner message 6 Verify that the disks were assigned correctly storage disk show ownership The disks belonging to the replacement controller should show the new system ID In the following example the disks owned by node1 now show the new system ID 1873775277 node1 storage disk show ownership Disk Ag...

Страница 378: ...h the old system ID of 118073209 dr group id cluster node node systemid dr partner systemid 1 Cluster_A Node_A_1 536872914 118073209 1 Cluster_B Node_B_1 118073209 536872914 2 entries were displayed 3 View the new system ID at the Maintenance mode prompt on the impaired node disk show In this example the new system ID is 118065481 Local System ID 118065481 4 Reassign disk ownership for FAS systems...

Страница 379: ... giveback You can monitor the progress of the savecore using the system node run node local node name partner savecore s command info c Return to the admin privilege level set privilege admin 7 If the replacement node is in Maintenance mode showing the prompt exit Maintenance mode and go to the LOADER prompt halt 8 Boot the replacement node boot_ontap 9 After the replacement node has fully booted ...

Страница 380: ...y and install licenses for the new controller and return the failed part to NetApp as described in the RMA instructions shipped with the kit Step 1 Install licenses for the replacement controller in ONTAP You must install new licenses for the replacement node if the impaired node was using ONTAP features that require a standard node locked license For features with standard licenses each node in t...

Страница 381: ...key management Restore onboard key management encryption keys Restore external key management encryption keys Step 3 Verify LIFs and register the serial number Before returning the replacement node to service you should verify that the LIFs are on their home ports and register the serial number of the replacement node if AutoSupport is enabled and reset automatic giveback Steps 1 Verify that the l...

Страница 382: ...ccessfully metrocluster check lif show 4 Perform the switchback by using the metrocluster switchback command from any node in the surviving cluster 5 Verify that the switchback operation has completed metrocluster show The switchback operation is still running when a cluster is in the waiting for switchback state cluster_B metrocluster show Cluster Configuration State Mode Local cluster_B configur...

Страница 383: ...ures depending on the storage system hardware configuration Option 1 Most configurations To shut down the impaired controller you must determine the status of the controller and if necessary take over the controller so that the healthy controller continues to serve data from the impaired controller storage About this task If you have a cluster with more than two nodes it must be in quorum If the c...

Страница 384: ...roller shows false for eligibility and health you must correct the issue before shutting down the impaired controller see the Administration overview with the CLI If you have a MetroCluster configuration you must have confirmed that the MetroCluster Configuration State is configured and that the nodes are in an enabled and normal state metrocluster node show Steps 1 If AutoSupport is enabled suppr...

Страница 385: ...ster status to determine whether the impaired controller has automatically switched over to the healthy controller metrocluster show 2 Depending on whether an automatic switchover has occurred proceed according to the following table If the impaired controller Then Has automatically switched over Proceed to the next step Has not automatically switched over Perform a planned switchover operation fr...

Страница 386: ... aggregates by using the metrocluster heal phase root aggregates command mcc1A metrocluster heal phase root aggregates Job 137 Job succeeded Heal Root Aggregates is successful If the healing is vetoed you have the option of reissuing the metrocluster heal command with the override vetoes parameter If you use this optional parameter the system overrides any soft vetoes that prevent the healing oper...

Страница 387: ... the controller module keeping track of where the cables were connected Leave the cables in the cable management device so that when you reinstall the cable management device the cables are organized 3 Remove and set aside the cable management devices from the left and right sides of the controller module 4 Loosen the thumbscrew on the cam handle on the controller module Thumbscrew Cam handle 5 Pu...

Страница 388: ...lashing there is no content in the NVMEM you can skip the following steps and proceed to the next task in this procedure 3 Unplug the battery The NVMEM LED blinks while destaging contents to the flash memory when you halt the system After the destage is complete the LED turns off If power is lost without a clean shutdown the NVMEM LED flashes until the destage is complete and then the LED turns of...

Страница 389: ...he NVMEM LED on the controller module 5 Locate the DIMMs on your controller module Each system memory DIMM has an LED located on the board next to each DIMM slot The LED for the faulty blinks every two seconds 6 Note the orientation of the DIMM in the socket so that you can insert the replacement DIMM in the proper orientation 7 Eject the DIMM from its slot by slowly pushing apart the two DIMM eje...

Страница 390: ... The notch among the pins on the DIMM should line up with the tab in the socket 9 Make sure that the DIMM ejector tabs on the connector are in the open position and then insert the DIMM squarely into the slot The DIMM fits tightly in the slot but should go in easily If not realign the DIMM with the slot and reinsert it Visually inspect the DIMM to verify that it is evenly aligned and fully inserte...

Страница 391: ...d to interrupt the boot process a With the cam handle in the open position firmly push the controller module in until it meets the midplane and is fully seated and then close the cam handle to the locked position Do not use excessive force when sliding the controller module into the chassis to avoid damaging the connectors b Tighten the thumbscrew on the cam handle on back of the controller module...

Страница 392: ...replacement of the DIMMs sldiag device status dev mem long state failed System level diagnostics returns you to the prompt if there are no test failures or lists the full status of failures resulting from testing the component 5 Proceed based on the result of the preceding step If the system level diagnostics tests Then Were completed without any failures a Clear the status logs sldiag device clea...

Страница 393: ...cs that cables are securely connected and that hardware components are properly installed in the storage system d Boot the controller module you are servicing interrupting the boot by pressing Ctrl C when prompted to get to the Boot menu If you have two controller modules in the chassis fully seat the controller module you are servicing in the chassis The controller module boots up when fully seat...

Страница 394: ...ccessfully metrocluster check lif show 4 Perform the switchback by using the metrocluster switchback command from any node in the surviving cluster 5 Verify that the switchback operation has completed metrocluster show The switchback operation is still running when a cluster is in the waiting for switchback state cluster_B metrocluster show Cluster Configuration State Mode Local cluster_B configur...

Страница 395: ... specific sequence of tasks You must replace the fan module within two minutes of removing it from the chassis System airflow is disrupted and the controller module or modules shut down after two minutes to avoid overheating 1 If you are not already grounded properly ground yourself 2 Remove the bezel if necessary with two hands by grasping the openings on each side of the bezel and then pulling i...

Страница 396: ...ds and then gently push the bezel onto the ball studs 11 After you replace the part you can return the failed part to NetApp as described in the RMA instructions shipped with the kit Contact technical support at NetApp Support 888 463 8277 North America 00 800 44 638277 Europe or 800 800 80 800 Asia Pacific if you need the RMA number or additional help with the replacement procedure Replace the NV...

Страница 397: ...he healthy controller storage failover takeover ofnode impaired_node_name When the impaired controller shows Waiting for giveback press Ctrl C and then respond y Option 2 Controller is in a MetroCluster Do not use this procedure if your system is in a two node MetroCluster configuration To shut down the impaired controller you must determine the status of the controller and if necessary take over ...

Страница 398: ...e impaired controller storage About this task If you are using NetApp Storage Encryption you must have reset the MSID using the instructions in the Return a FIPS drive or SED to unprotected mode section of NetApp Encryption overview with the CLI You must leave the power supplies turned on at the end of this procedure to provide power to the healthy controller Steps 1 Check the MetroCluster status ...

Страница 399: ...e 7 25 2016 18 45 55 End Time 7 25 2016 18 45 56 Errors 5 Check the state of the aggregates by using the storage aggregate show command controller_A_1 storage aggregate show Aggregate Size Available Used State Vols Nodes RAID Status aggr_b2 227 1GB 227 1GB 0 online 0 mcc1 a2 raid_dp mirrored normal 6 Heal the root aggregates by using the metrocluster heal phase root aggregates command mcc1A metroc...

Страница 400: ...oller module 1 If you are not already grounded properly ground yourself 2 Loosen the hook and loop strap binding the cables to the cable management device and then unplug the system cables and SFPs if needed from the controller module keeping track of where the cables were connected Leave the cables in the cable management device so that when you reinstall the cable management device the cables ar...

Страница 401: ...ation go to the next step If your system is in a stand alone configuration cleanly shut down the controller module and then check the NVRAM LED identified by the NV icon The NVRAM LED blinks while destaging contents to the flash memory when you halt the system After the destage is complete the LED turns off If power is lost without a clean shutdown the NVMEM LED flashes until the destage is comple...

Страница 402: ...der with the notches in the controller module side and then gently push down on the battery housing until the battery housing clicks into place 6 Close the CPU air duct Make sure that the plug locks down to the socket Step 4 Reinstall the controller After you replace a component within the controller module you must reinstall the controller module in the system chassis and boot it to a state where...

Страница 403: ... cables to the cable management device with the hook and loop strap e As each controller starts the booting press Ctrl C to interrupt the boot process when you see the message Press Ctrl C for Boot Menu f Select the option to boot to Maintenance mode from the displayed menu Step 5 Run system level diagnostics After installing a new NVMEM battery you should run diagnostics Your system must be at th...

Страница 404: ...s logs sldiag device clearstatus b Verify that the log was cleared sldiag device status The following default response is displayed SLDIAG No log messages are present c Exit Maintenance mode halt The controller displays the LOADER prompt d Boot the controller from the LOADER prompt bye e Return the controller to normal operation If your controller is in Then An HA pair Perform a give back storage ...

Страница 405: ... to get to the Boot menu If you have two controller modules in the chassis fully seat the controller module you are servicing in the chassis The controller module boots up when fully seated If you have one controller module in the chassis connect the power supplies and then turn them on e Select Boot to maintenance mode from the menu f Exit Maintenance mode by entering the following command halt A...

Страница 406: ...surviving cluster 5 Verify that the switchback operation has completed metrocluster show The switchback operation is still running when a cluster is in the waiting for switchback state cluster_B metrocluster show Cluster Configuration State Mode Local cluster_B configured switchover Remote cluster_A configured waiting for switchback The switchback operation is complete when the clusters are in the...

Страница 407: ...f the controller and if necessary take over the controller so that the healthy controller continues to serve data from the impaired controller storage About this task If you have a cluster with more than two nodes it must be in quorum If the cluster is not in quorum or a healthy controller shows false for eligibility and health you must correct the issue before shutting down the impaired controlle...

Страница 408: ...you have a MetroCluster configuration you must have confirmed that the MetroCluster Configuration State is configured and that the nodes are in an enabled and normal state metrocluster node show Steps 1 If AutoSupport is enabled suppress automatic case creation by invoking an AutoSupport message system node autosupport invoke node type all message MAINT number_of_hours_downh The following AutoSupp...

Страница 409: ...r Proceed to the next step Has not automatically switched over Perform a planned switchover operation from the healthy controller metrocluster switchover Has not automatically switched over you attempted switchover with the metrocluster switchover command and the switchover was vetoed Review the veto messages and if possible resolve the issue and try again If you are unable to resolve the issue co...

Страница 410: ...how command on the destination cluster mcc1A metrocluster operation show Operation heal root aggregates State successful Start Time 7 29 2016 20 54 41 End Time 7 29 2016 20 54 42 Errors 8 On the impaired controller module disconnect the power supplies Step 2 Open the controller module To access components inside the controller you must first remove the controller module from the system and then re...

Страница 411: ...dule out of the chassis Make sure that you support the bottom of the controller module as you slide it out of the chassis Step 3 Replace a PCIe card To replace a PCIe card locate it within the controller and follow the specific sequence of steps 1 Loosen the thumbscrew on the controller module side panel 2 Swing the side panel off the controller module 409 ...

Страница 412: ...bottom slot and cannot see the card socket well remove the top card so that you can see the card socket install the card and then reinstall the card you removed from the top slot 5 Close the side panel and tighten the thumbscrew Step 4 Reinstall the controller After you replace a component within the controller module you must reinstall the controller module in the system chassis and boot it 1 Ali...

Страница 413: ...odule d Bind the cables to the cable management device with the hook and loop strap A two node MetroCluster configuration a With the cam handle in the open position firmly push the controller module in until it meets the midplane and is fully seated and then close the cam handle to the locked position Tighten the thumbscrew on the cam handle on back of the controller module Do not use excessive fo...

Страница 414: ... site now active and serving data from the local disk pools This task only applies to two node MetroCluster configurations Steps 1 Verify that all nodes are in the enabled state metrocluster node show cluster_B metrocluster node show DR Configuration DR Group Cluster Node State Mirroring Mode 1 cluster_A controller_A_1 configured enabled heal roots completed cluster_B controller_B_1 configured ena...

Страница 415: ...or 800 800 80 800 Asia Pacific if you need the RMA number or additional help with the replacement procedure Swap out a power supply FAS8200 Swapping out a power supply involves turning off disconnecting and removing the old power supply and installing connecting and turning on the replacement power supply All other components in the system must be functioning properly if not you must contact techn...

Страница 416: ...pen the power cable retainer and then unplug the power cable from the power supply c Unplug the power cable from the power source 4 Press down the release latch on the power supply cam handle and then lower the cam handle to the fully open position to release the power supply from the mid plane Power supply 414 ...

Страница 417: ...9 Reconnect the power supply cabling a Reconnect the power cable to the power supply and the power source b Secure the power cable to the power supply using the power cable retainer Once power is restored to the power supply the status LED should be green 1 Turn on the power to the new power supply and then verify the operation of the power supply activity LEDs The power supply LEDs are lit when t...

Страница 418: ...ke node type all message MAINT number_of_hours_downh The following AutoSupport message suppresses automatic case creation for two hours cluster1 system node autosupport invoke node type all message MAINT 2h 2 Disable automatic giveback from the console of the healthy controller storage failover modify node local auto giveback false 3 Take the impaired controller to the LOADER prompt If the impaire...

Страница 419: ...e LOADER prompt Go to Remove controller module Waiting for giveback Press Ctrl C and then respond y when prompted System prompt or password prompt enter system password Take over or halt the impaired controller from the healthy controller storage failover takeover ofnode impaired_node_name When the impaired controller shows Waiting for giveback press Ctrl C and then respond y Option 3 Controller i...

Страница 420: ... 130 Job succeeded Heal Aggregates is successful If the healing is vetoed you have the option of reissuing the metrocluster heal command with the override vetoes parameter If you use this optional parameter the system overrides any soft vetoes that prevent the healing operation 4 Verify that the operation has been completed by using the metrocluster operation show command controller_A_1 metroclust...

Страница 421: ...red controller module disconnect the power supplies Step 2 Open the controller module To access components inside the controller you must first remove the controller module from the system and then remove the cover on the controller module 1 If you are not already grounded properly ground yourself 2 Loosen the hook and loop strap binding the cables to the cable management device and then unplug th...

Страница 422: ...ke sure that you support the bottom of the controller module as you slide it out of the chassis Step 3 Replace the RTC Battery To replace the RTC battery locate them inside the controller and follow the specific sequence of steps 1 If you are not already grounded properly ground yourself 2 Locate the RTC battery 420 ...

Страница 423: ...lder in the controller module 6 Note the polarity of the RTC battery and then insert it into the holder by tilting the battery at an angle and pushing down 7 Visually inspect the battery to make sure that it is completely installed into the holder and that the polarity is correct Step 4 Reinstall the controller module and setting time date after RTC battery replacement After you replace a componen...

Страница 424: ...er sources and then turn on the power to start the boot process e Halt the controller at the LOADER prompt 6 Reset the time and date on the controller a Check the date and time on the healthy controller with the show date command b At the LOADER prompt on the target controller check the time and date c If necessary modify the date with the set date mm dd yyyy command d If necessary set the time in...

Страница 425: ... by using the metrocluster switchback command from any node in the surviving cluster 5 Verify that the switchback operation has completed metrocluster show The switchback operation is still running when a cluster is in the waiting for switchback state cluster_B metrocluster show Cluster Configuration State Mode Local cluster_B configured switchover Remote cluster_A configured waiting for switchbac...

Страница 426: ...uctions with live links to additional content Video steps Video step by step instructions Detailed steps Online step by step instructions with live links to additional content For MetroCluster configurations see either Install MetroCluster IP configuration Install MetroCluster Fabric Attached configuration Quick guide FAS8300 and FAS8700 This guide gives graphic instructions for a typical installa...

Страница 427: ... of cables for your system and collect specific network information You need to have access to the Hardware Universe for information about site requirements as well as additional information on your configured system You might also want to have access to the Release Notes for your version of ONTAP for more information about this system NetApp Hardware Universe Find the Release Notes for your versi...

Страница 428: ...2A 112 00437 2m X66033A 112 00438 3m mini SAS HD to mini SAS HD cables order dependent Optical cables X66250 2 N C 112 00342 16 Gb FC or 25GbE cables for mezzanine cards order dependent RJ 45 order dependent X6585 R6 112 00291 3m X6562 R6 112 00196 5m Management network Micro USB console cable Not applicable Console connection used during software setup if laptop or console does not support networ...

Страница 429: ...o node switchless cluster method or by using the cluster interconnect network Option 1 Cable a two node switchless cluster The optional data ports optional NIC cards and management ports on the controller modules are connected to switches The cluster interconnect and HA ports are cabled on both controller modules You must have contacted your network administrator for information about connecting t...

Страница 430: ...bling instructions Option 2 Cable a switched cluster The optional data ports optional NIC cards mezzanine cards and management ports on the controller modules are connected to switches The cluster interconnect and HA ports are cabled on to the cluster HA switch You must have contacted your network administrator for information about connecting the system to the switches Be sure to check the direct...

Страница 431: ...lustration to complete the cabling between the controllers and to the switches Switched cluster cabling 2 Go to Step 4 Cable controllers to drive shelves for drive shelf cabling instructions Step 4 Cable controllers to drive shelves Option 1 Cable the controllers to SAS drive shelves You must cable each controller to the IOM modules on both SAS drive shelves 429 ...

Страница 432: ... tab for the DS224 C are down As you insert the connector you should feel it click into place if you do not feel it click remove it turn it around and try again Steps 1 Use the following animation or illustration to cable your controllers to two drive shelves Cabling the controllers to SAS drive shelves 430 ...

Страница 433: ...sing cluster discovery with only a connection to the switch and laptop or by connecting directly to a controller in the system and then connecting to the management switch Option 1 Completing system setup and configuration if network discovery is enabled If you have network discovery enabled on your laptop you can complete system setup and configuration using automatic cluster discovery Steps 431 ...

Страница 434: ...op to the Management switch 5 Select an ONTAP icon listed to discover a Open File Explorer b Click network in the left pane c Right click and select refresh d Double click either ONTAP icon and accept any certificates displayed on your screen XXXXX is the system serial number for the target node System Manager opens 6 Use System Manager guided setup to configure your system using the data you coll...

Страница 435: ... to 115 200 baud with N 8 1 See your laptop or console s online help for how to configure the console port b Connect the console cable to the laptop or console using the console cable that came with your system and then connect the laptop to the management switch on the management subnet c Assign a TCP IP address to the laptop or console using one that is on the management subnet 2 Use the followi...

Страница 436: ...App Support Registration b Register your system NetApp Product Registration c Download Active IQ Config Advisor NetApp Downloads Config Advisor 7 Verify the health of your system by running Config Advisor 8 After you have completed the initial configuration go to the ONTAP ONTAP System Manager Documentation Resources page for information about configuring additional features in ONTAP Maintain Boot...

Страница 437: ...etApp Encryption overview with the CLI Steps 1 Check the status of the impaired controller If the impaired controller is at the login prompt log in as admin If the impaired controller is at the LOADER prompt and is part of HA configuration log in as admin on the healthy controller If the impaired controller is in a standalone configuration and at LOADER prompt contact mysupport netapp com 2 If Aut...

Страница 438: ...ager types The types are KMIP AKV and GCP The process for confirming these types is the same as confirming external or onboard key manager types If the Key Manager type displays external and the Restored column displays yes it s safe to shut down the impaired controller If the Key Manager type displays onboard and the Restored column displays yes you need to complete some additional steps If the K...

Страница 439: ...t priv advanced e Enter the command to display the key management backup information security key manager onboard show backup f Copy the contents of the backup information to a separate file or your log file You ll need it in disaster scenarios where you might need to manually recover OKM g Return to admin mode set priv admin h You can safely shut down the controller Verify NSE configuration 1 Dis...

Страница 440: ...ort netapp com b Verify that the Restored column equals yes for all authentication keys security key manager key query c You can safely shut down the controller 3 If the Key Manager type displays onboard and the Restored column displays anything other than yes a Enter the onboard security key manager sync command security key manager onboard sync Enter the customer s onboard key management passphr...

Страница 441: ...tasks you need to complete the shutdown of the impaired controller Do not use this procedure if your system is in a two node MetroCluster configuration To shut down the impaired controller you must determine the status of the controller and if necessary take over the controller so that the healthy controller continues to serve data from the impaired controller storage If you have a cluster with mo...

Страница 442: ... down the impaired controller you must determine the status of the controller and if necessary switch over the controller so that the healthy controller continues to serve data from the impaired controller storage About this task If you are using NetApp Storage Encryption you must have reset the MSID using the instructions in the Return a FIPS drive or SED to unprotected mode section of NetApp Enc...

Страница 443: ...he override vetoes parameter If you use this optional parameter the system overrides any soft vetoes that prevent the healing operation 4 Verify that the operation has been completed by using the metrocluster operation show command controller_A_1 metrocluster operation show Operation heal aggregates State successful Start Time 7 25 2016 18 45 55 End Time 7 25 2016 18 45 56 Errors 5 Check the state...

Страница 444: ... module To access components inside the controller module you must remove the controller module from the chassis You can use the following animation illustration or the written steps to remove the controller module from the chassis Removing the controller module Steps 1 If you are not already grounded properly ground yourself 2 Release the power cable retainers and then unplug the cables from the ...

Страница 445: ... controller module and then follow the directions to replace it Before you begin Although the contents of the boot media is encrypted it is a best practice to erase the contents of the boot media before replacing it For more information see the Statement of Volatility for your system on the NetApp Support Site You must log into the NetApp Support Site to display the Statement of Volatility for you...

Страница 446: ...ss the locking tabs on the sides of the air duct in toward the middle of the controller module b Slide the air duct toward the back of the controller module and then rotate it upward to its completely open position 2 Locate and remove the boot media from the controller module 444 ...

Страница 447: ...n gently push it into the socket 4 Check the boot media to make sure that it is seated squarely and completely in the socket If necessary remove the boot media and reseat it into the socket 5 Lock the boot media in place a Rotate the boot media down toward the motherboard b Placing a finger at the end of the boot media by the blue button push down on the boot media end to engage the blue locking b...

Страница 448: ...h drive a Download the service image to your work space on your laptop b Unzip the service image If you are extracting the contents using Windows do not use WinZip to extract the netboot image Use another extraction tool such as 7 Zip or WinRAR There are two folders in the unzipped service image file boot efi c Copy the efi folder to the top directory on the USB flash drive The USB flash drive sho...

Страница 449: ... the option to boot to Maintenance mode and then halt the controller to boot to LOADER 9 If the controller is in a stretch or fabric attached MetroCluster you must restore the FC adapter configuration a Boot to Maintenance mode boot_ontap maint b Set the MetroCluster ports as initiators ucadmin modify m fc t initiator adapter_name c Halt to return to Maintenance mode halt The changes will be imple...

Страница 450: ...If you are prompted to continue with the update press y 4 Ensure that the environmental variables are set as expected a Take the controller to the LOADER prompt b Check the environment variable settings with the printenv command c If an environment variable is not set as expected modify it with the setenv environment variable name changed value command d Save your changes using the savenv command ...

Страница 451: ...rive 2 When prompted either enter the name of the image or accept the default image displayed inside the brackets on your screen 3 After the image is installed start the restoration process a Press n when prompted to restore the backup configuration b Press y when prompted to reboot to start using the newly installed software You should be prepared to interrupt the boot process when prompted 4 As ...

Страница 452: ... 2 entries were displayed 2 Verify that resynchronization is complete on all SVMs metrocluster vserver show 3 Verify that any automatic LIF migrations being performed by the healing operations were completed successfully metrocluster check lif show 4 Perform the switchback by using the metrocluster switchback command from any node in the surviving cluster 5 Verify that the switchback operation has...

Страница 453: ...captured at the beginning of this procedure If NSE or NVE are enabled and Onboard Key Manager is enabled go to Restore NVE or NSE when Onboard Key Manager is enabled If NSE or NVE are enabled for ONTAP 9 6 go to Restore NSE NVE on systems running ONTAP 9 6 and later Restore NVE or NSE when Onboard Key Manager is enabled Steps 1 Connect the console cable to the target controller 2 Use the boot_onta...

Страница 454: ...DRYRa9SCv8AAAAAAAAAAAAAAAAAAAAAAAAAAAAAAAAAAAAAAAAAAAAA AAAAAAAAAAAAAAAAAAAAAAAAAAAAAAAAAAAAAAAAAAAAAAAAAAAAAAAAAAAAAAAA AAAAAAAA END BACKUP 7 At the Boot Menu select the option for Normal Boot The system boots to Waiting for giveback prompt 8 Move the console cable to the partner controller and login as admin 9 Confirm the target controller is ready for giveback with the storage failover show com...

Страница 455: ...failover giveback fromnode local command 15 Check the giveback status 3 minutes after it reports complete using the storage failover show command If giveback is not complete after 20 minutes contact Customer Support 16 At the clustershell prompt enter the net int show is home false command to list the logical interfaces that are not on their home controller and port If any interfaces are listed as...

Страница 456: ...rfaces that are not on their home controller and port If any interfaces are listed as false revert those interfaces back to their home port using the net int revert command 7 Move the console cable to the target controller and run the version v command to check the ONTAP versions 8 Restore automatic giveback if you disabled it by using the storage failover modify node local auto giveback true comm...

Страница 457: ... 1 Shut down the impaired controller You can shut down or take over the impaired controller using different procedures depending on the storage system hardware configuration Option 1 Most configurations To shut down the impaired controller you must determine the status of the controller and if necessary take over the controller so that the healthy controller continues to serve data from the impair...

Страница 458: ...de MetroCluster configuration To shut down the impaired controller you must determine the status of the controller and if necessary take over the controller so that the healthy controller continues to serve data from the impaired controller storage If you have a cluster with more than two nodes it must be in quorum If the cluster is not in quorum or a healthy controller shows false for eligibility...

Страница 459: ...rotected mode section of NetApp Encryption overview with the CLI You must leave the power supplies turned on at the end of this procedure to provide power to the healthy controller Steps 1 Check the MetroCluster status to determine whether the impaired controller has automatically switched over to the healthy controller metrocluster show 2 Depending on whether an automatic switchover has occurred ...

Страница 460: ...eck the state of the aggregates by using the storage aggregate show command controller_A_1 storage aggregate show Aggregate Size Available Used State Vols Nodes RAID Status aggr_b2 227 1GB 227 1GB 0 online 0 mcc1 a2 raid_dp mirrored normal 6 Heal the root aggregates by using the metrocluster heal phase root aggregates command mcc1A metrocluster heal phase root aggregates Job 137 Job succeeded Heal...

Страница 461: ...ion or the written steps to remove the controller module from the chassis Removing the controller module Steps 1 If you are not already grounded properly ground yourself 2 Release the power cable retainers and then unplug the cables from the power supplies 3 Loosen the hook and loop strap binding the cables to the cable management device and then unplug the system cables and SFPs if needed from th...

Страница 462: ... the FRU map on the controller module for the location of the Flash Cache Your storage system must meet certain criteria depending on your situation It must have the appropriate operating system for the caching module you are installing It must support the caching capacity Although the contents of the caching module is encrypted it is a best practice to erase the contents of the module before repl...

Страница 463: ...ailed caching module s LED is lit a Press the blue release tab The caching module end rises clear of the release tab b Rotate the caching module up and slide it out of the socket 4 Install the replacement caching module a Align the edges of the replacement caching module with the socket and gently insert it into the socket b Rotate the caching module downward toward the motherboard c Placing your ...

Страница 464: ...le in the chassis until instructed to do so 3 Cable the management and console ports only so that you can access the system to perform the tasks in the following sections You will connect the rest of the cables to the controller module later in this procedure 4 Complete the installation of the controller module a Plug the power cord into the power supply reinstall the power cable locking collar an...

Страница 465: ...gnostics All commands in the diagnostic procedures are issued from the controller where the component is being replaced Steps 1 If the controller to be serviced is not at the LOADER prompt reboot the controller system node halt node node_name After you issue the command you should wait until the system stops at the LOADER prompt 2 At the LOADER prompt access the special drivers specifically design...

Страница 466: ... the local disk pools This task only applies to two node MetroCluster configurations Steps 1 Verify that all nodes are in the enabled state metrocluster node show cluster_B metrocluster node show DR Configuration DR Group Cluster Node State Mirroring Mode 1 cluster_A controller_A_1 configured enabled heal roots completed cluster_B controller_B_1 configured enabled waiting for switchback recovery 2...

Страница 467: ...the failed part to NetApp as described in the RMA instructions shipped with the kit Contact technical support at NetApp Support 888 463 8277 North America 00 800 44 638277 Europe or 800 800 80 800 Asia Pacific if you need the RMA number or additional help with the replacement procedure Chassis Overview of chassis replacement FAS8300 and FAS8700 All other components in the system must be functionin...

Страница 468: ... halt node node_name The confirmation message looks like the following Warning This operation will cause controller node name to be marked as unhealthy Unhealthy nodes do not participate in quorum voting If the controller goes out of service and one more controller goes out of service there will be a data serving failure for the entire cluster This will cause a client disruption Use cluster show t...

Страница 469: ...ccording to the following table If the impaired controller Then Has automatically switched over Proceed to the next step Has not automatically switched over Perform a planned switchover operation from the healthy controller metrocluster switchover Has not automatically switched over you attempted switchover with the metrocluster switchover command and the switchover was vetoed Review the veto mess...

Страница 470: ...sful If the healing is vetoed you have the option of reissuing the metrocluster heal command with the override vetoes parameter If you use this optional parameter the system overrides any soft vetoes that prevent the healing operation 7 Verify that the heal operation is complete by using the metrocluster operation show command on the destination cluster mcc1A metrocluster operation show Operation ...

Страница 471: ...roller module as you slide it out of the chassis 7 Set the controller module aside in a safe place and repeat these steps for the other controller module in the chassis Step 2 Move the fans To move the fan modules to the replacement chassis when replacing the chassis you must perform a specific sequence of tasks Steps 1 If you are not already grounded properly ground yourself 2 Remove the bezel if...

Страница 472: ...ssis all the way into the equipment rack or system cabinet 6 Secure the front of the chassis to the equipment rack or system cabinet using the screws you removed from the old chassis 7 If you have not already done so install the bezel Step 4 Install the controller modules After you install the controller modules into the new chassis you need to boot it to a state where you can run the diagnostic t...

Страница 473: ...boot to the LOADER prompt by pressing Ctrl C If your system stops at the boot menu select the option to boot to LOADER 4 Repeat the preceding steps to install the second controller into the new chassis Complete the restoration and replacement process FAS8300 and FAS8700 You must verify the HA state of the chassis run diagnostics and return the failed part to NetApp as described in the RMA instruct...

Страница 474: ...Select Scan System from the displayed menu to enable running the diagnostics tests 4 Select Test system from the displayed menu to run diagnostics tests 5 Select the test or series of tests from the various sub menus 6 Proceed based on the result of the preceding step If the test failed correct the failure and then rerun the test If the test reported no failures select Reboot from the menu to rebo...

Страница 475: ...surviving cluster 5 Verify that the switchback operation has completed metrocluster show The switchback operation is still running when a cluster is in the waiting for switchback state cluster_B metrocluster show Cluster Configuration State Mode Local cluster_B configured switchover Remote cluster_A configured waiting for switchback The switchback operation is complete when the clusters are in the...

Страница 476: ...acement FRU component you received from your provider You must be replacing a controller module with a controller module of the same model type You cannot upgrade your system by just replacing the controller module You cannot change any drives or drive shelves as part of this procedure In this procedure the boot device is moved from the impaired controller to the replacement controller so that the...

Страница 477: ...system password Take over or halt the impaired controller from the healthy controller storage failover takeover ofnode impaired_node_name When the impaired controller shows Waiting for giveback press Ctrl C and then respond y Option 2 Controller is in a MetroCluster Do not use this procedure if your system is in a two node MetroCluster configuration To shut down the impaired controller you must de...

Страница 478: ...wn the impaired controller you must determine the status of the controller and if necessary switch over the controller so that the healthy controller continues to serve data from the impaired controller storage About this task If you are using NetApp Storage Encryption you must have reset the MSID using the instructions in the Return a FIPS drive or SED to unprotected mode section of NetApp Encryp...

Страница 479: ...he override vetoes parameter If you use this optional parameter the system overrides any soft vetoes that prevent the healing operation 4 Verify that the operation has been completed by using the metrocluster operation show command controller_A_1 metrocluster operation show Operation heal aggregates State successful Start Time 7 25 2016 18 45 55 End Time 7 25 2016 18 45 56 Errors 5 Check the state...

Страница 480: ...chassis and then boot the system to Maintenance mode Step 1 Remove the controller module To access components inside the controller module you must remove the controller module from the chassis You can use the following animation illustration or the written steps to remove the controller module from the chassis Removing the controller module 1 If you are not already grounded properly ground yourse...

Страница 481: ... the controller module as you slide it out of the chassis 7 Place the controller module on a stable flat surface 8 On the replacement controller module open the air duct and remove the empty risers from the controller module using the animation illustration or the written steps Removing the empty risers from the replacement controller module 479 ...

Страница 482: ...side of riser 1 up and toward air duct lift the riser up and then set it aside d Repeat the previous step for the remaining risers Step 2 Move the power supplies You must move the power supply from the impaired controller module to the replacement controller module when you replace a controller module You can use the following animation illustration or the written steps to move the power supplies ...

Страница 483: ...dule until the locking tab clicks into place The power supplies will only properly engage with the internal connector and lock in place one way To avoid damaging the internal connector do not use excessive force when sliding the power supply into the system 4 Repeat the preceding steps for any remaining power supplies Step 3 Move the NVDIMM battery To move the NVDIMM battery from the impaired cont...

Страница 484: ...he blue locking tab marked PUSH and then lift the battery out of the holder and controller module 3 Move the battery to the replacement controller module 4 Align the battery module with the opening for the battery and then gently push the battery into slot until it locks into place Do not plug the battery cable back into the motherboard until instructed to do so Step 4 Move the boot media You must...

Страница 485: ...t 3 Check the boot media to make sure that it is seated squarely and completely in the socket If necessary remove the boot media and reseat it into the socket 4 Lock the boot media in place a Rotate the boot media down toward the motherboard b Press the blue locking button so that it is in the open position c Placing your fingers at the end of the boot media by the blue button firmly push down on ...

Страница 486: ...ove the PCIe risers and mezzanine card from the impaired controller module to the replacement controller module Moving PCIe riser 1 and 2 left and middle risers Moving PCI risers 1 and 2 Moving the mezzanine card and riser 3 right riser Moving the mezzanine card and riser 3 484 ...

Страница 487: ...iser squarely into the socket on the motherboard and then rotate the latch down flush with the sheet metal on the riser e Repeat this step for riser number 2 2 Remove riser number 3 remove the mezzanine card and install both into the replacement controller module a Remove any SFP or QSFP modules that might be in the PCIe cards b Rotate the riser locking latch on the left side of the riser up and t...

Страница 488: ...ules to the new controller module Moving the caching modules 1 If you are not already grounded properly ground yourself 2 Move the caching modules from the impaired controller module to the replacement controller module a Press the blue release tab at the end of the caching module rotate the module up and then remove the module from the socket b Move the caching module to the same socket on the re...

Страница 489: ...red controller module to the replacement controller module You must have the new controller module ready so that you can move the DIMMs directly from the impaired controller module to the corresponding slots in the replacement controller module You can use the following animation illustration or the written steps to move the DIMMs from the impaired controller module to the replacement controller m...

Страница 490: ...ule c Make sure that the DIMM ejector tabs on the DIMM socket are in the open position and then insert the DIMM squarely into the socket The DIMMs fit tightly in the socket but should go in easily If not realign the DIMM with the socket and reinsert it d Visually inspect the DIMM to verify that it is evenly aligned and fully inserted into the socket e Repeat these substeps for the remaining DIMMs ...

Страница 491: ...he power supply to the power source b Using the locking latches firmly push the controller module into the chassis until the locking latches begin to rise Do not use excessive force when sliding the controller module into the chassis to avoid damaging the connectors c Fully seat the controller module in the chassis by rotating the locking latches upward tilting them so that they clear the locking ...

Страница 492: ...u apply the commands in the steps on the correct systems The replacement node is the new node that replaced the impaired node as part of this procedure The healthy node is the HA partner of the replacement node Steps 1 If the replacement node is not at the LOADER prompt halt the system to the LOADER prompt 2 On the healthy node check the system time show date The date and time are given in GMT 3 A...

Страница 493: ...at the LOADER prompt reboot the controller system node halt node node_name After you issue the command you should wait until the system stops at the LOADER prompt 2 At the LOADER prompt access the special drivers specifically designed for system level diagnostics to function properly boot_diags 3 Select Scan System from the displayed menu to enable running the diagnostics tests 4 Select Test syste...

Страница 494: ...r your configuration Controller redundancy Then use this procedure HA pair Option 1 Verify the system ID change on an HA system Two node MetroCluster configuration Option 2 Manually reassign the system ID on systems in a two node MetroCluster configuration Option 1 Verify the system ID change on an HA system You must confirm the system ID change when you boot the replacement controller and then ve...

Страница 495: ...t privilege admin 5 Give back the controller a From the healthy controller give back the replaced controller s storage storage failover giveback ofnode replacement_node_name The replacement controller takes back its storage and completes booting If you are prompted to override the system ID due to a system ID mismatch you should enter y If the giveback is vetoed you can consider overriding the vet...

Страница 496: ...onfiguration running ONTAP You must be sure to issue the commands in this procedure on the correct node The impaired node is the node on which you are performing maintenance The replacement node is the new node that replaced the impaired node as part of this procedure The healthy node is the DR partner of the impaired node Steps 1 If you have not already done so reboot the replacement node interru...

Страница 497: ...k reassign s old system ID In the case of the preceding example the command is disk reassign s 118073209 You can respond Y when prompted to continue 5 Verify that the disks or FlexArray LUNs were assigned correctly disk show a Verify that the disks belonging to the replacement node show the new system ID for the replacement node In the following example the disks owned by system 1 now show the new...

Страница 498: ...de show fields configuration state node1_siteA metrocluster node show fields configuration state dr group id cluster node configuration state 1 node1_siteA node1mcc 001 configured 1 node1_siteA node1mcc 002 configured 1 node1_siteB node1mcc 003 configured 1 node1_siteB node1mcc 004 configured 4 entries were displayed 11 Verify the operation of the MetroCluster configuration in Data ONTAP a Check f...

Страница 499: ...ures on the node might put you out of compliance with your license agreement so you should install the replacement license key or keys on the replacement node as soon as possible Before you begin The licenses keys must be in the 28 character format You have a 90 day grace period in which to install the license keys After the grace period all old licenses are invalidated After a valid license key i...

Страница 500: ...ts network interface show is home false If any LIFs are listed as false revert them to their home ports network interface revert 2 Register the system serial number with NetApp Support If AutoSupport is enabled send an AutoSupport message to register the serial number If AutoSupport is not enabled call NetApp Support to register the serial number 3 If automatic giveback was disabled reenable it st...

Страница 501: ...surviving cluster 5 Verify that the switchback operation has completed metrocluster show The switchback operation is still running when a cluster is in the waiting for switchback state cluster_B metrocluster show Cluster Configuration State Mode Local cluster_B configured switchover Remote cluster_A configured waiting for switchback The switchback operation is complete when the clusters are in the...

Страница 502: ...ation Option 1 Most configurations To shut down the impaired controller you must determine the status of the controller and if necessary take over the controller so that the healthy controller continues to serve data from the impaired controller storage About this task If you have a cluster with more than two nodes it must be in quorum If the cluster is not in quorum or a healthy controller shows ...

Страница 503: ...roller shows false for eligibility and health you must correct the issue before shutting down the impaired controller see the Administration overview with the CLI If you have a MetroCluster configuration you must have confirmed that the MetroCluster Configuration State is configured and that the nodes are in an enabled and normal state metrocluster node show Steps 1 If AutoSupport is enabled suppr...

Страница 504: ...the healthy controller Steps 1 Check the MetroCluster status to determine whether the impaired controller has automatically switched over to the healthy controller metrocluster show 2 Depending on whether an automatic switchover has occurred proceed according to the following table If the impaired controller Then Has automatically switched over Proceed to the next step Has not automatically switch...

Страница 505: ...0 mcc1 a2 raid_dp mirrored normal 6 Heal the root aggregates by using the metrocluster heal phase root aggregates command mcc1A metrocluster heal phase root aggregates Job 137 Job succeeded Heal Root Aggregates is successful If the healing is vetoed you have the option of reissuing the metrocluster heal command with the override vetoes parameter If you use this optional parameter the system overri...

Страница 506: ...agement device and then unplug the system cables and SFPs if needed from the controller module keeping track of where the cables were connected Leave the cables in the cable management device so that when you reinstall the cable management device the cables are organized 4 Remove the cable management device from the controller module and set it aside 5 Press down on both of the locking latches and...

Страница 507: ...use the following animation illustration or the written steps to replace a system DIMM The animation and illustration shows empty slots for sockets without DIMMs These empty sockets are populated with blanks Replacing a system DIMM The number and location of DIMMS in your system depends on the model of your system Refer to FRU map on the air duct for more information If you have a FAS8300 system t...

Страница 508: ...t DIMM from the antistatic shipping bag hold the DIMM by the corners and align it to the slot The notch among the pins on the DIMM should line up with the tab in the socket 6 Make sure that the DIMM ejector tabs on the connector are in the open position and then insert the DIMM squarely into the slot The DIMM fits tightly in the slot but should go in easily If not realign the DIMM with the slot an...

Страница 509: ... cable locking collar and then connect the power supply to the power source b Using the locking latches firmly push the controller module into the chassis until the locking latches begin to rise Do not use excessive force when sliding the controller module into the chassis to avoid damaging the connectors c Fully seat the controller module in the chassis by rotating the locking latches upward tilt...

Страница 510: ... drivers specifically designed for system level diagnostics to function properly boot_diags 3 Select Scan System from the displayed menu to enable running the diagnostics tests 4 Select Test Memory from the displayed menu 5 Select an option from the displayed sub menu and run the test 6 Proceed based on the result of the preceding step If the test failed correct the failure and then rerun the test...

Страница 511: ...onfigured enabled heal roots completed cluster_B controller_B_1 configured enabled waiting for switchback recovery 2 entries were displayed 2 Verify that resynchronization is complete on all SVMs metrocluster vserver show 3 Verify that any automatic LIF migrations being performed by the healing operations were completed successfully metrocluster check lif show 4 Perform the switchback by using the...

Страница 512: ...A instructions shipped with the kit Contact technical support at NetApp Support 888 463 8277 North America 00 800 44 638277 Europe or 800 800 80 800 Asia Pacific if you need the RMA number or additional help with the replacement procedure Hot swap a fan module FAS8300 and FAS8700 To swap out a fan module without interrupting service you must perform a specific sequence of tasks You must replace th...

Страница 513: ...ndle and then rotate the cam handle downward The fan module moves a little bit away from the chassis 5 Pull the fan module straight out from the chassis making sure that you support it with your free hand so that it does not swing out of the chassis The fan modules are short Always support the bottom of the fan module with your free hand so that it does not suddenly drop free from the chassis and ...

Страница 514: ...ponent with a replacement FRU component you received from your provider Step 1 Shut down the impaired controller You can shut down or take over the impaired controller using different procedures depending on the storage system hardware configuration Option 1 Most configurations To shut down the impaired controller you must determine the status of the controller and if necessary take over the contr...

Страница 515: ...quorum or a healthy controller shows false for eligibility and health you must correct the issue before shutting down the impaired controller see the Administration overview with the CLI If you have a MetroCluster configuration you must have confirmed that the MetroCluster Configuration State is configured and that the nodes are in an enabled and normal state metrocluster node show Steps 1 If Auto...

Страница 516: ...the healthy controller Steps 1 Check the MetroCluster status to determine whether the impaired controller has automatically switched over to the healthy controller metrocluster show 2 Depending on whether an automatic switchover has occurred proceed according to the following table If the impaired controller Then Has automatically switched over Proceed to the next step Has not automatically switch...

Страница 517: ...0 mcc1 a2 raid_dp mirrored normal 6 Heal the root aggregates by using the metrocluster heal phase root aggregates command mcc1A metrocluster heal phase root aggregates Job 137 Job succeeded Heal Root Aggregates is successful If the healing is vetoed you have the option of reissuing the metrocluster heal command with the override vetoes parameter If you use this optional parameter the system overri...

Страница 518: ...nt device and then unplug the system cables and SFPs if needed from the controller module keeping track of where the cables were connected Leave the cables in the cable management device so that when you reinstall the cable management device the cables are organized 4 Remove the cable management device from the controller module and set it aside 5 Press down on both of the locking latches and then...

Страница 519: ...ough the contents of the NVDIMM is encrypted it is a best practice to erase the contents of the NVDIMM before replacing it For more information see the Statement of Volatility on the NetApp Support Site You must log into the NetApp Support Site to display the Statement of Volatility for your system You can use the following animation illustration or the written steps to replace the NVDIMM The anim...

Страница 520: ...MM ejector tabs on either side of the NVDIMM and then slide the NVDIMM out of the socket and set it aside Carefully hold the NVDIMM by the edges to avoid pressure on the components on the NVDIMM circuit board 3 Remove the replacement NVDIMM from the antistatic shipping bag hold the NVDIMM by the corners and then align it to the slot The notch among the pins on the NVDIMM should line up with the ta...

Страница 521: ...u have replaced the component in the controller module you must reinstall the controller module into the chassis and then boot it to Maintenance mode You can use the following animation illustration or the written steps to install the controller module in the chassis Installing the controller module Steps 1 If you have not already done so close the air duct 2 Align the end of the controller module...

Страница 522: ...terrupt the normal boot process and boot to LOADER by pressing Ctrl C If your system stops at the boot menu select the option to boot to LOADER f At the LOADER prompt enter bye to reinitialize the PCIe cards and other components g Interrupt the boot process and boot to the LOADER prompt by pressing Ctrl C If your system stops at the boot menu select the option to boot to LOADER Step 5 Run diagnost...

Страница 523: ...c cables 2 Return the controller to normal operation by giving back its storage storage failover giveback ofnode impaired_node_name 3 If automatic giveback was disabled reenable it storage failover modify node local auto giveback true Step 7 Switch back aggregates in a two node MetroCluster configuration After you have completed the FRU replacement in a two node MetroCluster configuration you can ...

Страница 524: ...surviving cluster 5 Verify that the switchback operation has completed metrocluster show The switchback operation is still running when a cluster is in the waiting for switchback state cluster_B metrocluster show Cluster Configuration State Mode Local cluster_B configured switchover Remote cluster_A configured waiting for switchback The switchback operation is complete when the clusters are in the...

Страница 525: ... status of the controller and if necessary take over the controller so that the healthy controller continues to serve data from the impaired controller storage About this task If you have a cluster with more than two nodes it must be in quorum If the cluster is not in quorum or a healthy controller shows false for eligibility and health you must correct the issue before shutting down the impaired ...

Страница 526: ...you have a MetroCluster configuration you must have confirmed that the MetroCluster Configuration State is configured and that the nodes are in an enabled and normal state metrocluster node show Steps 1 If AutoSupport is enabled suppress automatic case creation by invoking an AutoSupport message system node autosupport invoke node type all message MAINT number_of_hours_downh The following AutoSupp...

Страница 527: ...lowing table If the impaired controller Then Has automatically switched over Proceed to the next step Has not automatically switched over Perform a planned switchover operation from the healthy controller metrocluster switchover Has not automatically switched over you attempted switchover with the metrocluster switchover command and the switchover was vetoed Review the veto messages and if possibl...

Страница 528: ...eded Heal Root Aggregates is successful If the healing is vetoed you have the option of reissuing the metrocluster heal command with the override vetoes parameter If you use this optional parameter the system overrides any soft vetoes that prevent the healing operation 7 Verify that the heal operation is complete by using the metrocluster operation show command on the destination cluster mcc1A met...

Страница 529: ... management device so that when you reinstall the cable management device the cables are organized 4 Remove the cable management device from the controller module and set it aside 5 Press down on both of the locking latches and then rotate both latches downward at the same time The controller module moves slightly out of the chassis 6 Slide the controller module out of the chassis Make sure that y...

Страница 530: ... b Slide the air duct toward the back of the controller module and then rotate it upward to its completely open position 2 Locate the NVDIMM battery in the controller module 3 Locate the battery plug and squeeze the clip on the face of the battery plug to release the plug from the socket and then unplug the battery cable from the socket 4 Grasp the battery and press the blue locking tab marked PUS...

Страница 531: ...ntroller module with the opening in the chassis and then gently push the controller module halfway into the system Do not completely insert the controller module in the chassis until instructed to do so 3 Cable the management and console ports only so that you can access the system to perform the tasks in the following sections You will connect the rest of the cables to the controller module later...

Страница 532: ...ave replaced a component in your system you should run diagnostic tests on that component Your system must be at the LOADER prompt to start diagnostics All commands in the diagnostic procedures are issued from the controller where the component is being replaced Steps 1 If the controller to be serviced is not at the LOADER prompt reboot the controller system node halt node node_name After you issu...

Страница 533: ... serving data from the local disk pools This task only applies to two node MetroCluster configurations Steps 1 Verify that all nodes are in the enabled state metrocluster node show cluster_B metrocluster node show DR Configuration DR Group Cluster Node State Mirroring Mode 1 cluster_A controller_A_1 configured enabled heal roots completed cluster_B controller_B_1 configured enabled waiting for swi...

Страница 534: ... 463 8277 North America 00 800 44 638277 Europe or 800 800 80 800 Asia Pacific if you need the RMA number or additional help with the replacement procedure Replace a PCIe or mezzanine card FAS8300 and FAS8700 To replace a PCIe or mezzanine card you must disconnect the cables and any SFP and QSFP modules from the cards replace the failed PCIe or mezzanine card and then recable the cards You can use...

Страница 535: ...sword Take over or halt the impaired controller from the healthy controller storage failover takeover ofnode impaired_node_name When the impaired controller shows Waiting for giveback press Ctrl C and then respond y Option 2 Controller is in a MetroCluster Do not use this procedure if your system is in a two node MetroCluster configuration To shut down the impaired controller you must determine th...

Страница 536: ...wn the impaired controller you must determine the status of the controller and if necessary switch over the controller so that the healthy controller continues to serve data from the impaired controller storage About this task If you are using NetApp Storage Encryption you must have reset the MSID using the instructions in the Return a FIPS drive or SED to unprotected mode section of NetApp Encryp...

Страница 537: ...he override vetoes parameter If you use this optional parameter the system overrides any soft vetoes that prevent the healing operation 4 Verify that the operation has been completed by using the metrocluster operation show command controller_A_1 metrocluster operation show Operation heal aggregates State successful Start Time 7 25 2016 18 45 55 End Time 7 25 2016 18 45 56 Errors 5 Check the state...

Страница 538: ...ocluster operation show Operation heal root aggregates State successful Start Time 7 29 2016 20 54 41 End Time 7 29 2016 20 54 42 Errors 8 On the impaired controller module disconnect the power supplies Step 2 Remove the controller module To access components inside the controller module you must remove the controller module from the chassis You can use the following animation illustration or the ...

Страница 539: ...e 5 Press down on both of the locking latches and then rotate both latches downward at the same time The controller module moves slightly out of the chassis 6 Slide the controller module out of the chassis Make sure that you support the bottom of the controller module as you slide it out of the chassis 7 Place the controller module on a stable flat surface Step 3 Replace a PCIe card To replace a P...

Страница 540: ...d with the socket press the card into the socket and then close the side panel on the riser if present Be sure that you properly align the card in the slot and exert even pressure on the card when seating it in the socket The PCIe card must be fully and evenly seated in the slot If you are installing a card in the bottom slot and cannot see the card socket well remove the top card so that you can ...

Страница 541: ...ises up slightly from the controller module d Lift the riser up and then set it aside on a stable flat surface 2 Replace the mezzanine card a Remove any QSFP or SFP modules from the card b Loosen the thumbscrews on the mezzanine card and gently lift the card directly out of the socket and set it aside c Align the replacement mezzanine card over the socket and the guide pins and gently push the car...

Страница 542: ... of the controller module with the opening in the chassis and then gently push the controller module halfway into the system Do not completely insert the controller module in the chassis until instructed to do so 3 Recable the system as needed If you removed the media converters QSFPs or SFPs remember to reinstall them if you are using fiber optic cables 4 Complete the installation of the controll...

Страница 543: ...ER f At the LOADER prompt enter bye to reinitialize the PCIe cards and other components and let the controller reboot 5 Return the controller to normal operation by giving back its storage storage failover giveback ofnode impaired_node_name 6 If automatic giveback was disabled reenable it storage failover modify node local auto giveback true Step 6 Switch back aggregates in a two node MetroCluster...

Страница 544: ...surviving cluster 5 Verify that the switchback operation has completed metrocluster show The switchback operation is still running when a cluster is in the waiting for switchback state cluster_B metrocluster show Cluster Configuration State Mode Local cluster_B configured switchover Remote cluster_A configured waiting for switchback The switchback operation is complete when the clusters are in the...

Страница 545: ...chnical support at NetApp Support 888 463 8277 North America 00 800 44 638277 Europe or 800 800 80 800 Asia Pacific if you need the RMA number or additional help with the replacement procedure Replace a power supply FAS8300 and FAS8700 Replacing a power supply PSU involves disconnecting the target PSU from the power source unplugging the power cable removing the old PSU and installing the replacem...

Страница 546: ...wer supply from the chassis c Using both hands pull the power supply out of the chassis and then set it aside 5 Using both hands support and align the edges of the power supply with the opening in the controller module and then gently push the power supply into the controller module until the locking tab clicks into place The power supplies will only properly engage with the internal connector and...

Страница 547: ...system hardware configuration Option 1 Most configurations To shut down the impaired controller you must determine the status of the controller and if necessary take over the controller so that the healthy controller continues to serve data from the impaired controller storage About this task If you have a cluster with more than two nodes it must be in quorum If the cluster is not in quorum or a h...

Страница 548: ...you have a MetroCluster configuration you must have confirmed that the MetroCluster Configuration State is configured and that the nodes are in an enabled and normal state metrocluster node show Steps 1 If AutoSupport is enabled suppress automatic case creation by invoking an AutoSupport message system node autosupport invoke node type all message MAINT number_of_hours_downh The following AutoSupp...

Страница 549: ...lowing table If the impaired controller Then Has automatically switched over Proceed to the next step Has not automatically switched over Perform a planned switchover operation from the healthy controller metrocluster switchover Has not automatically switched over you attempted switchover with the metrocluster switchover command and the switchover was vetoed Review the veto messages and if possibl...

Страница 550: ...eded Heal Root Aggregates is successful If the healing is vetoed you have the option of reissuing the metrocluster heal command with the override vetoes parameter If you use this optional parameter the system overrides any soft vetoes that prevent the healing operation 7 Verify that the heal operation is complete by using the metrocluster operation show command on the destination cluster mcc1A met...

Страница 551: ... management device so that when you reinstall the cable management device the cables are organized 4 Remove the cable management device from the controller module and set it aside 5 Press down on both of the locking latches and then rotate both latches downward at the same time The controller module moves slightly out of the chassis 6 Slide the controller module out of the chassis Make sure that y...

Страница 552: ...d the back of the controller module and then rotate it upward to its completely open position 3 Locate remove and then replace the RTC battery a Using the FRU map locate the RTC battery on the controller module b Gently push the battery away from the holder rotate it away from the holder and then lift it out of the holder Note the polarity of the battery as you remove it from the holder The batter...

Страница 553: ...oller and then boot it You can use the following animation illustration or the written steps to install the controller module in the chassis Installing the controller module Steps 1 If you have not already done so close the air duct or controller module cover 2 Align the end of the controller module with the opening in the chassis and then gently push the controller module halfway into the system ...

Страница 554: ...er with the show date command b At the LOADER prompt on the target controller check the time and date c If necessary modify the date with the set date mm dd yyyy command d If necessary set the time in GMT using the set time hh mm ss command e Confirm the date and time on the target controller 7 At the LOADER prompt enter bye to reinitialize the PCIe cards and other components and let the controlle...

Страница 555: ...surviving cluster 5 Verify that the switchback operation has completed metrocluster show The switchback operation is still running when a cluster is in the waiting for switchback state cluster_B metrocluster show Cluster Configuration State Mode Local cluster_B configured switchover Remote cluster_A configured waiting for switchback The switchback operation is complete when the clusters are in the...

Страница 556: ...deo steps Video step by step instructions Detailed steps Online step by step instructions with live links to additional content For MetroCluster configurations see either Install MetroCluster IP configuration Install MetroCluster Fabric Attached configuration Quick steps AFF A700 and FAS9000 This guide gives graphic instructions for a typical installation of your system from racking and cabling th...

Страница 557: ...pe of cables for your system and collect specific network information Before you begin You need to have access to the Hardware Universe for information about site requirements as well as additional information on your configured system You might also want to have access to the Release Notes for your version of ONTAP for more information about this system NetApp Hardware Universe Find the Release N...

Страница 558: ...network cables order dependent X6553 R6 112 00188 2m X6536 R6 112 00090 5m FC host network Cat 6 RJ 45 order dependent Part numbers X6585 R6 112 00291 3m X6562 R6 112 00196 5m Management network and Ethernet data Storage X66031A 112 00436 1m X66032A 112 00437 2m X66033A 112 00438 3m Storage Micro USB console cable Not applicable Console connection during software setup on non Windows or Mac laptop...

Страница 559: ...ontrollers to your network You can cable the controllers to your network by using the two node switchless cluster method or by using the cluster interconnect network Option 1 Two node switchless cluster Management network data network and management ports on the controllers are connected to switches The cluster interconnect ports are cabled on both controllers You must have contacted your network ...

Страница 560: ... drive shelves for drive shelf cabling instructions Option 2 Switched cluster Management network data network and management ports on the controllers are connected to switches The cluster interconnect and HA ports are cabled on to the cluster HA switch You must have contacted your network administrator for information about connecting the system to the switches Be sure to check the direction of th...

Страница 561: ...cabling instructions Step 4 Cable controllers to drive shelves You can cable your new system to DS212C DS224C or NS224 shelves depending on if it is an AFF or FAS system Option 1 Cable the controllers to DS212C or DS224C drive shelves You must cable the shelf to shelf connections and then cable both controllers to the DS212C or DS224C drive shelves The cables are inserted into the drive shelf with...

Страница 562: ...cable your drive shelves to your controllers The examples use DS224C shelves Cabling is similar with other supported SAS drive shelves Cabling SAS shelves in FAS9000 AFF A700 and ASA AFF A700 ONTAP 9 7 and earlier Cabling SAS storage ONTAP 9 7 and earlier 560 ...

Страница 563: ... Cabling SAS shelves in FAS9000 AFF A700 and ASA AFF A700 ONTAP 9 8 and later Cabling SAS storage ONTAP 9 8 and later 561 ...

Страница 564: ...If you have more than one drive shelf stack see the Installation and Cabling Guide for your drive shelf type Install and cable shelves for a new system installation shelves with IOM12 modules 562 ...

Страница 565: ...ers to a single NS224 drive shelf in AFF A700 and ASA AFF A700 systems running ONTAP 9 8 and later only You must cable each controller to the NSM modules on the NS224 drive shelf on an AFF A700 or ASA AFF A700 running system ONTAP 9 8 or later This task applies to AFF A700 and ASA AFF A700 running ONTAP 9 8 or later only 563 ...

Страница 566: ... storage modules are up while the pull tabs on the shelves are down As you insert the connector you should feel it click into place if you do not feel it click remove it turn it around and try again Steps 1 Use the following animation or illustrations to cable your controllers with two X91148A storage modules to a single NS224 drive shelf or use the diagram to cable your controllers with one X9114...

Страница 567: ... the NSM modules on the NS224 drive shelves on an AFF A700 or ASA AFF A700 running system ONTAP 9 8 or later This task applies to AFF A700 and ASA AFF A700 running ONTAP 9 8 or later only The systems must have two X91148A modules per controller installed in slots 3 and 7 Be sure to check the illustration arrow for the proper cable connector pull tab orientation The cable pull tab for the storage m...

Страница 568: ...l it click into place if you do not feel it click remove it turn it around and try again Steps 1 Use the following animation or illustrations to cable your controllers to two NS224 drive shelves Cabling two NS224 shelves ONTAP 9 8 and later 566 ...

Страница 569: ...sing cluster discovery with only a connection to the switch and laptop or by connecting directly to a controller in the system and then connecting to the management switch Option 1 Completing system setup and configuration if network discovery is enabled If you have network discovery enabled on your laptop you can complete system setup and configuration using automatic cluster discovery Steps 567 ...

Страница 570: ...trollers Initial booting may take up to eight minutes 4 Make sure that your laptop has network discovery enabled See your laptop s online help for more information 5 Use the following animation to connect your laptop to the Management switch Connecting your laptop to the Management switch 6 Select an ONTAP icon listed to discover a Open File Explorer b Click network in the left pane c Right click ...

Страница 571: ...NTAP Option 2 Completing system setup and configuration if network discovery is not enabled If network discovery is not enabled on your laptop you must complete the configuration and setup using this task Steps 1 Cable and configure your laptop or console a Set the console port on the laptop or console to 115 200 baud with N 8 1 See your laptop or console s online help for how to configure the con...

Страница 572: ...d a Open a console session using PuTTY a terminal server or the equivalent for your environment Check your laptop or console s online help if you do not know how to configure PuTTY b Enter the management IP address when prompted by the script 6 Using System Manager on your laptop or console configure your cluster a Point your browser to the node management IP address The format for the address is ...

Страница 573: ...connection to restore the var file system but the process requires two reboots You must replace the failed component with a replacement FRU component you received from your provider It is important that you apply the commands in these steps on the correct node The impaired node is the node on which you are performing maintenance The healthy node is the HA partner of the impaired node Check onboard...

Страница 574: ...lse Option 1 Check NVE or NSE on systems running ONTAP 9 5 and earlier Before shutting down the impaired controller you need to check whether the system has either NetApp Volume Encryption NVE or NetApp Storage Encryption NSE enabled If so you need to verify the configuration Steps 1 Connect the console cable to the impaired controller 2 Check whether NVE is configured for any volumes in the clust...

Страница 575: ...nformation security key manager backup show Copy the contents of the backup information to a separate file or your log file You ll need it in disaster scenarios where you might need to manually recover OKM Return to admin mode set priv admin Shut down the impaired controller b If the Restored column displays anything other than yes Run the key manager setup wizard security key manager setup node t...

Страница 576: ...sage This command is not supported when onboard key management is enabled display the keys stored in the onboard key manager security key manager key show detail a If the Restored column displays yes manually back up the onboard key management information Go to advanced privilege mode and enter y when prompted to continue set priv advanced Enter the command to display the OKM backup information se...

Страница 577: ...eed to verify the NSE configuration and in use If no disks are shown NSE is not configured If NVE and NSE are not configured no drives are protected with NSE keys it s safe to shut down the impaired controller Verify NVE configuration 1 Display the key IDs of the authentication keys that are stored on the key management servers security key manager key query After the ONTAP 9 6 release you may hav...

Страница 578: ...other than yes a Enter the onboard security key manager sync command security key manager onboard sync Enter the customer s onboard key management passphrase at the prompt If the passphrase cannot be provided contact NetApp Support mysupport netapp com b Verify the Restored column shows yes for all authentication keys security key manager key query c Verify that the Key Manager type shows onboard ...

Страница 579: ...display the key management information security key manager onboard show backup c Copy the contents of the backup information to a separate file or your log file You ll need it in disaster scenarios where you might need to manually recover OKM d Return to admin mode set priv admin e You can safely shut down the controller 2 If the Key Manager type displays external and the Restored column displays...

Страница 580: ... LOADER prompt Go to Remove controller module Waiting for giveback Press Ctrl C and then respond y when prompted System prompt or password prompt enter system password Take over or halt the impaired controller from the healthy controller storage failover takeover ofnode impaired_node_name When the impaired controller shows Waiting for giveback press Ctrl C and then respond y 1 From the LOADER prom...

Страница 581: ...oller module Waiting for giveback Press Ctrl C and then respond y when prompted System prompt or password prompt enter system password Take over or halt the impaired controller from the healthy controller storage failover takeover ofnode impaired_node_name When the impaired controller shows Waiting for giveback press Ctrl C and then respond y Option 3 Controller is in a two node MetroCluster After...

Страница 582: ...mpt or password prompt enter system password Take over or halt the impaired controller from the healthy controller storage failover takeover ofnode impaired_node_name When the impaired controller shows Waiting for giveback press Ctrl C and then respond y Replace the boot media AFF A700 and FAS9000 To replace the boot media you must remove the impaired controller module install the replacement boot...

Страница 583: ...roller module out of the chassis Make sure that you support the bottom of the controller module as you slide it out of the chassis 5 Place the controller module lid side up on a stable flat surface press the blue button on the cover slide the cover to the back of the controller module and then swing the cover up and lift it off of the controller module 581 ...

Страница 584: ...Controller module cover locking button Step 2 Replace the boot media Locate the boot media using the following illustration or the FRU map on the controller module 1 2 582 ...

Страница 585: ...ocedure You must have a USB flash drive formatted to FAT32 with at least 4GB capacity A copy of the same image version of ONTAP as what the impaired controller was running You can download the appropriate image from the Downloads section on the NetApp Support Site If NVE is enabled download the image with NetApp Volume Encryption as indicated in the download button If NVE is not enabled download t...

Страница 586: ...that is connected to the HA partner gateway is the gateway for the network dns_addr is the IP address of a name server on your network dns_domain is the Domain Name System DNS domain name If you use this optional parameter you do not need a fully qualified domain name in the netboot server URL You need only the server s host name Other parameters might be necessary for your interface You can enter...

Страница 587: ...y when prompted to restore the backup configuration b Set the healthy node to advanced privilege level set privilege advanced c Run the restore backup command system node restore backup node local target address impaired_node_IP_address d Return the node to admin level set privilege admin e Press y when prompted to use the restored configuration f Press y when prompted to reboot the node No networ...

Страница 588: ...ession state is changed to Connected for the target iSCSI target type dr_auxiliary address ip address date and time node name iscsi session stateChanged notice iSCSI session state is changed to Connected for the target iSCSI target type dr_partner address ip address d Select the Update flash from backup config sync flash option from the displayed menu If you are prompted to continue with the updat...

Страница 589: ...ailover modify node local auto giveback true command Option 2 Boot the recovery image in a two node MetroCluster configuration You must boot the ONTAP image from the USB drive and verify the environmental variables This procedure applies to systems in a two node MetroCluster configuration Steps 1 From the LOADER prompt boot the recovery image from the USB flash drive boot_recovery The image is dow...

Страница 590: ...ly applies to two node MetroCluster configurations Steps 1 Verify that all nodes are in the enabled state metrocluster node show cluster_B metrocluster node show DR Configuration DR Group Cluster Node State Mirroring Mode 1 cluster_A controller_A_1 configured enabled heal roots completed cluster_B controller_B_1 configured enabled waiting for switchback recovery 2 entries were displayed 2 Verify t...

Страница 591: ...fic to systems that have Onboard Key Manager OKM NetApp Storage Encryption NSE or NetApp Volume Encryption NVE enabled Determine which section you should use to restore your OKM NSE or NVE configurations If NSE or NVE are enabled along with Onboard Key Manager you must restore settings you captured at the beginning of this procedure If NSE or NVE are enabled and Onboard Key Manager is enabled go t...

Страница 592: ...w or security key manager onboard show backup command Example of backup data BEGIN BACKUP TmV0QXBwIEtleSBCbG9iAAEAAAAEAAAAcAEAAAAAAADuD byAAAAACEAAAAAAAAA QAAAAAAAAABvOlH0AAAAAMh7qDLRyH1DBz12piVdy9ATSFMT0C0TlYFss4PDjTaV dzRYkLd1PhQLxAWJwOIyqSr8qY1SEBgm1IWgE5DLRqkiAAAAAAAAACgAAAAAAAAA 3WTh7gAAAAAAAAAAAAAAAAIAAAAAAAgAZJEIWvdeHr5RCAvHGclo wAAAAAAAAAA IgAAAAAAAAAoAAAAAAAAAEOTcR0AAAAAAAAAAAAAAAACAAAAAA...

Страница 593: ...running ONTAP 9 5 and earlier run the key manager setup wizard a Start the wizard using the security key manager setup nodenodename command and then enter the passphrase for onboard key management when prompted b Enter the key manager key show detail command to see a detailed view of all keys stored in the onboard key manager and verify that the Restored column yes for all authentication keys If t...

Страница 594: ...troller is ready for giveback with the storage failover show command 4 Move the console cable to the partner controller and give back the target controller storage using the storage failover giveback fromnode local only cfo aggregates true local command If the command fails because of a failed disk physically disengage the failed disk but leave the disk in the slot until a replacement is received ...

Страница 595: ...ity key manager query again to ensure that the Restored column yes and all key managers report in an available state 11 If the Onboard Key Management is enabled a Use the security key manager key show detail to see a detailed view of all keys stored in the onboard key manager b Use the security key manager key show detail command and verify that the Restored column yes for all authentication keys ...

Страница 596: ...3 minutes and check the failover status with the storage failover show command 6 At the clustershell prompt enter the net int show is home false command to list the logical interfaces that are not on their home controller and port If any interfaces are listed as false revert those interfaces back to their home port using the net int revert command 7 Move the console cable to the target controller ...

Страница 597: ...gone offline failure to do so results in performance degradation If AutoSupport is not enabled you can locate the failed caching module by the fault LED on the front of the module You can also add or replace the 1TB X9170A core dump module which is required if you are installing NS224 drive shelves in an AFF A700 system Before you begin You must replace the failed component with a replacement FRU ...

Страница 598: ...sword Take over or halt the impaired controller from the healthy controller storage failover takeover ofnode impaired_node_name When the impaired controller shows Waiting for giveback press Ctrl C and then respond y Option 2 Controller is in a MetroCluster Do not use this procedure if your system is in a two node MetroCluster configuration To shut down the impaired controller you must determine th...

Страница 599: ...wn the impaired controller you must determine the status of the controller and if necessary switch over the controller so that the healthy controller continues to serve data from the impaired controller storage About this task If you are using NetApp Storage Encryption you must have reset the MSID using the instructions in the Return a FIPS drive or SED to unprotected mode section of NetApp Encryp...

Страница 600: ...he override vetoes parameter If you use this optional parameter the system overrides any soft vetoes that prevent the healing operation 4 Verify that the operation has been completed by using the metrocluster operation show command controller_A_1 metrocluster operation show Operation heal aggregates State successful Start Time 7 25 2016 18 45 55 End Time 7 25 2016 18 45 56 Errors 5 Check the state...

Страница 601: ...locate it on the rear of the system on slot 6 and then follow the specific sequence of steps to replace it Before you begin Your storage system must meet certain criteria depending on your situation It must have the appropriate operating system for the caching module you are installing It must support the caching capacity The target node must be at the LOADER prompt before adding or replacing the ...

Страница 602: ...am handle straight toward you to remove the caching module from the NVRAM10 module Be sure to support the caching module as you remove it from the NVRAM10 module 4 Install the caching module a Align the edges of the caching module with the opening in the NVRAM10 module b Gently push the caching module into the bay until the cam handle engages c Rotate the cam handle until it locks into place Step ...

Страница 603: ...t before adding or replacing the code dump module You must have received two X9170 core dump modules one for each controller All other components in the storage system must be functioning properly if not you must contact technical support Steps 1 If you are not already grounded properly ground yourself 2 If you are replacing a failed core dump module locate and remove it Orange release button Core...

Страница 604: ...NVRAM10 module c Gently push the core dump module into the bay until the cam handle engages d Rotate the cam handle until it locks into place Step 4 Reboot the controller after FRU replacement After you replace the FRU you must reboot the controller module Step 1 To boot ONTAP from the LOADER prompt enter bye Step 5 Switch back aggregates in a two node MetroCluster configuration After you have com...

Страница 605: ...surviving cluster 5 Verify that the switchback operation has completed metrocluster show The switchback operation is still running when a cluster is in the waiting for switchback state cluster_B metrocluster show Cluster Configuration State Mode Local cluster_B configured switchover Remote cluster_A configured waiting for switchback The switchback operation is complete when the clusters are in the...

Страница 606: ... for the caching module you are installing It must support the caching capacity The replacement caching module must have the same capacity as the failed caching module but can be from a different supported vendor All other components in the storage system must be functioning properly if not you must contact technical support Steps 1 If you are not already grounded properly ground yourself 2 Locate...

Страница 607: ...e system node run local sysconfig av 6 ii In admin privilege level prepare the target NVMe slot for removal responding y when prompted whether to continue system controller slot module remove node node_name slot slot_number The following command prepares slot 6 2 on node1 for removal and displays a message that it is safe to remove system controller slot module remove node node1 slot 6 2 Warning S...

Страница 608: ...m handle straight toward you to remove the caching module from the NVRAM10 module Be sure to support the caching module as you remove it from the NVRAM10 module 5 Install the caching module a Align the edges of the caching module with the opening in the NVRAM10 module b Gently push the caching module into the bay until the cam handle engages c Rotate the cam handle until it locks into place 6 Brin...

Страница 609: ...etApp Support 888 463 8277 North America 00 800 44 638277 Europe or 800 800 80 800 Asia Pacific if you need the RMA number or additional help with the replacement procedure Chassis Overview of chassis replacement AFF A700 and FAS9000 All other components in the system must be functioning properly if not you must contact technical support You can use this procedure with all versions of ONTAP suppor...

Страница 610: ...healthy nodes do not participate in quorum voting If the controller goes out of service and one more controller goes out of service there will be a data serving failure for the entire cluster This will cause a client disruption Use cluster show to verify cluster state If possible bring other nodes online to improve the resiliency of this cluster Do you want to continue y n You must perform a clean...

Страница 611: ...ched over Proceed to the next step Has not automatically switched over Perform a planned switchover operation from the healthy controller metrocluster switchover Has not automatically switched over you attempted switchover with the metrocluster switchover command and the switchover was vetoed Review the veto messages and if possible resolve the issue and try again If you are unable to resolve the ...

Страница 612: ... Verify that the heal operation is complete by using the metrocluster operation show command on the destination cluster mcc1A metrocluster operation show Operation heal root aggregates State successful Start Time 7 29 2016 20 54 41 End Time 7 29 2016 20 54 42 Errors 8 On the impaired controller module disconnect the power supplies Move and replace hardware AFF A700 and FAS9000 Move the fans hard d...

Страница 613: ...s use two hands to support its weight Locking button 4 Repeat the preceding steps for any remaining power supplies Step 2 Remove the fans To remove the fan modules when replacing the chassis you must perform a specific sequence of tasks Steps 1 Remove the bezel if necessary with two hands by grasping the openings on each side of the bezel and then pulling it toward you until the bezel releases fro...

Страница 614: ...e fan module aside 4 Repeat the preceding steps for any remaining fan modules Step 3 Remove the controller module To replace the chassis you must remove the controller module or modules from the old chassis Steps 1 Unplug the cables from the impaired controller module and keep track of where the cables were connected 2 Slide the orange button on the cam handle downward until it unlocks 612 ...

Страница 615: ...he controller module as you slide it out of the chassis 4 Set the controller module aside in a safe place and repeat these steps if you have another controller module in the chassis Step 4 Remove the I O modules Steps To remove I O modules from the old chassis including the NVRAM modules follow the specific sequence of steps You do not have to remove the FlashCache module from the NVRAM module whe...

Страница 616: ... cam latch down until it is in a horizontal position The I O module disengages from the chassis and moves about 1 2 inch out of the I O slot c Remove the I O module from the chassis by pulling on the pull tabs on the sides of the module face Make sure that you keep track of which slot the I O module was in Lettered and numbered I O cam latch I O cam latch completely unlocked 3 Set the I O module a...

Страница 617: ...et Steps You must remove the existing chassis from the equipment rack or system cabinet before you can install the replacement chassis 1 Remove the screws from the chassis mount points If the system is in a system cabinet you might need to remove the rear tie down bracket 2 With the help of two or three people slide the old chassis off the rack rails in a system cabinet or L brackets in an equipme...

Страница 618: ... push the module all the way into the chassis until it clicks into place Step 8 Install the de stage controller power module when replacing the chassis Steps Once the replacement chassis is installed into the rack or system cabinet you must reinstall the de stage controller power modules into it 1 Align the end of the DCPM module with the chassis opening and then gently slide it into the chassis u...

Страница 619: ...ssis and connecting to the power source 1 Using both hands support and align the edges of the power supply with the opening in the system chassis and then gently push the power supply into the chassis until it locks into place The power supplies are keyed and can only be installed one way Do not use excessive force when sliding the power supply into the system You can damage the connector 2 Reconn...

Страница 620: ...r modules boot to ONTAP enter halt and then at the LOADER prompt enter boot_ontap press Ctrl C when prompted and then repeat this step b From the boot menu select the option for Maintenance mode Complete the restoration and replacement process AFF A700 and FAS9000 You must verify the HA state of the chassis run diagnostics and return the failed part to NetApp as described in the RMA instructions s...

Страница 621: ...if you are in an HA configuration Both controllers must be in Maintenance mode to run the interconnect test 3 At the LOADER prompt access the special drivers specifically designed for system level diagnostics to function properly boot_diags During the boot process you can safely respond y to the prompts until the Maintenance mode prompt appears 4 Enable the interconnect diagnostics tests from the ...

Страница 622: ...e following command on both controllers at the LOADER prompt bye e Return the node to normal operation With two nodes in the cluster Issue these commands node cluster ha modify configured true node storage failover modify node node0 enabled true With more than two nodes in the cluster Issue this command node storage failover modify node node0 enabled true In a two node MetroCluster configuration P...

Страница 623: ...tion you can perform the MetroCluster switchback operation This returns the configuration to its normal operating state with the sync source storage virtual machines SVMs on the formerly impaired site now active and serving data from the local disk pools This task only applies to two node MetroCluster configurations Steps 1 Verify that all nodes are in the enabled state metrocluster node show clus...

Страница 624: ...d part to NetApp After you replace the part you can return the failed part to NetApp as described in the RMA instructions shipped with the kit Contact technical support at NetApp Support 888 463 8277 North America 00 800 44 638277 Europe or 800 800 80 800 Asia Pacific if you need the RMA number or additional help with the replacement procedure Controller module Overview of controller module replac...

Страница 625: ...the node s console output to a text file This provides you a record of the procedure so that you can troubleshoot any issues that you might encounter during the replacement process Shut down the impaired controller Shut down or take over the impaired controller using the appropriate procedure for your configuration Option 1 Most systems To shut down the impaired controller you must determine the s...

Страница 626: ...quorum or a healthy controller shows false for eligibility and health you must correct the issue before shutting down the impaired controller see the Administration overview with the CLI If you have a MetroCluster configuration you must have confirmed that the MetroCluster Configuration State is configured and that the nodes are in an enabled and normal state metrocluster node show Steps 1 If Auto...

Страница 627: ...the healthy controller Steps 1 Check the MetroCluster status to determine whether the impaired controller has automatically switched over to the healthy controller metrocluster show 2 Depending on whether an automatic switchover has occurred proceed according to the following table If the impaired controller Then Has automatically switched over Proceed to the next step Has not automatically switch...

Страница 628: ...0 mcc1 a2 raid_dp mirrored normal 6 Heal the root aggregates by using the metrocluster heal phase root aggregates command mcc1A metrocluster heal phase root aggregates Job 137 Job succeeded Heal Root Aggregates is successful If the healing is vetoed you have the option of reissuing the metrocluster heal command with the override vetoes parameter If you use this optional parameter the system overri...

Страница 629: ...the system to Maintenance mode Step 1 Remove the controller module To access components inside the controller you must first remove the controller module from the system and then remove the cover on the controller module Steps 1 If you are not already grounded properly ground yourself 2 Unplug the cables from the impaired controller module and keep track of where the cables were connected 3 Slide ...

Страница 630: ... the chassis Make sure that you support the bottom of the controller module as you slide it out of the chassis 2 Place the controller module lid side up on a stable flat surface press the blue button on the cover slide the cover to the back of the controller module and then swing the cover up and lift it off of the controller module Controller module cover locking button 628 ...

Страница 631: ...ress the blue button on the boot media housing to release the boot media from its housing and then gently pull it straight out of the boot media socket Do not twist or pull the boot media straight up because this could damage the socket or the boot media 3 Move the boot media to the new controller module align the edges of the boot media with the socket housing and then gently push it into the soc...

Страница 632: ...ded properly ground yourself 2 Locate the DIMMs on your controller module 3 Note the orientation of the DIMM in the socket so that you can insert the DIMM in the replacement controller module in the proper orientation 4 Eject the DIMM from its slot by slowly pushing apart the two DIMM ejector tabs on either side of the DIMM and then slide the DIMM out of the slot Carefully hold the DIMM by the edg...

Страница 633: ...boot the operating system For HA pairs with two controller modules in the same chassis the sequence in which you install the controller module is especially important because it attempts to reboot as soon as you completely seat it in the chassis The system might update system firmware when it boots Do not abort this process The procedure requires you to interrupt the boot process which you can typ...

Страница 634: ...reconfigure system settings as necessary Step 1 Set and verify system time after replacing the controller You should check the time and date on the replacement controller module against the healthy controller module in an HA pair or against a reliable time server in a stand alone configuration If the time and date do not match you must reset them on the replacement controller module to prevent pos...

Страница 635: ...e where the component is being replaced Steps 1 If the node to be serviced is not at the LOADER prompt reboot the node halt After you issue the command you should wait until the system stops at the LOADER prompt 2 At the LOADER prompt access the special drivers specifically designed for system level diagnostics to function properly boot_diags During the boot process you can safely respond y to the...

Страница 636: ...d devices identified in the preceding step c Examine the output and if applicable select only the tests that you want to run sldiag device modify dev dev_name selection only selection only disables all other tests that you do not want to run for the device d Run the selected tests sldiag device run dev dev_name After the test is complete the following message is displayed SLDIAG _ALL_TESTS_COMPLET...

Страница 637: ...ant to run for the device d Verify that the tests were modified sldiag device show e Repeat these substeps for each device that you want to run concurrently f Run diagnostics on all of the devices sldiag device run Do not add to or modify your entries after you start running diagnostics After the test is complete the following message is displayed SLDIAG _ALL_TESTS_COMPLETED g Verify that there ar...

Страница 638: ... Boot the node from the LOADER prompt bye e Return the node to normal operation An HA pair Perform a give back storage failover giveback ofnode replacement_node_name If you disabled automatic giveback re enable it with the storage failover modify command A two node MetroCluster configuration Proceed to the next step The MetroCluster switchback procedure is done in the next task in the replacement ...

Страница 639: ...perly installed in the storage system d Boot the controller module you are servicing interrupting the boot by pressing Ctrl C when prompted to get to the Boot menu If you have two controller modules in the chassis fully seat the controller module you are servicing in the chassis The controller module boots up when fully seated If you have one controller module in the chassis connect the power supp...

Страница 640: ...e mode showing the prompt exit Maintenance mode and go to the LOADER prompt halt 2 From the LOADER prompt on the replacement node boot the node entering y if you are prompted to override the system ID due to a system ID mismatch boot_ontap 3 Wait until the Waiting for giveback message is displayed on the replacement node console and then from the healthy node verify that the new partner system ID ...

Страница 641: ...e vetoes Find the High Availability Configuration Guide for your version of ONTAP 9 b After the giveback has been completed confirm that the HA pair is healthy and that takeover is possible storage failover show The output from the storage failover show command should not include the System ID changed on partner message 6 Verify that the disks were assigned correctly storage disk show ownership Th...

Страница 642: ...ate node1_siteA metrocluster node show fields configuration state dr group id cluster node configuration state 1 node1_siteA node1mcc 001 configured 1 node1_siteA node1mcc 002 configured 1 node1_siteB node1mcc 003 configured 1 node1_siteB node1mcc 004 configured 4 entries were displayed 10 Verify that the expected volumes are present for each node vol show node node name 11 If you disabled automat...

Страница 643: ...ss on file If you fail to receive the email with the license keys within 30 days you should contact technical support Steps 1 Install each license key system license add license code license key license key 2 Remove the old licenses if desired a Check for unused licenses license clean up unused simulate b If the list looks correct remove the unused licenses license clean up unused Step 2 Restoring...

Страница 644: ... the sync source storage virtual machines SVMs on the formerly impaired site now active and serving data from the local disk pools This task only applies to two node MetroCluster configurations Steps 1 Verify that all nodes are in the enabled state metrocluster node show cluster_B metrocluster node show DR Configuration DR Group Cluster Node State Mirroring Mode 1 cluster_A controller_A_1 configur...

Страница 645: ... additional help with the replacement procedure Hot swap a de stage controller power module DCPM AFF A700 and FAS9000 To hot swap a de stage controller power module DCPM which contains the NVRAM10 battery you must locate the failed DCPM module remove it from the chassis and install the replacement DCPM module You must have a replacement DCPM module in hand before removing the failed module from th...

Страница 646: ...DCPM module LED lights when the module is fully seated into the chassis Dispose of batteries You must dispose of batteries according to the local regulations regarding battery recycling or disposal If you cannot properly dispose of batteries you must return the batteries to NetApp as described in the RMA instructions that are shipped with the kit https library netapp com ecm ecm_download_file ECMP...

Страница 647: ...serve data from the impaired controller storage About this task If you have a cluster with more than two nodes it must be in quorum If the cluster is not in quorum or a healthy controller shows false for eligibility and health you must correct the issue before shutting down the impaired controller see the Administration overview with the CLI Steps 1 If AutoSupport is enabled suppress automatic cas...

Страница 648: ...you have a MetroCluster configuration you must have confirmed that the MetroCluster Configuration State is configured and that the nodes are in an enabled and normal state metrocluster node show Steps 1 If AutoSupport is enabled suppress automatic case creation by invoking an AutoSupport message system node autosupport invoke node type all message MAINT number_of_hours_downh The following AutoSupp...

Страница 649: ...lowing table If the impaired controller Then Has automatically switched over Proceed to the next step Has not automatically switched over Perform a planned switchover operation from the healthy controller metrocluster switchover Has not automatically switched over you attempted switchover with the metrocluster switchover command and the switchover was vetoed Review the veto messages and if possibl...

Страница 650: ... is successful If the healing is vetoed you have the option of reissuing the metrocluster heal command with the override vetoes parameter If you use this optional parameter the system overrides any soft vetoes that prevent the healing operation 7 Verify that the heal operation is complete by using the metrocluster operation show command on the destination cluster mcc1A metrocluster operation show ...

Страница 651: ...ndle 4 Rotate the cam handle so that it completely disengages the controller module from the chassis and then slide the controller module out of the chassis Make sure that you support the bottom of the controller module as you slide it out of the chassis 5 Place the controller module lid side up on a stable flat surface press the blue button on the cover slide the cover to the back of the controll...

Страница 652: ... inside the controller and follow the specific sequence of steps Steps 1 If you are not already grounded properly ground yourself 2 Locate the DIMMs on your controller module Each system memory DIMM has an LED located on the board next to each DIMM slot The LED for the faulty blinks every two seconds 650 ...

Страница 653: ...s slot by slowly pushing apart the two DIMM ejector tabs on either side of the DIMM and then slide the DIMM out of the slot Carefully hold the DIMM by the edges to avoid pressure on the components on the DIMM circuit board 651 ...

Страница 654: ... connector are in the open position and then insert the DIMM squarely into the slot The DIMM fits tightly in the slot but should go in easily If not realign the DIMM with the slot and reinsert it Visually inspect the DIMM to verify that it is evenly aligned and fully inserted into the slot 6 Push carefully but firmly on the top edge of the DIMM until the ejector tabs snap into place over the notch...

Страница 655: ...ion of the controller module a If you have not already done so reinstall the cable management device b Firmly push the controller module into the chassis until it meets the midplane and is fully seated The locking latches rise when the controller module is fully seated Do not use excessive force when sliding the controller module into the chassis to avoid damaging the connectors The controller mod...

Страница 656: ...ulted from the replacement of the DIMMs sldiag device status dev mem long state failed System level diagnostics returns you to the prompt if there are no test failures or lists the full status of failures resulting from testing the component 5 Proceed based on the result of the preceding step If the system level diagnostics tests Then Were completed without any failures a Clear the status logs sld...

Страница 657: ...ne controller module in the chassis turn off the power supplies and unplug them from the power sources c Verify that you have observed all the considerations identified for running system level diagnostics that cables are securely connected and that hardware components are properly installed in the storage system d Boot the controller module you are servicing interrupting the boot by pressing Ctrl...

Страница 658: ...onfigured enabled heal roots completed cluster_B controller_B_1 configured enabled waiting for switchback recovery 2 entries were displayed 2 Verify that resynchronization is complete on all SVMs metrocluster vserver show 3 Verify that any automatic LIF migrations being performed by the healing operations were completed successfully metrocluster check lif show 4 Perform the switchback by using the...

Страница 659: ...ule without interrupting service you must perform a specific sequence of tasks You must replace the fan module within two minutes of removing it from the chassis System airflow is disrupted and the controller module or modules shut down after two minutes to avoid overheating Steps 1 If you are not already grounded properly ground yourself 2 Remove the bezel if necessary with two hands by grasping ...

Страница 660: ...800 44 638277 Europe or 800 800 80 800 Asia Pacific if you need the RMA number or additional help with the replacement procedure Replace an I O module AFF A700 and FAS9000 To replace an I O module you must perform a specific sequence of tasks You can use this procedure with all versions of ONTAP supported by your system All other components in the system must be functioning properly if not you mus...

Страница 661: ...password prompt enter system password Take over or halt the impaired controller from the healthy controller storage failover takeover ofnode impaired_node_name When the impaired controller shows Waiting for giveback press Ctrl C and then respond y Option 2 Controller is in a MetroCluster Do not use this procedure if your system is in a two node MetroCluster configuration To shut down the impaired ...

Страница 662: ...ter To shut down the impaired controller you must determine the status of the controller and if necessary switch over the controller so that the healthy controller continues to serve data from the impaired controller storage About this task If you are using NetApp Storage Encryption you must have reset the MSID using the instructions in the Return a FIPS drive or SED to unprotected mode section of...

Страница 663: ...he override vetoes parameter If you use this optional parameter the system overrides any soft vetoes that prevent the healing operation 4 Verify that the operation has been completed by using the metrocluster operation show command controller_A_1 metrocluster operation show Operation heal aggregates State successful Start Time 7 25 2016 18 45 55 End Time 7 25 2016 18 45 56 Errors 5 Check the state...

Страница 664: ...eplace I O modules To replace an I O module locate it within the chassis and follow the specific sequence of steps Steps 1 If you are not already grounded properly ground yourself 2 Unplug any cabling associated with the target I O module Make sure that you label the cables so that you know where they came from 3 Remove the target I O module from the chassis a Depress the lettered and numbered cam...

Страница 665: ...he controller after PCIe module replacement After you replace a PCIe module you must reboot the controller module Steps 1 If the node is at the LOADER prompt boot the node responding y if you see a prompt warning of a system ID mismatch and asking to override the system ID bye 2 If your system is configured to support 10 GbE cluster interconnect and data connections on 40 GbE NICs or onboard ports...

Страница 666: ...nes SVMs on the formerly impaired site now active and serving data from the local disk pools This task only applies to two node MetroCluster configurations Steps 1 Verify that all nodes are in the enabled state metrocluster node show cluster_B metrocluster node show DR Configuration DR Group Cluster Node State Mirroring Mode 1 cluster_A controller_A_1 configured enabled heal roots completed cluste...

Страница 667: ...luster config replication resync status show command 6 Reestablish any SnapMirror or SnapVault configurations Step 5 Return the failed part to NetApp After you replace the part you can return the failed part to NetApp as described in the RMA instructions shipped with the kit Contact technical support at NetApp Support 888 463 8277 North America 00 800 44 638277 Europe or 800 800 80 800 Asia Pacifi...

Страница 668: ... the RMA instructions shipped with the kit Contact technical support at NetApp Support 888 463 8277 North America 00 800 44 638277 Europe or 800 800 80 800 Asia Pacific if you need the RMA number or additional help with the replacement procedure Replace the NVRAM module or NVRAM DIMMs AFF A700 and FAS9000 The NVRAM module consists of the NVRAM10 and DIMMs and up to two NVMe SSD Flash Cache modules...

Страница 669: ...teps for automatically or manually reassigning disks to the controller module associated with the new NVRAM module You must reassign the disks when directed to in the procedure Completing the disk reassignment before giveback can cause issues You must replace the failed component with a replacement FRU component you received from your provider You cannot change any disks or disk shelves as part of...

Страница 670: ...torage failover modify node local auto giveback false 3 Take the impaired controller to the LOADER prompt If the impaired controller is displaying Then The LOADER prompt Go to Remove controller module Waiting for giveback Press Ctrl C and then respond y when prompted System prompt or password prompt enter system password Take over or halt the impaired controller from the healthy controller storage...

Страница 671: ...password prompt enter system password Take over or halt the impaired controller from the healthy controller storage failover takeover ofnode impaired_node_name When the impaired controller shows Waiting for giveback press Ctrl C and then respond y Option 3 Two node MetroCluster To shut down the impaired controller you must determine the status of the controller and if necessary switch over the con...

Страница 672: ... 130 Job succeeded Heal Aggregates is successful If the healing is vetoed you have the option of reissuing the metrocluster heal command with the override vetoes parameter If you use this optional parameter the system overrides any soft vetoes that prevent the healing operation 4 Verify that the operation has been completed by using the metrocluster operation show command controller_A_1 metroclust...

Страница 673: ...te by using the metrocluster operation show command on the destination cluster mcc1A metrocluster operation show Operation heal root aggregates State successful Start Time 7 29 2016 20 54 41 End Time 7 29 2016 20 54 42 Errors 8 On the impaired controller module disconnect the power supplies Step 2 Replace the NVRAM module To replace the NVRAM module locate it in slot 6 in the chassis and follow th...

Страница 674: ... into the front of the new NVRAM module d Gently push the FlashCache module all the way into the NVRAM module and then swing the cam handle closed until it locks the module in place 3 Remove the target NVRAM module from the chassis a Depress the lettered and numbered cam button The cam button moves away from the chassis b Rotate the cam latch down until it is in a horizontal position The NVRAM mod...

Страница 675: ...h completely unlocked 4 Set the NVRAM module on a stable surface and remove the cover from the NVRAM module by pushing down on the blue locking button on the cover and then while holding down the blue button slide the lid off the NVRAM module 673 ...

Страница 676: ... to engage with the I O cam pin and then push the I O cam latch all the way up to lock the module in place Step 3 Replace a NVRAM DIMM To replace NVRAM DIMMs in the NVRAM module you must remove the NVRAM module open the module and then replace the target DIMM Steps 1 If you are not already grounded properly ground yourself 2 Remove the target NVRAM module from the chassis a Depress the lettered an...

Страница 677: ...e face Lettered and numbered I O cam latch I O latch completely unlocked 3 Set the NVRAM module on a stable surface and remove the cover from the NVRAM module by pushing down on the blue locking button on the cover and then while holding down the blue button slide the lid off the NVRAM module 675 ...

Страница 678: ...t NVRAM module into the chassis a Align the module with the edges of the chassis opening in slot 6 b Gently slide the module into the slot until the lettered and numbered I O cam latch begins to engage with the I O cam pin and then push the I O cam latch all the way up to lock the module in place Step 4 Reboot the controller after FRU replacement After you replace the FRU you must reboot the contr...

Страница 679: ...Select one of the following options for instructions on how to reassign disks to the new controller 677 ...

Страница 680: ...as been automatically assigned storage failover show In the command output you should see a message that the system ID has changed on the impaired node showing the correct old and new IDs In the following example node2 has undergone replacement and has a new system ID of 151759706 node1 storage failover show Takeover Node Partner Possible State Description node1 node2 false System ID changed on pa...

Страница 681: ...ed on partner message 6 Verify that the disks were assigned correctly storage disk show ownership The disks belonging to the replacement node should show the new system ID In the following example the disks owned by node1 now show the new system ID 1873775277 node1 storage disk show ownership Disk Aggregate Home Owner DR Home Home ID Owner ID DR Home ID Reserver Pool 1 0 0 aggr0_1 node1 node1 1873...

Страница 682: ...e1mcc 004 configured 4 entries were displayed 10 Verify that the expected volumes are present for each node vol show node node name 11 If you disabled automatic takeover on reboot enable it from the healthy node storage failover modify node replacement node name onreboot true Option 2 Reassign ID MetroCluster config Reassign the system ID in a two node MetroCluster configuration In a two node Metr...

Страница 683: ...ew the new system ID at the Maintenance mode prompt on the impaired node disk show In this example the new system ID is 118065481 Local System ID 118065481 4 Reassign disk ownership for FAS systems or LUN ownership for FlexArray systems by using the system ID information obtained from the disk show command disk reassign s old system ID In the case of the preceding example the command is disk reass...

Страница 684: ...local node name partner savecore If the command output indicates that savecore is in progress wait for savecore to complete before issuing the giveback You can monitor the progress of the savecore using the system node run node local node name partner savecore s command info c Return to the admin privilege level set privilege admin 7 If the replacement node is in Maintenance mode showing the promp...

Страница 685: ...tions in the output to address any issues discovered 12 Simulate a switchover operation a From any node s prompt change to the advanced privilege level set privilege advanced You need to respond with y when prompted to continue into advanced mode and see the advanced mode prompt b Perform the switchback operation with the simulate parameter metrocluster switchover simulate c Return to the admin pr...

Страница 686: ...ot swappable This procedure is written for replacing one power supply at a time It is a best practice to replace the power supply within two minutes of removing it from the chassis The system continues to function but ONTAP sends messages to the console about the degraded power supply until the power supply is replaced The number of power supplies in the system depends on the model Power supplies ...

Страница 687: ...is restored to the power supply the status LED should be green 8 Turn on the power to the new power supply and then verify the operation of the power supply activity LEDs The green power LED lights when the PSU is fully inserted into the chassis and the amber attention LED flashes initially but turns off after a few moments 9 After you replace the part you can return the failed part to NetApp as d...

Страница 688: ...e before shutting down the impaired controller see the Administration overview with the CLI Steps 1 If AutoSupport is enabled suppress automatic case creation by invoking an AutoSupport message system node autosupport invoke node type all message MAINT number_of_hours_downh The following AutoSupport message suppresses automatic case creation for two hours cluster1 system node autosupport invoke no...

Страница 689: ...port message suppresses automatic case creation for two hours cluster1 system node autosupport invoke node type all message MAINT 2h 2 Disable automatic giveback from the console of the healthy controller storage failover modify node local auto giveback false 3 Take the impaired controller to the LOADER prompt If the impaired controller is displaying Then The LOADER prompt Go to Remove controller ...

Страница 690: ...ed Review the veto messages and if possible resolve the issue and try again If you are unable to resolve the issue contact technical support 3 Resynchronize the data aggregates by running the metrocluster heal phase aggregates command from the surviving cluster controller_A_1 metrocluster heal phase aggregates Job 130 Job succeeded Heal Aggregates is successful If the healing is vetoed you have th...

Страница 691: ...peration 7 Verify that the heal operation is complete by using the metrocluster operation show command on the destination cluster mcc1A metrocluster operation show Operation heal root aggregates State successful Start Time 7 29 2016 20 54 41 End Time 7 29 2016 20 54 42 Errors 8 On the impaired controller module disconnect the power supplies Step 2 Remove the controller module To access components ...

Страница 692: ...roller module out of the chassis Make sure that you support the bottom of the controller module as you slide it out of the chassis 5 Place the controller module lid side up on a stable flat surface press the blue button on the cover slide the cover to the back of the controller module and then swing the cover up and lift it off of the controller module 690 ...

Страница 693: ...tery To replace the RTC battery you must locate the failed battery in the controller module remove it from the holder and then install the replacement battery in the holder Steps 1 If you are not already grounded properly ground yourself 2 Locate the RTC battery 691 ...

Страница 694: ...antistatic shipping bag 5 Locate the empty battery holder in the controller module 6 Note the polarity of the RTC battery and then insert it into the holder by tilting the battery at an angle and pushing down 7 Visually inspect the battery to make sure that it is completely installed into the holder and that the polarity is correct 8 Reinstall the controller module cover Step 4 Reinstall the contr...

Страница 695: ...pplies and to the power sources and then turn on the power to start the boot process e Halt the controller at the LOADER prompt 6 Reset the time and date on the controller a Check the date and time on the healthy node with the show date command b At the LOADER prompt on the target node check the time and date c If necessary modify the date with the set date mm dd yyyy command d If necessary set th...

Страница 696: ... by using the metrocluster switchback command from any node in the surviving cluster 5 Verify that the switchback operation has completed metrocluster show The switchback operation is still running when a cluster is in the waiting for switchback state cluster_B metrocluster show Cluster Configuration State Mode Local cluster_B configured switchover Remote cluster_A configured waiting for switchbac...

Страница 697: ...controller Make sure that all other components are functioning properly Add an X91148A module in an AFF A700 with open slots AFF A700 and FAS9000 You can add an X91148A module into an empty module slot in your system as either a 100GbE NIC or a storage module for the NS224 storage shelves Your system must be running ONTAP 9 8 and later To non disruptively add the X91148A module you must takeover t...

Страница 698: ...dule with the edges of the slot b Slide the X91148A module into the slot until the lettered and numbered I O cam latch begins to engage with the I O cam pin c Push the I O cam latch all the way up to lock the module in place 5 Cable the module to the data switches 6 Reboot controller A boot_ontap 7 Giveback the node from the partner node storage failover giveback ofnode target_node_name 8 Enable a...

Страница 699: ...48A storage module in a system with no open slots AFF A700 and FAS9000 You must remove one more or more existing NIC or storage modules in your system in order to install one or more X91148A storage modules into your fully populated system Your system must be running ONTAP 9 8 and later To non disruptively add the X91148A module you must takeover the target controller add the module and then giveb...

Страница 700: ...lover modify node local auto giveback false b Take over the target node storage failover takeover ofnode target_node_name The console connection shows that the node drops to the LOADER prompt when the takeover is complete 3 If you are not already grounded properly ground yourself 4 Unplug any cabling on the target I O module 5 Remove the target I O module from the chassis a Depress the lettered an...

Страница 701: ...at the remove and install steps to replace additional modules for controller A 8 Cable the module or modules to the data switches 9 Reboot controller A boot_ontap 10 Giveback the node from the partner node storage failover giveback ofnode target_node_name 11 Enable automatic giveback if it was disabled storage failover modify node local auto giveback true 12 If you added the X91148A module as a NI...

Страница 702: ...matic giveback storage failover modify node local auto giveback false b Take over the target node storage failover takeover ofnode target_node_name The console connection shows that the node drops to the LOADER prompt when the takeover is complete 3 If you are not already grounded properly ground yourself 4 Unplug any cabling on the target I O module 5 Remove the target I O module from the chassis...

Страница 703: ...l the way up to lock the module in place d If you are installing a second X91148A module for storage repeat the remove and install steps for the module in slot 7 7 Reboot controller A boot_ontap 8 Giveback the node from the partner node storage failover giveback ofnode target_node_name 9 Enable automatic giveback if it was disabled storage failover modify node local auto giveback true 10 Repeat th...

Страница 704: ...Y WHETHER IN CONTRACT STRICT LIABILITY OR TORT INCLUDING NEGLIGENCE OR OTHERWISE ARISING IN ANY WAY OUT OF THE USE OF THIS SOFTWARE EVEN IF ADVISED OF THE POSSIBILITY OF SUCH DAMAGE NetApp reserves the right to change any products described herein at any time and without notice NetApp assumes no responsibility or liability arising from the use of products described herein except as expressly agree...

Отзывы: