18
KEN002VKM
v1a • 17.04.2020
EN
●
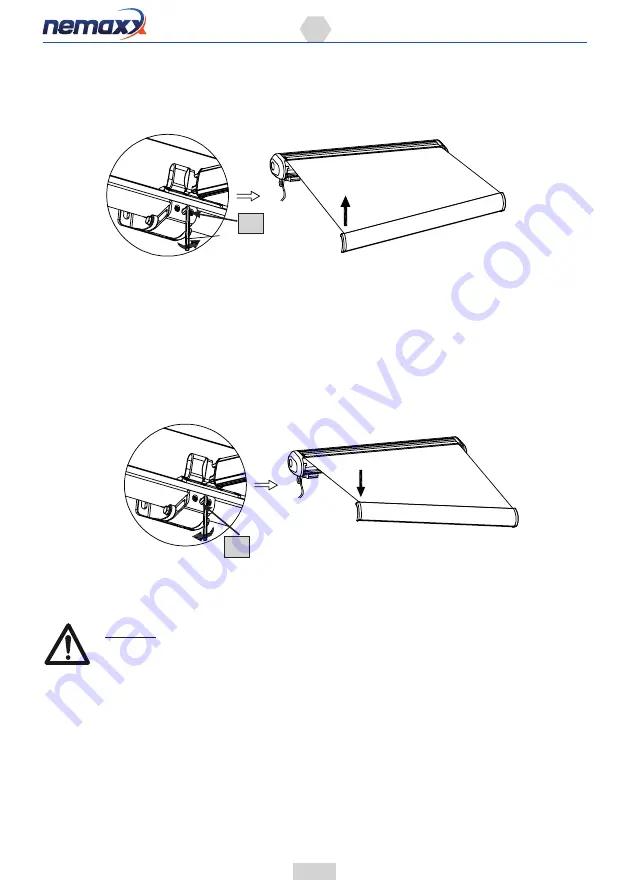
Rotate the adjustment screw (20) using the Allen key until the required slope has been set.
●
Rotate the adjustment screw (20) anti-clockwise to make the set angle larger (the front line of the extended
awning becomes higher).
●
Rotate the adjustment screw (20) clockwise to make the set angle smaller (the front line of the extended
awning becomes lower).
●
Repeat the procedure for all wall brackets (8).
●
Tighten the locking nuts (20) back up again on both sides, on all wall wall brackets (8).
●
Check the front cover (6) of the awning with a spirit level to ensure that it is horizontal.
●
If necessary, adjust until the front cover (6) is horizontal.
SETTING THE END POSITION SWITCH
CAUTION
●
Product damages!
If the end switches are not correctly set, there is a risk that the motor will run
hot. This may lead to motor damages and, potentially, cause a risk of fire.
●
Attention: The awning is already adjusted at the factory, the end customer does not need to
adjust the motor again.
●
The user can adjust the limit of one direction at one time, do not adjust two knobs at the same
time.
●
Do not turn knobs fiercely, please check the limit with remote control per revolute about half
cycle, and check if the setting you satisfied.
20
20
hex key: 6 mm
hex key: 6 mm
●
When setting the end switches, the awning may not be fully retracted or extended.
●
Direction „+“ extends the run time, direction „-“ shortens the run time


