


1-4 Introducing the NEC Versa
Around the Front of the System
The NEC Versa is compact with features on every side. First, look at the front of the
system.
To open your NEC Versa E120 DayLite notebook computer, slide the LCD panel latch
to the right and lift the cover (see the section, “Front Features,” to locate the latch).
Base Unit
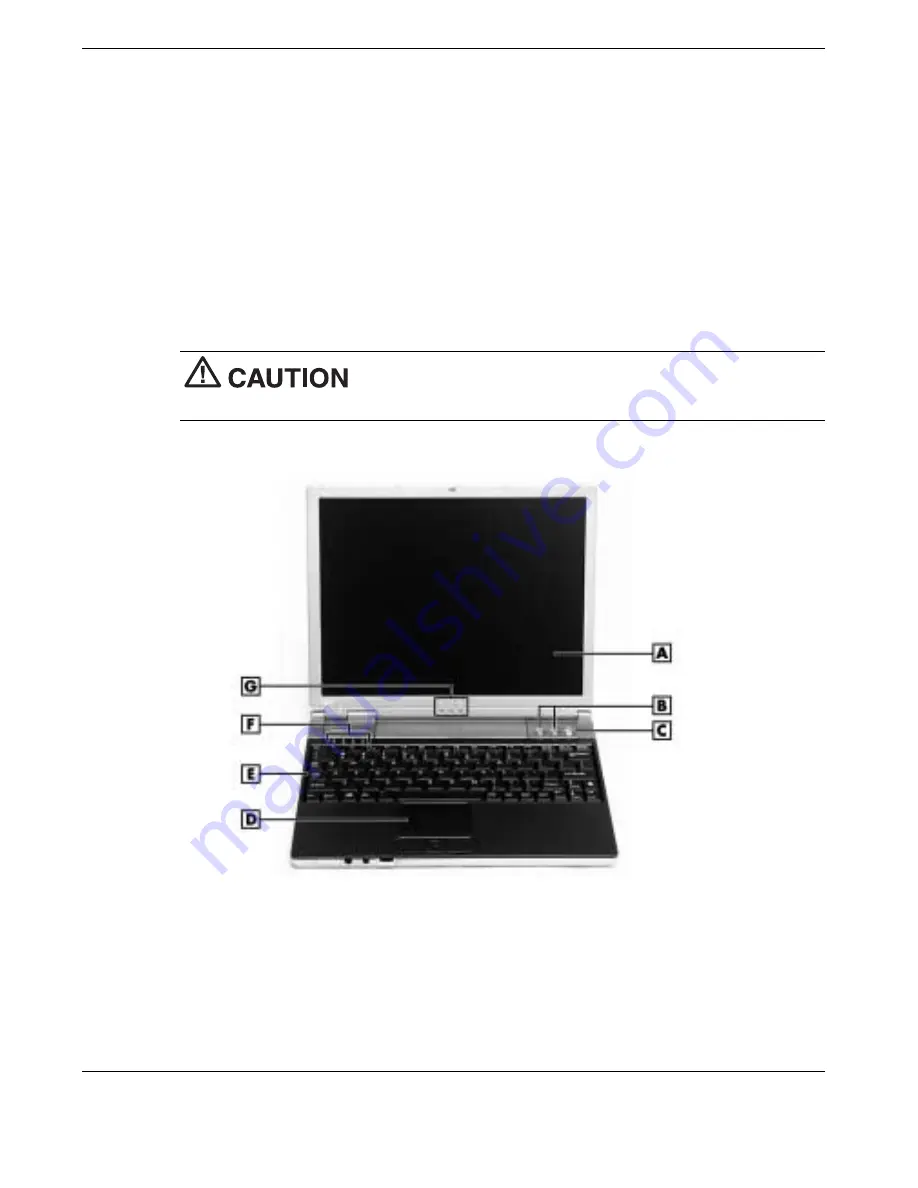
The base unit of your NEC Versa notebook offers the features shown in the following
figure. Feature descriptions follow the figure.
After extended use, the surface of the base unit, below the
keyboard, might become hot to the touch.
LCD panel and base unit
A – LCD Panel
E – Keyboard
B – Shortcut Buttons
F – Drive and Keyboard Status LEDs
C – Power Button
G – Power and E-Mail Status LEDs
D – NEC VersaGlide Touchpad
Содержание VERSA DAYLITE E120
Страница 1: ...otebook Computer ersa E120 DayLite User s Guide ...
Страница 94: ...6 Communicating with Your NEC Versa MDC Modem LAN Connection Internet Connections ...
Страница 103: ...8 Solving System Problems Problem Checklist Startup Problems If You Need Assistance ...
Страница 118: ...B Specifications Base System Expansion Power Security Dimensions and Weight Recommended Environment ...


