Using the Function Utilities
5-24
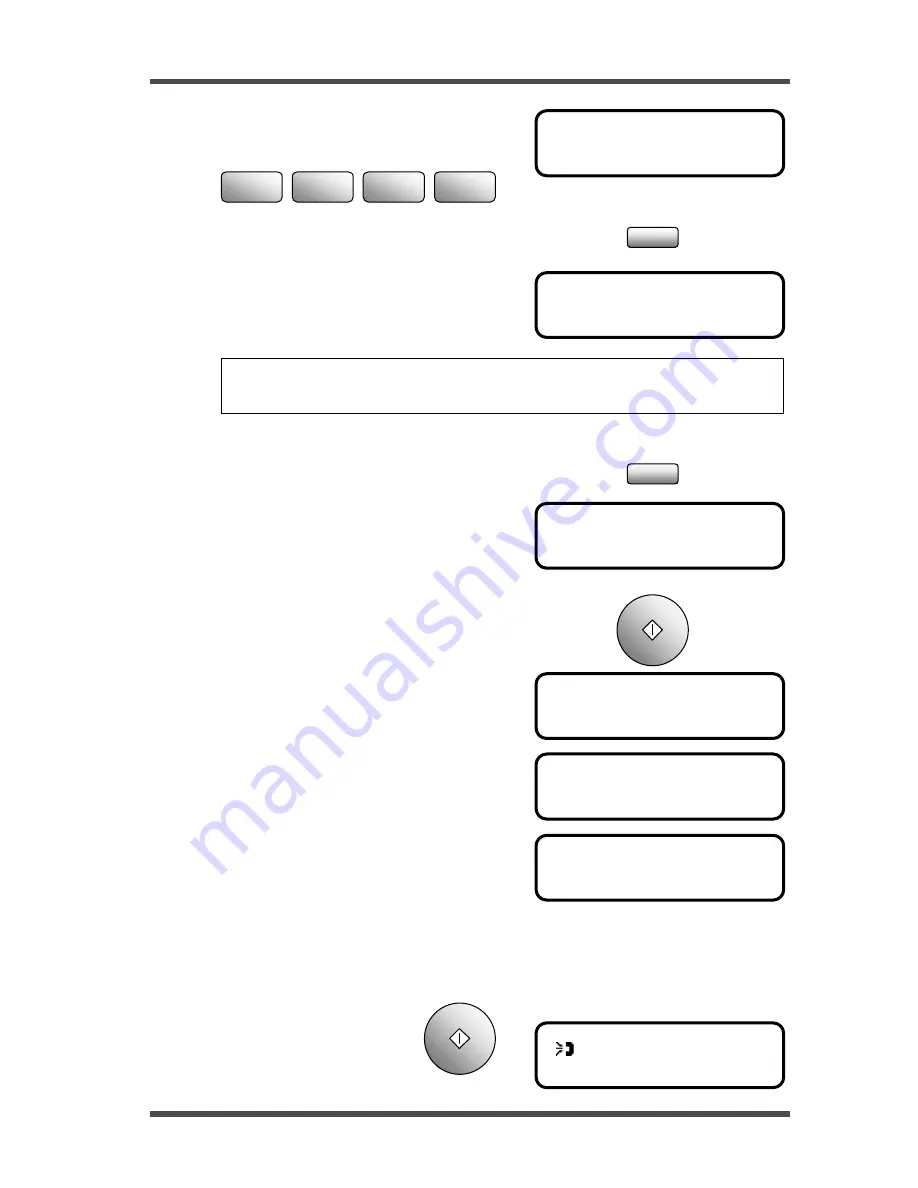
POLLING ID =1234
OK=YES (DEL=NO)
POLLING ID =_
OK=YES
NO.002 =_
(Fin.=START)
CHECK DESTINATIONS?
OK=YES (RX=START)
NO.001=123456
OK=YES (DEL=NO)
NO.002=010101
OK=YES (DEL=NO)
(123456 ) 100%
-SET DOC. FACE UP-
Use the numeric key to input the polling ID.
For example: 1234
If you input a wrong number press the No/Clear key to clear
this entry and input the ID again.
5. Press the Yes key.
Then the message appears to ask for the next
polling RX destination. Repeat the procedure
step 4 to 5, until all the polling RX
destinations have been specified.
6. Press the Start key to finish the input operation.
Then the message asks if you want to check
these destinations.
If you want to check the destinations you
inputted, press the Yes key. The display
appears the first destination.
Press Yes key to accept this entry, then the
display shows the next destination.
If you want to delete this destination, press
the No/Clear key.
Do it until all entries have been checked. Then press the Start key.
7. Press the Start key to
perform the Polling RX
function.
Yes
No
C
Start
1
2
ABC
3
DEF
4
GHI
NOTE: If you do not have the ID of the remote fax unit, you must to contact
the remote fax operator for this information.
Start
Содержание NEFAX 805
Страница 1: ...FACSIMAL OPERATION MANUAL ...
Страница 2: ...NEC FACSIMILE OPERATION MANUAL ...
Страница 13: ...Chapter 1 First Things to Know About Your Machine ...
Страница 39: ...Chapter 2 Making Copies ...
Страница 60: ...Chapter 3 Basic Fax Operation 1 ...
Страница 84: ...Chapter 4 Basic Fax Operation 2 ...
Страница 94: ...Chapter 5 Using the Function Utilities ...
Страница 124: ...Chapter 6 Using the Enhanced Utilities 1 ...
Страница 152: ...Using the Enhanced Utilities 2 Chapter 7 ...
Страница 175: ...Chapter 8 Using the Confirm Utilities ...
Страница 181: ...Chapter 9 Printing Reports ...
Страница 203: ...Chapter 10 Connect to PC ...
Страница 208: ...Chapter 11 Troubleshooting ...
Страница 228: ...Chapter 12 General Specification ...


