English-21
English
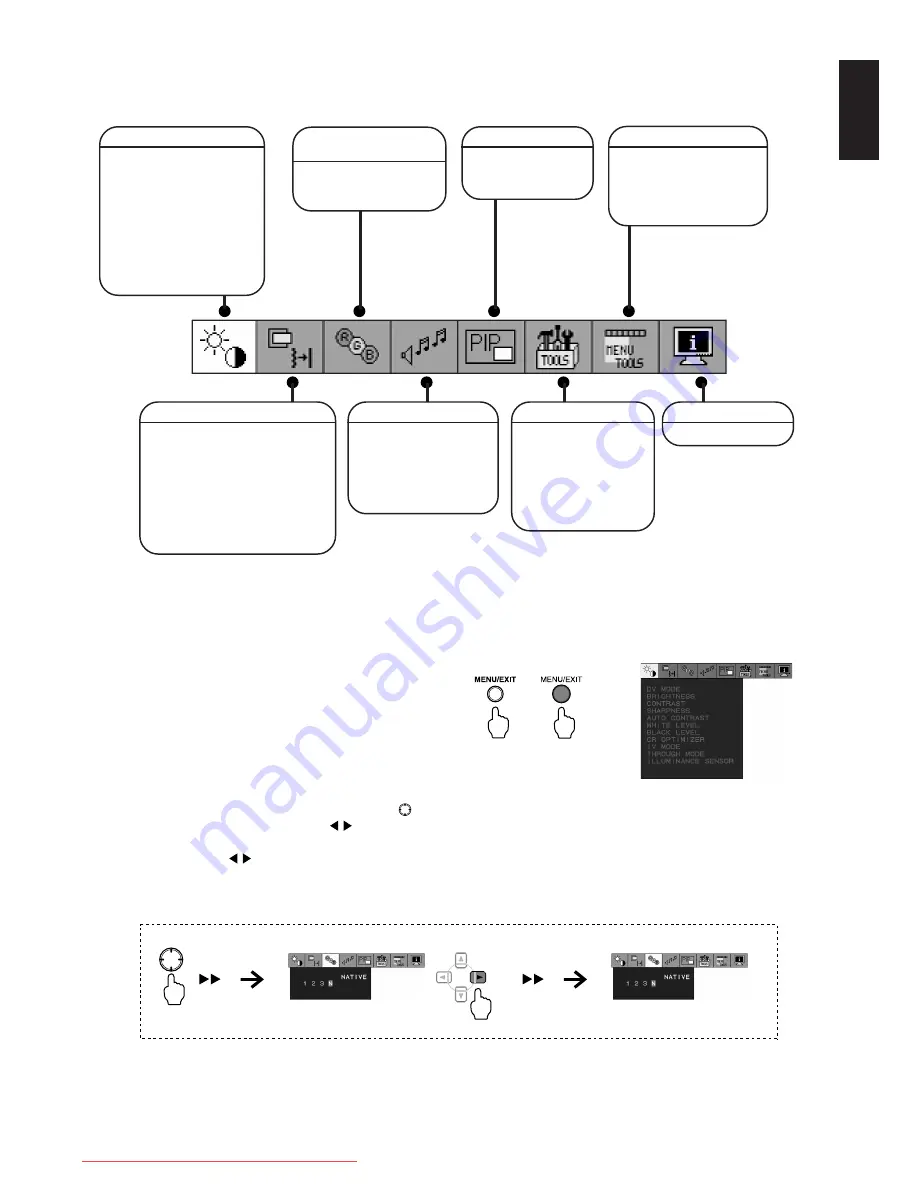
Configuration of group icons (when HDMI/Video Input is selected)
The configuration of each of the group icons is as shown below. For details on the options, refer to the page that is listed for
the explanation on each of the group icons.
*4: For HDMI input only
*5: For VIDEO1 input only
*6: For VIDEO2 input only
INFORMATION (P33)
DISPLAY MODE
AUDIO SETTINGS (P33)
TREBLE
BASS
BALANCE
SURROUND
AUDIO INPUT
VOLUME
PIP SETTINGS (P33)
PIP ON/OFF
PIP SIZE
PIP POSITION
PICTURE SETTINGS (P30)
DV MODE
BRIGHTNESS
CONTRAST
SHARPNESS
BLACK LEVEL
INPUT TYPE*
4
CR OPTIMIZER
IV MODE
THROUGH MODE
BRIGHTNESS SENSOR
COLOR CONTROL (P32)
ADJUSTMENT OF COLOR
1, 2, 3, N*
4
HUE*
5, 6
SATURATION*
5, 6
MENU TOOLS (P33)
LANGUAGE
OSD POSITION
OSD AUTO OFF
INFORMATION AUTO OFF
OSD LOCK
MONITOR SETTINGS (P30 to 32)
SCREEN SIZE
OVERSCAN
AV ASPECT RATIO
NOISE REDUCTION*
5, 6
LEFT/RIGHT
DOWN/UP
I/P CONVERSION*
6
FILM MODE
PHASE*
5
TOOLS (P33)
INPUT SKIP
OFF TIMER
LED BRIGHTNESS
DDC/CI
SIDE BORDER COLOR
ECO METER
ALL RESET
OSD Screen Operations
Here, an explanation of how to perform basic OSD Screen operations is given, using contrast adjustment as an example.
For details on other options, refer to “Options for OSD Functions” (Page 23 and 30).
Example: Adjust the contrast to 100%.
1. Press the MENU/EXIT button on the monitor or the
remote control to display the OSD Screen.
The group icon that is currently selected is highlighted.
Note:
• If the MENU/EXIT button on the monitor or the
remote control is pressed again, the OSD
Screen will be cleared.
• It is possible to change the position in which
the OSD Screen is displayed. Refer to the
options for [MENU TOOLS] (Page 29).
• To select another group icon, move the
button of the monitor in the directions as
shown in the example below, or press and
move the control buttons on the remote
control to the left or right.
Example: Select Color Control
Monitor
Remote Control
Monitor
Remote Control
2 to the right
2 to the right
Downloaded from ManualMonitor.com Manuals


