


1. Installing Internal Optional Devices
Express5800/T110j User’s Guide
40
Chapter 2 Preparations
Installation
Install a DIMM by using the following procedure.
1.
See steps 1 to 4 in
Chapter 2 (1.2 Overview of Installation and Removal)
for preparations.
2.
Hold the server with both hands and slowly and gently lay it so that the left side faces upward.
3.
Open both levers of the target DIMM slot outward.
4.
Hold the DIMM vertically and push it into
the slot.
When the DIMM is inserted correctly, the
lever automatically closes.
Important Do not apply too much pressure when you push a DIMM into the socket.
Note
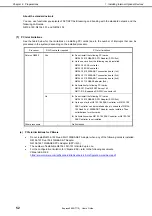
Align the notch on the DIMM with the key on the slot.
5.
Firmly close the lever.
6.
Continue to install or remove internal optional devices, mount and connect the server, and turn it on.
7.
Confirm that no error messages are displayed in POST screen.
If any error messages are displayed, see
Chapter 3 (1. POST Error Message)
in "
Maintenance
Guide
".
8.
Run the BIOS Setup Utility, go to the
Advanced
menu, and check the
Memory Configuration
.
Confirm that the added DIMM has been recognized in the BIOS. Confirm that the applicable
DIMM
Group Status
is set to "Normal". See
Chapter 2 (1. System BIOS)
in "
Maintenance Guide
".
9.
Set the paging file size to the recommended value (Total memory size x 1.5) or more.
When using a Windows OS, see
Chapter 1 (5.1 Specifying Memory Dump Settings (Debug
Information))
in "
Installation Guide (Windows)
".
For other OS, see the manual provided with the operating system or contact your sales
representative.
Notch
Key
Содержание EXP339
Страница 127: ...MEMO...


