78K0/Fx2 – CAN it!
Next the correct linker settings of the demo project will be checked. This can be done in the “Linker”
category as shown below. Select the “Config” tab and check that the linker command file
“DF054780_V4.XCL” is selected. This file is used by the linker and contains information on where to place
To start the IAR C-SPY debugge
m the “Project” menu or press the
the different sections of code and data that may be used within the demo project:
Figure 73: IAR Linker options
Now after everything has been setup correctly it’s time to compile and link the demonstration project. Close
the Options menu and select “Rebuild All” from the “Project” menu. If the project is compiled and linked
without errors or warnings it can now be downloaded to the
78K0/Fx2 – CAN it!
board and debugged.
(
)
r select the option “Debug” fro
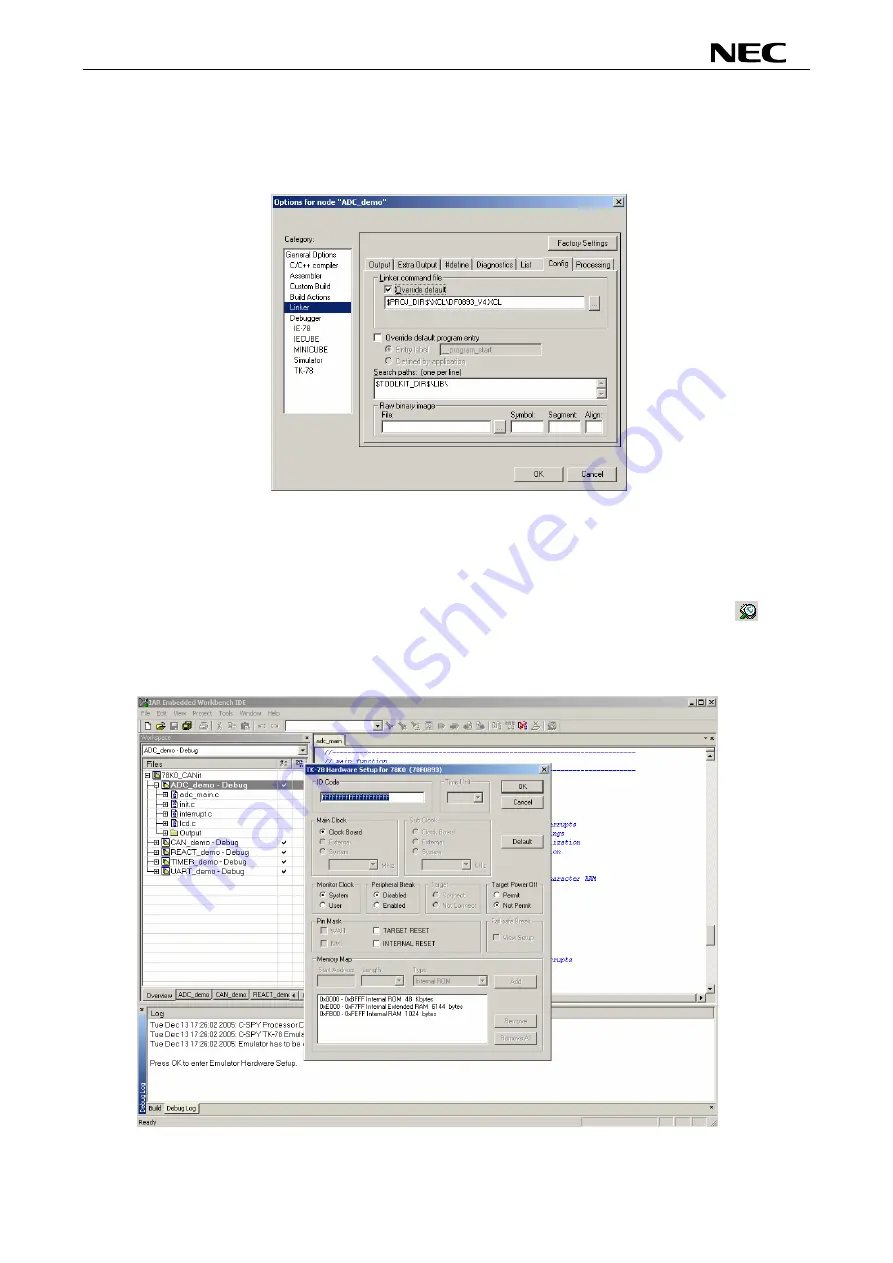
“Debugger” button. In the next step the TK-78 Emulator has to be configured before downloading a new
F
enu
application. Press the OK button to enter the hardware setup menu. Set the configuration as show in the
figure below and start the download by pressing the OK button.
igure 74: TK-78 hardware setup m
74
Содержание 78K0/Fx2
Страница 80: ...78K0 Fx2 CAN it 15 USB interface cable Mini B type Figure 77 USB interface cable Mini B type 80 ...
Страница 81: ...78K0 Fx2 CAN it 16 Schematics Figure 78 78K0 Fx2 CAN it baseboard schematics 81 ...
Страница 82: ...78K0 Fx2 CAN it Figure 79 78K0 Fx2 CAN it CPU module schematics 82 ...
Страница 83: ...78K0 Fx2 CAN it MEMO 83 ...


