


1-10
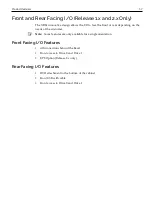
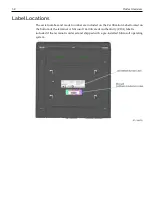
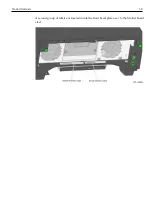
Product Overview
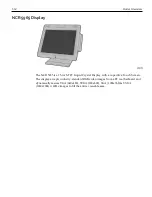
Displays
X-Series Displays
The NCR RealPOS X-Series Displays (also known as NCR 5968 and NCR 5985) offer an
innovative design, multi-touch capability, ruggedized packaging, and more. The X-
Series displays are an ideal complement to any point-of-sale (POS) terminal.
The NCR RealPOS X-Series Displays are available in both touch and non-touch models:
•
NCR RealPOS 5968 XT (Touch)
•
NCR RealPOS 5985 XD (Non-Touch)
The NCR RealPOS X-Series Non-Touch Displays are available with a 10.4" (4:3) or 15”
(4:3). The NCR RealPOS X-Series Touch Displays are available with a 10.4" (4:3), 15” (4:3),
or 18.5" (16:9) display. Place it on a tabletop, or hang it on a wall, or a pole. You can also
customize your solution with integrated options including an encrypted magnetic stripe
reader (MSR), biometric fingerprint reader, or camera.
Standard Features
•
Display
•
Display Size: 10.4" (4:3 aspect ratio), 15" (4:3 aspect ratio), 18.5" (16:9 aspect ratio)
•
LCD Technology: TFT, Pixel Configuration: RGB
•
LCD LED Backlit Technology
•
Viewing Direction: 12 o'clock
•
50K hour minimum backlight ½ life at Rated Luminance: 50,000 hours
•
LCD LED Backlight: Controllable using the Software OSD Application
Содержание POS XR8
Страница 1: ...User Guide NCR POS XR8 XR8c 7607 B005 0000 2436 Issue C ...
Страница 9: ...vii Touch Screen Cleaning Procedures 141 ...
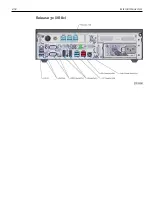
Страница 27: ...Chapter 2 External Connectors Motherboard Release 1 x Release 2 x Display Port Connections ...
Страница 28: ...2 18 External Connectors Release 3 x XR8c ...
Страница 42: ...2 32 ...
Страница 59: ...Hardware Installation 3 49 24V Powered USB and RS232 Cables ...
Страница 61: ...Hardware Installation 3 51 24V Powered USB and RS232 Cables ...
Страница 65: ...Hardware Installation 3 55 2185 Cash Drawer Fliptop with Locking lid The NCR 2185 is a Fliptop Cash Drawer ...
Страница 70: ...3 60 Hardware Installation NCR 5932 5715 Big Ticket USB Keyboard ...
Страница 72: ...3 62 Hardware Installation NCR 5932 6674 POS Compact Alphanumeric USB Keyboard ...
Страница 77: ...Hardware Installation 3 67 3 Disconnect the SATA Power connector from the Drive ...
Страница 78: ...3 68 Hardware Installation 4 Unscrew the Drive from the Hard Drive chassis Retain the screws ...
Страница 79: ...Hardware Installation 3 69 5 Slide the drive out of the chassis bracket ...
Страница 80: ...3 70 Hardware Installation 6 Slide in the new drive and secure with the retained screws ...
Страница 81: ...Hardware Installation 3 71 7 Connect the SATA Power connector to the Drive ...
Страница 82: ...3 72 Hardware Installation 8 Replace the Sled Cover and reconnect power to the terminal ...
Страница 85: ...Hardware Installation 3 75 5 Remove the HDD from the Bracket 6 Install the new HDD to the Bracket ...
Страница 92: ...5 82 ...
Страница 104: ...6 94 Disk Image Backup and Recovery Tool A message is displayed when the load is complete 5 Reboot the POS ...
Страница 130: ...7 120 ...
Страница 147: ...Configuring a Second HDD for RAID 10 137 7 Select Next ...
Страница 152: ...11 142 ...


