


6-90
Disk Image Backup and Recovery Tool
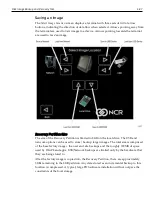
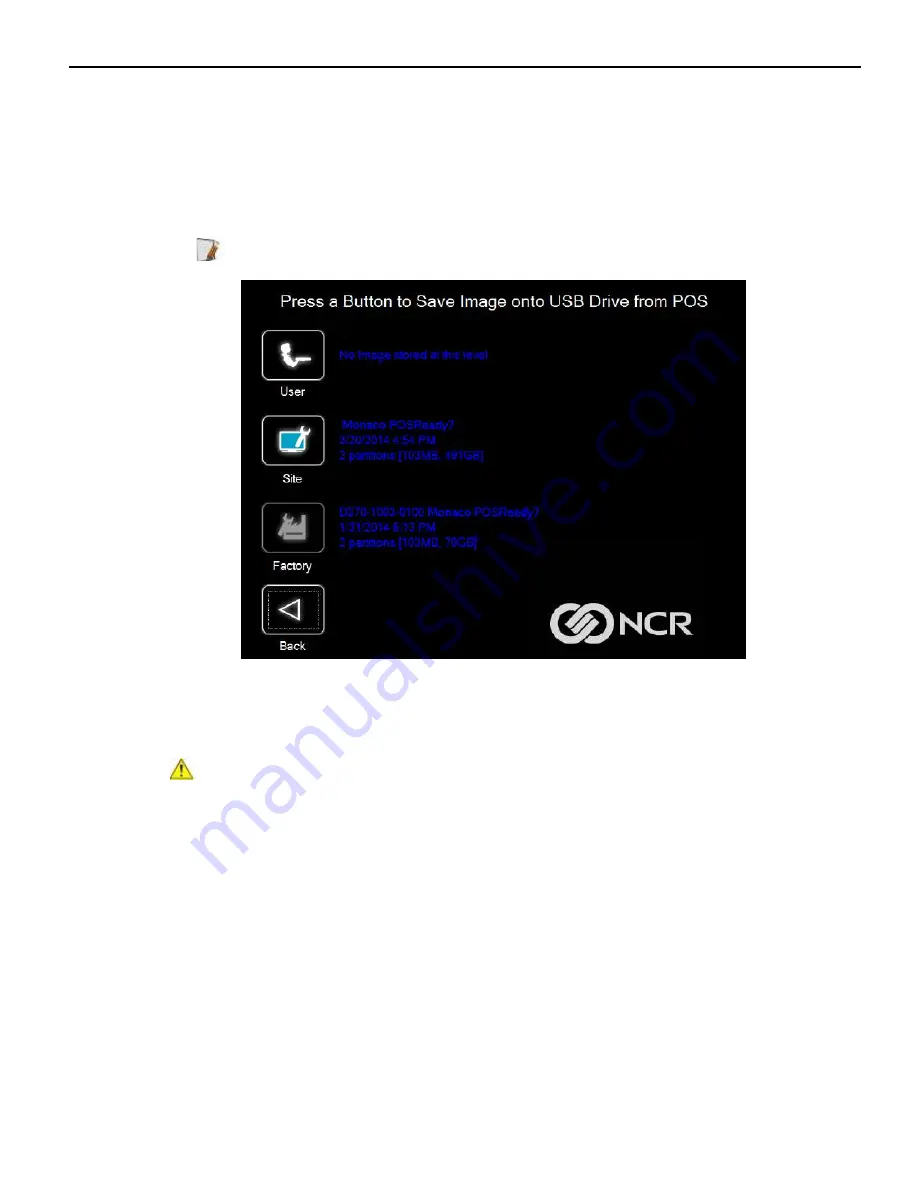
If a backup already exists, you have the choice of performing either a
Site
or
User
backup.
•
Site Image
- Use this option immediately after all application components have
been loaded and set up for initial operation or for base image updates.
•
User Image
- Use this option for routine day-to-day or periodical backups.
Note:
Site
and
User
backups are separate independent backups.
The image information is updated with the new image date.
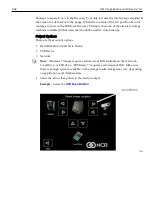
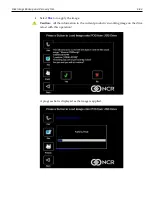
Loading an Image
Caution:
Do NOT remove power during an Image Load. Complete the Operating
System setup and then shut down Windows properly. Removing power prematurely
will corrupt the image and display various messages like "Windows failed to load" or
"missing or corrupt registry". If this happens you can do an Image load of the Factory
image with the Recovery Tool.
Содержание POS XR8
Страница 1: ...User Guide NCR POS XR8 XR8c 7607 B005 0000 2436 Issue C ...
Страница 9: ...vii Touch Screen Cleaning Procedures 141 ...
Страница 27: ...Chapter 2 External Connectors Motherboard Release 1 x Release 2 x Display Port Connections ...
Страница 28: ...2 18 External Connectors Release 3 x XR8c ...
Страница 42: ...2 32 ...
Страница 59: ...Hardware Installation 3 49 24V Powered USB and RS232 Cables ...
Страница 61: ...Hardware Installation 3 51 24V Powered USB and RS232 Cables ...
Страница 65: ...Hardware Installation 3 55 2185 Cash Drawer Fliptop with Locking lid The NCR 2185 is a Fliptop Cash Drawer ...
Страница 70: ...3 60 Hardware Installation NCR 5932 5715 Big Ticket USB Keyboard ...
Страница 72: ...3 62 Hardware Installation NCR 5932 6674 POS Compact Alphanumeric USB Keyboard ...
Страница 77: ...Hardware Installation 3 67 3 Disconnect the SATA Power connector from the Drive ...
Страница 78: ...3 68 Hardware Installation 4 Unscrew the Drive from the Hard Drive chassis Retain the screws ...
Страница 79: ...Hardware Installation 3 69 5 Slide the drive out of the chassis bracket ...
Страница 80: ...3 70 Hardware Installation 6 Slide in the new drive and secure with the retained screws ...
Страница 81: ...Hardware Installation 3 71 7 Connect the SATA Power connector to the Drive ...
Страница 82: ...3 72 Hardware Installation 8 Replace the Sled Cover and reconnect power to the terminal ...
Страница 85: ...Hardware Installation 3 75 5 Remove the HDD from the Bracket 6 Install the new HDD to the Bracket ...
Страница 92: ...5 82 ...
Страница 104: ...6 94 Disk Image Backup and Recovery Tool A message is displayed when the load is complete 5 Reboot the POS ...
Страница 130: ...7 120 ...
Страница 147: ...Configuring a Second HDD for RAID 10 137 7 Select Next ...
Страница 152: ...11 142 ...


