

4-4
Chapter 4: Operating System Recovery
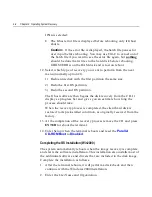
If No is selected:
•
The Ghost error file is displayed before rebooting only if Ghost
aborts.
Caution:
If the error file is displayed, the batch file pauses for
user input before rebooting. You may use Ctrl-C to cancel out of
the batch file if you want to see the error file again, but nothing
should be done that writes to the hard disk before rebooting.
GHOST.ERR is on the RAM disk and is lost on reboot.
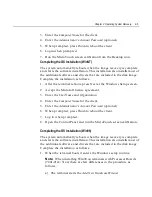
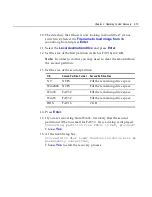
12.
Select which type of recovery you want to perform from the next
menu (normally option #1).
1)
Redo entire disk with the first partition the same size.
2)
Redo the first OS partition.
3)
Redo the second OS partition.
The Ghost software then begins the disk recovery from the CD. It
displays a progress bar and gives you an estimate how long the
process should take.
When the recovery process is completed, the client hard disk is
restored to its preinstalled condition, as originally received from the
factory.
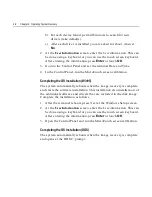
13.
At the completion of the recovery process remove the CD and press
ENTER
to reboot the terminal.
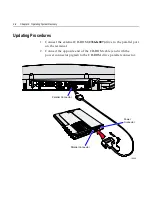
14.
Enter Setup when the terminal reboots and reset the
Parallel
CD-ROM Boot
to
Disabled
.
Completing the OS Installation (Win2000)
The system automatically reboots when the image recovery is complete
and starts the software installation. This installation also installs most of
the additional software and drivers that are included in the disk image.
Complete the installation as follows.
1.
After the terminal reboots, it will perform a disk check and then
continue with the Windows 2000 installation.
2.
Enter the User Name and Organization.
Содержание 7401 Web Kiosk
Страница 1: ...NCR 7401 Web Kiosk Release 2 3 Hardware User s Guide 16436 NCR B005 0000 1254 Issue D...
Страница 80: ...Chapter 2 Hardware Installation 2 21 2 Remove the Core Module from the Fixed Angle Mount 16397...
Страница 132: ...Chapter 3 Setup 3 23 5 Move the cursor to the Exit Menu select Save Changes Exit or Save Changes and press Enter...
Страница 154: ...Chapter 3 Setup 3 45 2 Press Enter and then select the desired setting from the drop down menu Other RS 232...
Страница 183: ...3 74 Chapter 3 Setup...
Страница 221: ...Appendix B Feature Kits B 13 3 Select Install or Update BACKPACK Driver 4 Select Finish to restart the computer...
Страница 232: ...B 24 Appendix B Feature Kits 5 Install the Antenna Cover and secure it with screws 2 16874 Wireless Antenna Cover...
Страница 249: ...Appendix B Feature Kits B 41 10 Slide the Keyboard Shelf onto the Bottom Plate and install the four screws 17372...
Страница 251: ...Appendix B Feature Kits B 43 12 Install a Strain Relief Bushing through the Mounting Bracket 18530 Strain Relief Bushing...
Страница 259: ...Appendix B Feature Kits B 51 5 Wrap the metal strap around the pole and loop it through the other end of the clamp 17356...
Страница 260: ...B 52 Appendix B Feature Kits 6 Snug the clamp and then crimp the metal strap with a pair of pliers 17357...
Страница 263: ...Appendix B Feature Kits B 55 11 Route the cables in the Wall Bracket as shown below 17359...
Страница 294: ...B 86 Appendix B Feature Kits 5 Push in the Core Module Support and lower the Core Module 6 Remove the Core Module 17345...
Страница 302: ...B 94 Appendix B Feature Kits 17729 Pole Mount Wall Mount...
Страница 311: ...Appendix B Feature Kits B 103 10 Route the cables in the Wall Bracket as shown below 17734 Mounting Screw on both sides...
Страница 326: ...B 118 Appendix B Feature Kits 2 Insert the end of the paper into the Paper Guide 16731...
Страница 328: ...B 120 Appendix B Feature Kits 4 Remove the cut paper waste from the Presenter 16965...
Страница 334: ...B 126 Appendix B Feature Kits 19050...
Страница 352: ...B 144 Appendix B Feature Kits 10 Install the CD ROM Bracket 3 screws 19232 Screws CD ROM Bracket...
Страница 366: ...Index 158 USB RS 232 port server 1 34 1 35 B 14 V Video subsystem 1 11 W Wireless LAN communications 1 12...
Страница 367: ...Index 159...
Страница 368: ...B005 0000 1254 September 2001 Printed on recycled paper...