Navig8r NAVSPORTPRO Скачать руководство пользователя страница 14

14 | 

P a g e


DELETING, PROTECTING, AND AUTO-PLAYBACK  

 
From the playback mode, press the M key to access the following options: 
 
Deleting a file 
From the video, photo or video/photo mode, highlight or open a file and press the M key 
Then select between “delete single” (Delete current file only) or “delete all” (deletes all 
unprotected files). Then confirm your choice using the tick or cross boxes and press OK.  
Protecting a file 
From the video, photo, or video/photo mode, highlight or open a file and press the M key 
then select File Protection. Select between the following and press OK to confirm: 
Protect single: protects a file; Protect all: protects all the files. Once complete, an icon of a 
padlock appears on the bottom left side of the image “thumbnail”. To unlock a file use the 
above instruction but in reverse.  
Automatically Play a file 
Select Autoplay for a slideshow presentation that changes every five seconds. 
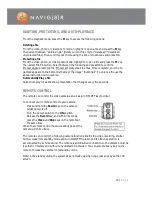
REMOTE CONTROL 

The remote can control the video camera as well as turn ON/OFF laser pointer.  
 
To connect your remote control to your camera;  

­


Press and hold the Record key on the camera 
whilst power is off. 

­


Turn the power switch to the ON position. 

­


Release the Record key, and within 3 seconds, 
press the Video and Stop keys on the remote at 
the same time. 

When the remote control has successfully paired, the 
camera will chime twice. 
 
The remote can control the following camera functions: start/stop video recording, shutter 
button, wake from standby mode and turn ON/OFF the laser pointer. Each operation is 
accompanied by a chime sound. The remote is an Infra-Red connection so the distance must be 
less than 10 meters and without any obstacle in between. You can also press any key on the 
remote to wake the camera from stand-by mode.   
 
Note: in the standby mode, the system does not wake up when you press any key on the LCD 
screen. 


Содержание NAVSPORTPRO

Страница 1: ...1 P a g e NAVSPORTPRO USER GUIDE...

Страница 2: ...orruption Backing up data is also good practice Read all instructions carefully before use Retain this product manual for future reference Use this product only in the manner described Only use a wate...

Страница 3: ...E DATE AND TIME INITIAL USE Page 7 STORAGE AND PLAY OF A FILE Page 8 MAIN UNIT AND LCD SCREEN ICONS Page 9 MAIN MENU SCREEN Page 10 VIDEO MENU SETTINGS Page 10 CAMERA MENU SETTINGS Page 11 SYSTEM MENU...

Страница 4: ...e Detachable Battery 1 x AV Composite Cable 1 x Flat Mounting kit 1 x Flat Mount Spare Base 1 x Carry Pouch OPTIONAL ACCESSORIES The optional WI FI MODULE is used in conjunction with an iPhone or Andr...

Страница 5: ...accessory release button 14 Record key 19 LCD status display 24 Laser pointer 3 Up key Zoom In whilst recording 9 Wrist strap attach point 15 Video Audio recording indicator Green 20 Shutter key 25 HD...

Страница 6: ...other corrosive substances such as strong acid s or alkalis Do not subject the waterproof housing to temperatures over high 50 C or lower than 10 C for sustained periods of time If the housing were t...

Страница 7: ...e card slot ONE WAY Do not force the card into the card slot Follow the diagram on the body of the camera near the slot for guidanceThe Micro SD card will click into place To take the memory card out...

Страница 8: ...a computer for storage or playback by using a USB data cable supplied You can also remove the Micro SD card and access the data using a card reader Video playback software such as VLC is recommended f...

Страница 9: ...When full the green indicator lamp will illuminate On LCD Video Recording mode selected On LCD Audio mode selected Note Restart the camera to revert back to video mode or press the Playback button twi...

Страница 10: ...udio recording mode VIDEO MENU SETTINGS Note During audio recording the video camera responds only to the Stop and Power off keys Exe Select between Video and Audio Only modes Resolution Options 1080P...

Страница 11: ...g this watermark is permanent and cannot be removed Note Excluding 1080i WVGA 100fps and WVGA 120fps modes CAMERA MENU SETTINGS Resolution For picture quality on still photos Select between 3 0 lower...

Страница 12: ...tre image is bright with dark surrounds Language Select between the available languages provided Date time Adjust time and date Note not supported in 1080i 50 and 1080i 60 modes Format Format Micro SD...

Страница 13: ...tion Key Description Zooms in Zooms out Moves a picture right Moves a picture left Resets and plays a file from the beginning OR returns to the playback screen PLAYING AN AUDIO FILE From the Video pho...

Страница 14: ...Play a file Select Autoplay for a slideshow presentation that changes every five seconds REMOTE CONTROL The remote can control the video camera as well as turn ON OFF laser pointer To connect your re...

Страница 15: ...y Note After cable connection the camera might need to be restarted LASER POINTER HELPER Press and hold the Record button for three seconds to turn the laser pointer ON or OFF during any operation TUR...

Страница 16: ...x 1080i 50fps 960P 1280 x 960P 25fps 720P 1280 x 720P 25fps 720P 1280 x 720P 50fps WVGA 848 x 480P 50fps WVGA 848 x 480P 100fp Note Due to scanning frequency capabilities in PAL and NTSC formats 60fp...

Страница 17: ...f the fault and refund or replace the product as per their store refund or warranty policy Step 2b If your place of purchase cannot be contacted then you can contact Laser Customer Service with detail...

Отзывы: