

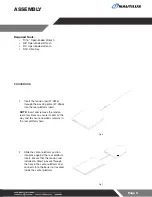


Page 8
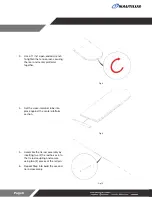
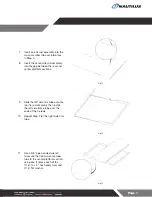
12.
Use a 5/16” allen key to install the
fl oor trim bracket using one (1)
piece each of the 1/2” fl at washer
and 1/2” -13 x 1’’ button head cap
screw.
13.
Repeat Step 12 to install a fl oor trim
bracket onto the remaining three
corners of the frame.
NOTE:
The platform can be secured to
the fl oor via the fl oor trim bracket if the
platform is moving during use. Follow
all safety and building codes when
securing the platform to the fl oor.
Fig. 14
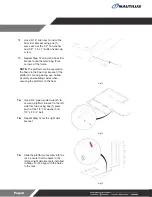
14.
Use a 3/4” open-ended wrench to
secure a platform bracket to the left
side trim tube using one (1) piece
each of the 1/2” fl at washer and
1/2” x 2 3/4” bolt.
15.
Repeat Step 14 for the right side
bracket.
Fig. 15
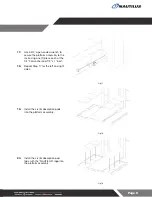
16.
Slide the platform assembly into the
rack, ensure that the holes in the
left and right side brackets installed
in Steps 14+15 align with the holes
in the rack.
Fig. 16


