


Page 5
PROCEDURE
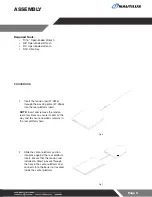
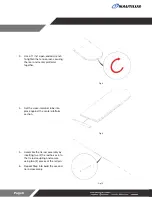
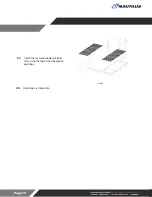
1.
Insert the tension rod (27-0876)
through the backing plate (27-0366)
into the rear platform insert.
NOTE:
Insert and remove the tension
rod a few times to ensure it seats all the
way and to ensure no debris remains in
the rear platform hole.
Fig. 6
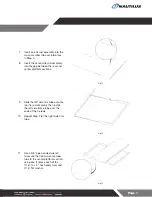
2.
Slide the center platform section
into place against the rear platform
insert. Ensure that the tension rod
installed in Step 1 passes through
the hole in the center platform and
connects into the barrel nut located
inside the center platform.
Fig. 7
Required Tools:
• 11/16” Open-Ended Wrench
• 5/8” Open-Ended Wrench
• 3/4” Open-Ended Wrench
• 5/16” Allen Key
ASSEMBLY


