
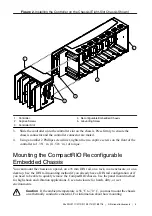
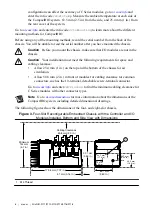
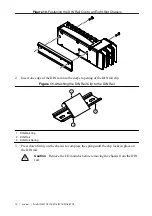
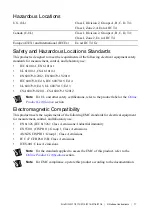


Figure 2. Installing the Controller on the Chassis (Eight-Slot Chassis Shown)
1
4
3
5
2
1. Controller
2. Captive Screws
3. Controller Slot
4. Reconfigurable Embedded Chassis
5. Grounding Screw
3.
Slide the controller onto the controller slot on the chassis. Press firmly to ensure the
chassis connector and the controller connector are mated.
4.
Using a number 2 Phillips screwdriver, tighten the two captive screws on the front of the
controller to 1.3 N · m (11.5 lb · in.) of torque.
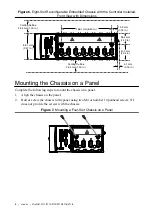
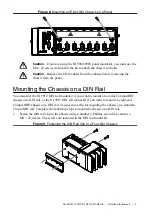
Mounting the CompactRIO Reconfigurable
Embedded Chassis
You can mount the chassis on a panel, on a 35 mm DIN rail, on a rack, in an enclosure, or on a
desktop. Use the DIN rail mounting method if you already have a DIN rail configuration or if
you need to be able to quickly remove the CompactRIO chassis. Use the panel mount method
for high shock and vibration applications. Use an enclosure for harsh, dirty, or wet
environments.
Caution
If the ambient temperature is 56 °C to 70 °C, you must mount the chassis
on a thermally conductive material. For information about how mounting
NI cRIO-9111/9112/9113/9114/9116/9118
|
© National Instruments
|
5