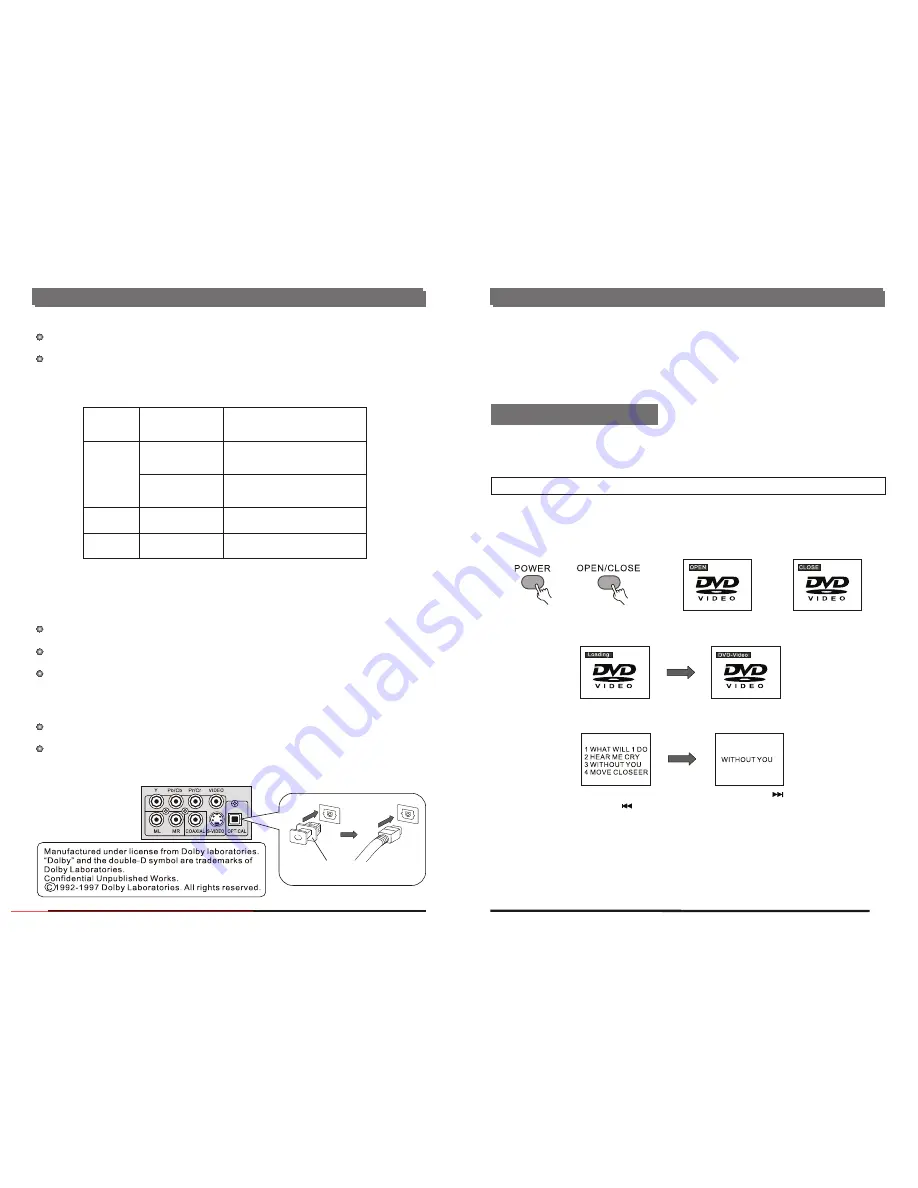
Notes when connecting the optical digital audio cable
(optional)
Disc
Sound
recording
format
Optical/coaxial digital audio
output from connector
DVD
Dolby Digital
(AC-3)
Dolby Digital bitsream
(2-5.1ch) or PCM (2ch)
(48 KHz/16 bit)*1
Linear PCM
(48/96 KHz
16/20/24 bit)
Linear PCM (2ch)
(48KHz sampling/16 bit only)*2
or no output*1
Video
CD
MPEG 1
PCM
(44.1 KHz sampling)
CD
Linear PCM
Linear PCM
(44.1KHz sampling)
For your reference:
Dust protection cap
Optional audio connections
11
10
Remove the dust protection cap from the optical digital audio output and connect the cable
firmly so that the configurations of both the cable and the connector match.
Keep the dust protection cap and to protect against dust, always reattach the cap when not
using the connector.
Concerning the audio output from the player's optical/coaxial digital audio output connector
* 1 The type of audio output from the connector can be selected by the initial settings.
* 2 Sound having 96 KHz sampling is converted into 48 KHz or 96 KHz sampling when it is output
from the player s optical/coaxial digital audio output connector.
Dolby Digital (AC-3)is a digital sound compression technique developed by the Dolby
Laboratories Licensing Corporation.
Linear PCM is signal recording format used in a CD. While a CD is recorded in 44.1 KHz/16
bit, a DVD is recorded in 48KHz /16 bit up to 96KHz/24 bit.
If you have a DOLBY Pro Logic Surround decoder, you will obtain the full benefit of Pro Logic
from the same DVD movies that provide full 5.1-channel Dolby Digital soundtracks, as well as
from titles with the Dolby Surround mark.
Caution for speaker setup
Turn off the amplifier before you connect or disconnect the DVD video player's power cord. lf
you have the amplifier power on, the speakers may be damaged.
The output sound of the DVD video player has a wide dynamic range Be sure to adjust the
receiver's volume to a moderate listening level. Otherwise, the speakers may be damaged by
a sudden high volume sound.
Before enjoying MPEG4/DVD/Video CD/CD
BASIC PLAY
Preparations:
Basic play
The On-Screen menu language of your player has been factory pre-set to English.
If you would like to change the menu language to other Language, please refer to "Selecting
language of On-Screen Display menu".
In the explanation given below it is assumed that English has been selected as the menu
language.
1. Switch the TV on and select "Video" as the TV input.
2. Switch on the stereo system s power if the player has been connected to a stereo system.
1. Press POWER to switch on the power.
2. Press OPEN button to open the disc tray.
3. Place a disc onto the disc tray and press OPEN/CLOSE again. Hold the disc without touching
either of its surfaces, position it with the printed title side facing up, align it with the guides,
and place it in its proper position.
The disc tray is automatically closed and play begins. When the disc tray is closed by pressing
OPEN/CLOSE, the player will start to read the disc immediately.
4. When a menu screen appears on the TV, move the navigation buttons or press the numeric
buttons to select preferred track number, then press ENTER button to confirm.
5. When the menu continues onto another screen, press NEXT SKIP button to view the next
screen, or press PREV SKIP button to skip to previous screen.
NOTE:
Due to the different design of some software titles, NEXT button may not always work.
6. To stop play and return to the menu screen, press TITLE button, or MENU button(which button
is pressed depend on which kind disc used):
DVD: Press TITLE, MENU or RETURN;
VCD/SVCD : Press RETURN or PBC Button.
Basic Operation
Downloaded From DvDPlayer-Manual.com Nash Manuals


