4. napp-it ToGo setup (install from a preconfigured image,
beta
)
There are two options, one for a barebone setup and one for a virtualized ESXi setup
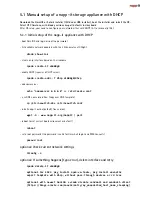
4.1 ready to use barebone napp-it ToGo distribution for an Sata bootdisk
This is the easiest and suggested setup method of installing, backup and recover a napp-it barebone appliance
based on a preconfigured image for a ready to use ZFS storage server. It works best for OEM use with known
hardware. It may not work with any hardware or disk. On success, please send a mail to [email protected]
with your mainboard, interface, disk type and remark. I will create then a list of known to work setups.
Download and clone the 512n or 512e image. For best reliability use an Intel S3510 - 80 GB with powerloss
protection (512e). You may use a 64 GB SuperMicro Sata DOM or a 60GB+ Sata disk or SSD (mostly 512n).
Use
an Sata port for your bootdisk.
As Clonezilla currently is not ZFS aware it clones the whole disk via dd.
Step 1: Create a bootable USB stick (256MB is ok) with Clonezilla, a free cloning tool.
You can use a 16/32GB USB FAT-32 stick (depend on size), USB/Sata disk or share for the systemimage.
Step 2: Download the zipped napp-it image from https://www.napp-it.org/downloads/index_en.html, either
the version for 512n disks or the version for 512e (4k physical sectorsize),
unzip and copy the included folder
to another USB stick or a network share ex NFS/SMB. You can download an image with a preconfigured OmniOS
+ napp-it 512n for free. The foldername is something like „2016-04-05-img18-disk-mainboard-512n. For
napp-it Pro users, there are plans to add images with different mainboards, disk sizes and napp-it.
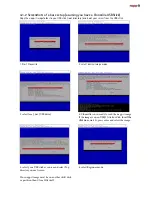
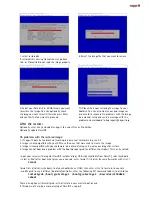
Step 3: Boot your server from the CloneZilla USB stick to restore napp-it.
Select your keyboard type, device-
image-mode and a the source of the image ex a local USB Stick/ disk or a NAS. Default is restoring the image
from a local USB stick/disk to your local Sata disk. The Sata bootdisk or DOM can be 512n or 512e (the disk is
physically 4k sectorsize) with 64 GB or more (Imagesize 62 GB). It is important that you use an image that fits to
your disk (512n or 512e physical sectorsize). With an USB device for the image, plug it in prior selecting source
image. see http://clonezilla.org/show-live-doc-content.php?topic=clonezilla-live/doc/02_Restore_disk_image
btw: You can use CloneZilla to backup, clone or restore any bootdisk, even a Mac with OSX.
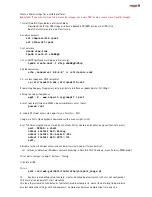
Step 4: Boot napp-it from your Sata disk (Set the Sata disk as boot-disk in the mainboard bios).
All network adapters are enabled automatically in DHCP mode. You can logon at console as root
(no password) and enter ifconfig -a to list all network adapters with their ip adresses.
Start your browser and connect napp-it via http://ip:81
Next, set a root password, a napp-it password and optionally enable/disable SSH root access
On a new setup, create now a new datapool, optionally some users and share filesystems:
If this is a restore after a crash, import the old datapool and optionally restore users and settings
from a backup on your datapool (manually or with the ACL extension in menu Users > restore) settings.
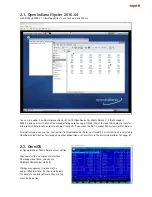
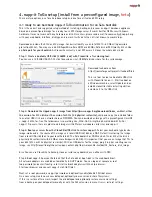
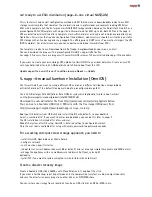
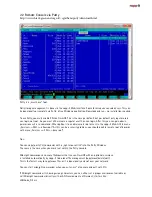
Download tuxboot.exe from
https://sourceforge.net/projects/tuxboot/files/
This is a tool to create a bootable USB stick
with Clonezilla live on it. Start tuxboot on
a Windows machine, select Update and an
amd64 clonezilla stable or testing edition
and clone it to the USB stick
Содержание ZFS Storage
Страница 8: ...3 1 ZFS Configurations...
Страница 45: ...Example Map Chenbro 50 x 3 5 Bay...


