© MuxLab Inc.
Extender Model 500759
Page 168
a.
The user clicks on one or more cells in the display pane. Once clicked, the
panes will change to blue to indicate that they are now actively selected.
b.
The user clicks on any single source shown in the lower part of the screen.
c.
The clicked cell(s) in the display pane is (are) now mapped to the given
source.
d.
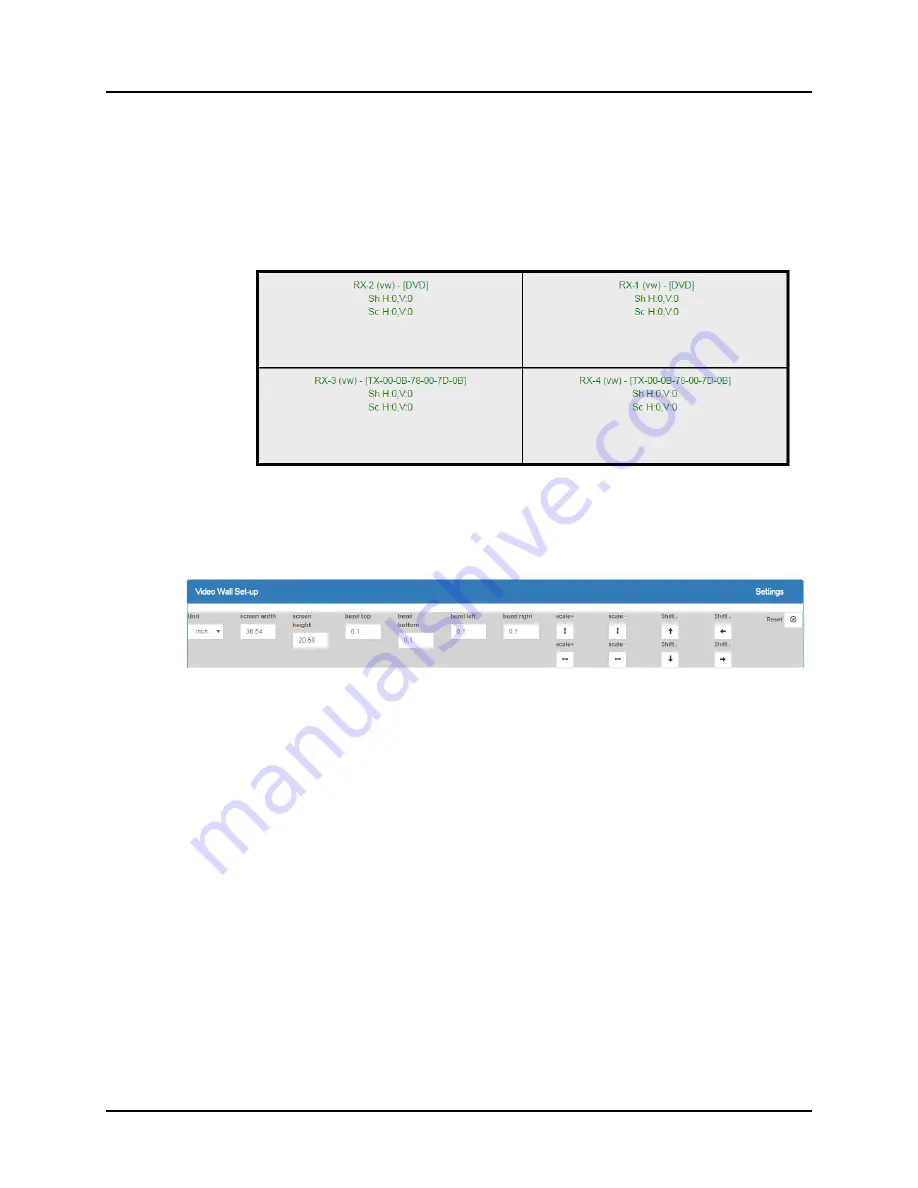
The user maps some or all sources to all cells. The display pane then
becomes fully source mapped (Figure 260).
Figure 260: Video Wall Tab
– Fully Source Mapped Video Wall
To configure the display size and bezel dimensions of all the displays (assumed to be
all equal) comprising the video wall, the user clicks on
Settings
in the top right hand
side of the
Video Wall
tab. This brings up the display setting options (Figure 261).
Figure 261: Video Wall Tab
– Display Setting Options
Since the video wall consists of only one type of display (all displays are the same),
the user only needs to modify the dimensions for only one representative display.
Note that
Unit
,
screen width
, and
screen height
values are derived from the
information provided by the user when first creating the video wall (Figure 255). Also,
Bezel top
,
bezel bottom
,
bezel left
, and
bezel right
are all set to 0.1 inch by default,
but these values may be changed.
Display settings options also allow the user to scale or shift the image of one or
several displays at the same time. The user must first selects the display(s) to be
modified in the display plane, and then clicks on any of the eight buttons (Scale/Shift)
in the display setting options. Clicking on
Reset
resets any changes made to these
eight buttons, not to
Unit
,
screen width
,
screen height
, or
bezel
values.
The settings of any video wall can be saved as a named configuration by using the
options shown in the left hand side of the
Video Wall
tab. Video wall configurations
can be named, saved, deleted, or activated.
Содержание 500811
Страница 1: ...P N 94 000810 E SE 000810 E MuxLab Pro Digital Network Controller MNC Model 500811 Operation Manual ...
Страница 15: ... MuxLab Inc ProDigital Network Controller MNC Page 15 Step 5D Step 5E Step 5F Figure 10 ...
Страница 16: ... MuxLab Inc ProDigital Network Controller MNC Page 16 Step 5G Steps 5H 5I Figure 11 ...
Страница 26: ... MuxLab Inc Extender Model 500752 Page 26 Figure 24 Products Screen Set up Tab Figure 25 Name Editing ...
Страница 44: ... MuxLab Inc Extender Model 500753 Page 44 Figure 53 Products Screen Set up Tab Figure 54 Name Editing ...
Страница 63: ... MuxLab Inc Extender Model 500754 Page 63 Figure 83 Products Screen Set up Tab Figure 84 Name Editing ...
Страница 86: ... MuxLab Inc Extender Model 500755 Page 86 Figure 122 Products Screen Set up Tab Figure 123 Name Editing ...
Страница 105: ... MuxLab Inc Extender Model 500756 Page 105 Figure 152 Products Screen Set up Tab Figure 153 Name Editing ...
Страница 124: ... MuxLab Inc Extender Model 500757 Page 124 Figure 182 Products Screen Set up Tab Figure 183 Name Editing ...
Страница 140: ... MuxLab Inc Extender Model 500758 Page 140 Figure 209 Products Screen Set up Tab Figure 210 Name Editing ...
Страница 157: ... MuxLab Inc Extender Model 500759 Page 157 Figure 238 Products Screen Set up Tab Figure 239 Name Editing ...
Страница 178: ... MuxLab Inc Extender Model 500755 AMP Page 178 Figure 276 Products Screen Set up Tab Figure 277 Name Editing ...
Страница 197: ... MuxLab Inc Extender Model 500762 Page 197 Figure 306 Products Screen Set up Tab Figure 307 Name Editing ...


