13
Scan, Save, and Share (WiFi Mode)
•
Ensure the Scanner is switched to the “
WiFi
” mode on the
side of the Scanner, and is connected to your device prior
to use. (See p.10)
•
Make sure your device is supported. (See p.4)
NOTES
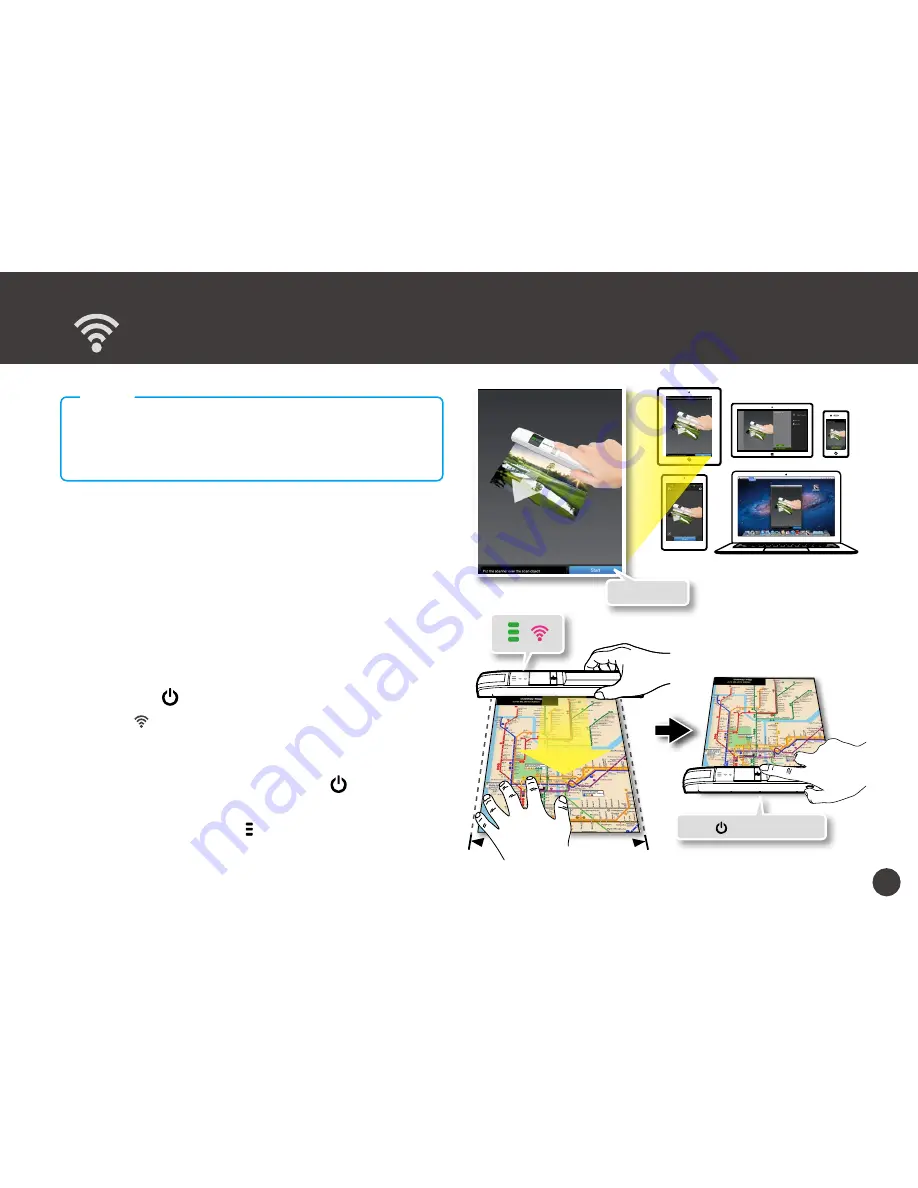
Scan
1. Press
iScanAir Go
app on your device to open it,
then press
Start
.
* For Windows 8, swipe in or mouse in from the right edge of
the screen. Select "File Format" from the menu, and choose
"Scan to JPG" or "Scan to PDF".
2. Place the Scanner on the object with the scanning
lens facing down, making sure the scanned area is
located between the two arrows on the scanner.
3. Press the
/
SCAN button to start scanning.
* The LED will blink a purple light, and the iScan Air app
will show real-time preview.
4. Move the scanner slowly and steadily down towards
the bottom of the object, press the /SCAN button
again to end scanning.
* Ensure the Status LED ( ) blink green light at the normal
speed during scanning.
(continued on the next page)
Press
/
SCAN
to end.
* The app looks slightly different
depending on your device's
operating system
Press
Start
.


