


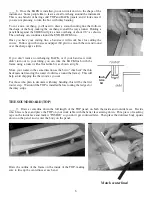
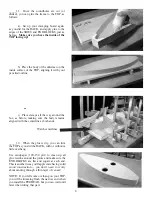


_____2. Mark a centerline on the outside of each END BLOCK, as shown below. It does not matter yet which
block you put at which end. The blocks for the Hourglass kit are identical, and the blocks for the Teardrop kit will
determine the head and tail of the instrument after you glue them.
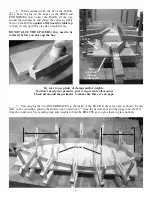
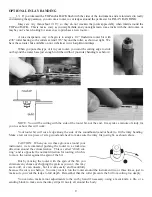
Use a good woodworking glue (such as Elmer’s Carpenter’s Wood Glue or Titebond) to build this dulcimer. Start
the assembly by gluing the SIDES to the END BLOCKS, as shown here.
These parts will be under some stress. Use enough glue so some squeezes out when the clamps are applied, and
leave them clamped for 8 hours. You can proceed to steps 3 & 4 immediately if you leave the clamps in place.
Use c-clamps or spring clamps to hold the parts
together until dry. It is always smart to add a scrap of
wood under the clamp to protect the instrument from
being dented by the pressure of the clamp.
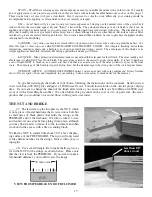
CAUTION: It is possible to glue these parts at odd
angles if you are not careful. We like to press the
parts down against a flat work surface to make sure
they are level and straight.
Position the end of the SIDE piece just a little beyond
the flat of the END BLOCK. You can sand it flush
after the glue is dry.
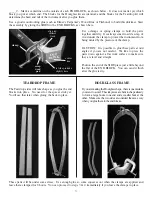
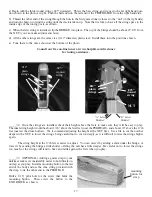
TEARDROP FRAME HOURGLASS FRAME
If you are making the Hourglass shape, there is one mistake
you want to avoid: The side pieces are bent to shape already
to form a large bout at one end and a smaller bout at the
other. Make sure the two sides are oriented the same way
when you glue them to the end blocks.
The Teardrop sides will take shape as you glue the end
blocks into place. No need for the spacer stick yet.
You’ll use that later when gluing the back in place.
END
BLOCK
SIDE
clamp
scrap
wood
pad
let side protrude
slightly here
align top
surfaces
flush
center
line
3


