background image

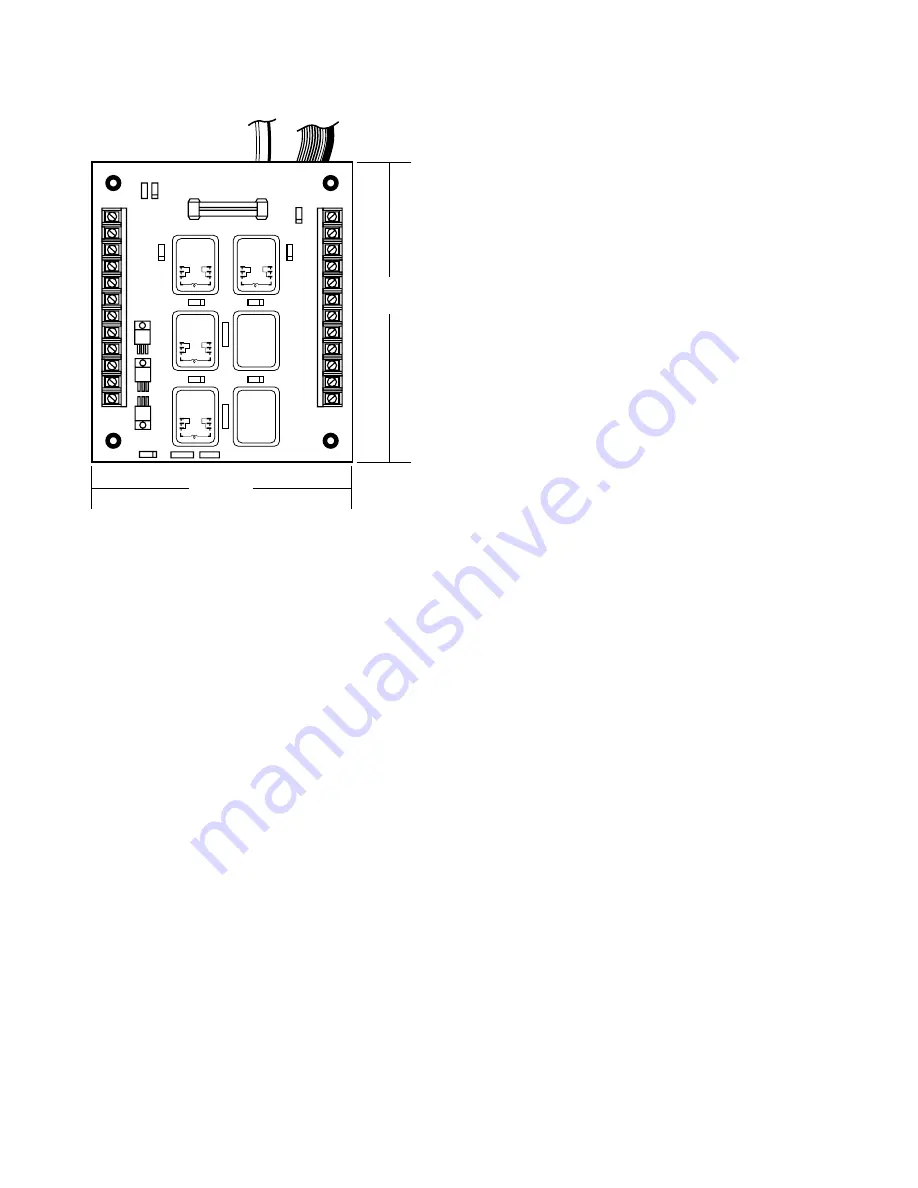
make up the generator engine control.  Relays are available for
operation on either 12 or 24 volt battery systems.  Four (4)
relays are included for:

3-7.2.1  Fuel Relay;  this relay provides two outputs, one to
energize the engine fuel solenoid and a separate circuit to
energize the battery charging alternator field.
3-7.2.2  Shutdown Relay;  this relay is operated by the shutdown
circuits of the Control / Display Module and provides an output
that can be used to trip the generator circuit breaker on an
emergency shutdown.
3-7.2.3  Overspeed Relay;  operates only on an Overspeed
shutdown.  This relay provides an output to trip an air shut off
solenoid to close the air damper on a two-cycle engine.
3-7.2.4  Local Audible Alarm Relay;  provides a contact closure
to operate a local audible alarm as required by NFPA- 110, Level
1 and Level 2.
3-7.3  Status Signals.  The relay module also includes three
outputs that can be used with external circuits for signaling or
control functions.
3-7.3.1 The Control On function at terminal 12 is on (closed to
negative) as long as the Mode Selector Switch is in either Auto
or Test.  When the Mode Selector is turned Off, the Control On
signal is open.  This can be used to signal switch position or to
reset an external circuit when the Mode Selector is turned Off.
3-7.3.2  The System Ready signal at terminal 13 is on (closed
to negative) as long as the Mode Selector Switch is in either
Auto or Test and no shutdown TATTLETALE

®

circuit is

latched on.  This can be used to signal that the generator
engine is ready to automatically start or is running in Test.
3-7.3.3  The Control On function at terminal 14 is on (closed to
positive) as long as the Mode Selector Switch is in either Auto
or Test.  When the Mode Selector is turned Off, the Control On
signal is open.  This can be used to signal switch position or to
reset an external circuit when the Mode Selector is turned Off.

Section 4: Installation

4-1  Location.
4-1.1 
The A900 series is designed to mount in a
MURPHYMATIC

®

Generator Control panel with the Control /

Display module on the front panel and the Relay module on the
inside bottom surface.  Other types of installation is possible as
long as the relationship of the two modules are maintained.
4-1.2  Clearance for Installation and Service; The modules must
be accessible for wiring to the terminal blocks and adjustment of
the user controls on the back of the Control / Display module.
Figure 4-1.2 shows the mounting dimensions and the minimum
clearances recommended for installation.
4-1.3 Wiring Terminals;  Terminal blocks are provided on both
sides of the Control / Display enclosure and the Relay Module.
Torque all terminal screws to 12 inch pound maximum.

4-2  Wiring.
4-2.1  
After the A900 has been located and installed, the wiring
connections can be made.  This work should be done with all
electrical power disconnected from the engine. BE SURE THAT
THE BATTERY IS DISCONNECTED.
4-2.2  All electrical installation work should be done in
accordance with the National Electrical Code, NFPA-70, and all
applicable local codes.
4-2.3  In general, the following connections will be made:

(a)  Battery positive and negative. An 8 A fuse or circuit

breaker must be provided to protect powered relay contact
circuits.

(b)  Engine run device, such as a fuel shutoff solenoid.
(c)  Engine speed sensor, such as a magnetic pickup or the

tachometer output of a battery charging alternator. 

(d)  Auxiliary crank disconnect device, such as a voltage

sensing relay contact wired to the generator output. 

(e)  Engine starter circuit; an auxiliary starter solenoid is

required to handle most starter solenoid requirements.

(f)   Remote start contact.  This is normally from the automatic

transfer switch but other sources are possible.

(g)   Alarm and shutdown sensing switches as required.

4-2.3.1  The complete wiring of a Model A901 control is shown
in figure 4-2.3.1.  Provision is made in the A900 series to
operate remote lights for all of the alarm and shutdown circuits
however these circuits do not have to be wired for the A900 to
function.  Alarm input switches are not required but the alarm
circuits will not work without them.
4-2.3.2  Figure 4-2.3.2 is for wiring of the A902 control. The
same provisions as for the A901 are made.
4-2.3.3 The A903 wiring is shown in figure 4-2.3.3.
4-2.3.4  Wire Termination; the terminal blocks that are supplied
requires that all wires be terminated with #6 stud size forked
spade solderless wire connectors or stripped and inserted under
the captive terminal plates.  Torque all terminal screws to 12
inch pound maximum.
4-2.3.5  All inductive loads (relays-soleniods-coils-etc.) that are
connected to the A900 must have reverse diodes wired across
the coil to supress reverse voltage that is generated whenever the
inductive load is de-energized. This will protect the electronic
components in the A900 and should prevent operating
malfunction due to noise. The “rule of thumb” for sizing the
reverse diode is to use one with a PIV (Peak Inverse Voltage)
rating equal to the operating voltage, or at least 100 volts and a

14

DC12V

3A Fuse

1A

4

5

6

7

8

9

16

17

18

19

20

21

22

23

24

25

DC12V

DC12V

DC12V

6-1/4 in.

(159 mm)

4-1/2 in.

(114 mm)

Figure 3-7.2

Содержание MURPHYMATIC A900 Series

Страница 1: ...SERIES A900 MURPHYMATIC GENERATOR ENGINE CONTROL SYSTEM DESIGN INSTALLATION AND OPERATING MANUAL A900 9025N Revised 10 99 Section 40 00 02 0197...

Страница 2: ...ot operate during installation Follow all safety warnings of the machine manufacturer Read and follow all installation instructions Certain danger to human safety and to equipment may occur if some eq...

Страница 3: ...4 Installation 14 4 1 Location 14 4 2 Wiring 14 4 3 Crank Disconnect 19 4 4 Pre Operational Check Out 19 Section 5 Operation 21 5 1 Operator Controls 21 5 2 Operating Modes 21 Section 6 Routine Maint...

Страница 4: ...phy c SWICHGAGE A combination indicating gauge and switch d TATTLETALE A term that refers to a shutdown indicating device or circuit in the control panel 1 5 How to use this manual 1 5 1 Section 1 2 4...

Страница 5: ...of a two cycle engine 3 1 7 Table 3 1 7 illustrates the alarm and shutdown require ments of NFPA 110 NFPA99 and CAN CSA C282 M89 and compares the features of the A900 series controls to those require...

Страница 6: ...X X X O O i Control Switch not set in Auto X X X X O O O X X X X X X X X O O j High Battery Voltage X X X O O O X X X O O k Low VoltageBattery X X X O O O X X X X X X X O O l Lamp Test X X X X X X X...

Страница 7: ...preset speed c Oil Pressure tripped by the oil pressure SWICHGAGE if pressure drops below preset point while the engine is running d Water Temperature tripped by the water temperature SWICHGAGE if en...

Страница 8: ...automatic control and the engine start sequence begins 3 3 1 2 Lamp Test Pushbutton Tests the lights on the A 901 2 module 3 3 1 3 Alarm Silence Pushbutton Turns off any audible alarm that is connecte...

Страница 9: ...ill running Since the Overspeed shutdown circuit is activated by the frequency input it prevents the engine from running without overspeed protection g Remote Shutdown this circuit is provided to shut...

Страница 10: ...ntrol Module includes the following engine control features a Cycle crank circuit will crank the engine for 15 seconds then rest for 15 seconds until the engine starts The crank rest time is selectabl...

Страница 11: ...s circuit is provided for an additional alarm that may be required by the user 3 4 2 Relay Module The Relay Module figure 3 4 2 includes all of the control alarm and shutdown relays that are required...

Страница 12: ...is depressed the set point of the speed switch is lowered approximately 10 3 The push to test switch can also be used to set the overspeed switch at approximately 110 of running speed Hold the switch...

Страница 13: ...he Mode Selector Switch is in either Auto or Test When the Mode Selector is turned Off the Control On signal is open This can be used to signal switch position or to reset an external circuit when the...

Страница 14: ...ing With engine speed at 1800 RPM or 3540 Hz g Cooldown circuit this circuit keeps the engine running for five minutes after the transfer switch has removed the load from the generator and signaled th...

Страница 15: ...Test and no shutdown TATTLETALE circuit is latched on This can be used to signal that the generator engine is ready to automatically start or is running in Test 3 6 3 3 The Control On function at term...

Страница 16: ...tdown Circuits provide first out indication of cause of shutdown These circuits deactivate the fuel relay and lockout the A903 until reset Shutdown circuits are activated by the crank disconnect circu...

Страница 17: ...ces recommended for installation 4 1 3 Wiring Terminals Terminal blocks are provided on both sides of the Control Display enclosure and the Relay Module Torque all terminal screws to 12 inch pound max...

Страница 18: ...3 4 in 171 mm 9 3 8 in 238 mm 6 in 152 mm 4 15 32 in 114 mm Mounting Holes 1 8 in 3 mm diameter 1 1 2 in 38 mm clearance 5 in 127 mm maximum between A 900 Series module relay module when mounting 1 7...

Страница 19: ...REMOTE AUDIBLE LOCAL AUDIBLE N C N C OVERSPEED RELAY SHUTDOWN RELAY FUEL RELAY CRANK RELAY AUX CRANK DISCONNECT N C CONTROL ON SYSTEM READY FUSED B B Energize to Stop solenoid Energize to Run solenoid...

Страница 20: ...Alarm I Fuel Relay J1 J2 Q2 Q1 J1G Red Blk LOW WATER LEVEL REMOTE VISUAL REMOTE AUDIBLE LOCAL AUDIBLE N C N C OVERSPEED RELAY SHUTDOWN RELAY FUEL RELAY CRANK RELAY AUX CRANK DISCONNECT N C CONTROL ON...

Страница 21: ...dible Alarm H Shut Down Relay D Local Audible Alarm I Fuel Relay J1 J2 Q2 Q1 J1G Red Blk LOW WATER LEVEL REMOTE VISUAL REMOTE AUDIBLE LOCAL AUDIBLE N C N C OVERSPEED RELAY SHUTDOWN RELAY FUEL RELAY CR...

Страница 22: ...e to increase setting The adjustments are 20 turn controls without stops at either end 4 4 1 1 Be sure to have a fully charged battery to do these tests Low battery voltage can cause improper results...

Страница 23: ...on and the engine shuts down f Release pushbutton check Overspeed light on front panel to be sure it is on g Turn Mode Selector switch OFF to reset shutdown circuits then back to TEST h When engine s...

Страница 24: ...the Mode Selector switch in the AUTOMATIC position When a start signal is received the engine will start 5 2 3 2 When the start signal is removed the engine will stop It is now ready to restart 5 2 4...

Страница 25: ...put Voltage Input Voltage Input Voltage Input Voltage Input Voltage 13 8 27 6 13 8 27 6 13 8 27 6 13 8 27 6 13 8 27 6 31 6 6 6 6 6 6 6 6 6 6 32 6 6 6 6 6 6 6 6 6 6 33 6 6 6 6 6 6 6 6 6 6 34 6 6 6 6 6...

Страница 26: ...o shutdown the engine and generator a The TATTLETALE light for that function turns on b Shutdown relay K 2 is energized closing its contacts at terminal 9 These contacts can be wired to a shunt trip s...

Страница 27: ...e OEM parts and are available only to Detroit Diesel and their distributors 8 2 1 The A900 DDC parts are the same as the Murphy A900 series that has been covered throughout the A900 manual except the...

Страница 28: ...1722 410697 fax 44 1722 410088 e mail france fwmurphy co uk www fwmurphy co uk francais htm In order to consistently bring you the highest quality full featured products we reserve the right to chang...

Отзывы: