19
Operation
3
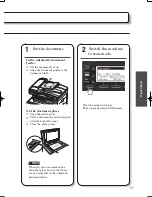
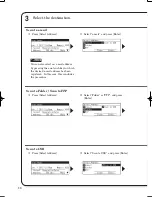
Select the destination.
Scan to e-mail
Press [Select Address].
NOTE
You can also select an e-mail address
by pressing the one-touch key in which
the desired e-mail address has been
registered. In this case, this concludes
the procedure.
Select “e-mail”, and press [Enter].
Select either “Shared” or “Personal”,
and press [Enter].
Select the destination and press
[Select].
NOTE
To use the personal address book,
log in to the machine. See chapter
1, “Logging in / Logging out” in the
Administrator’s Guide.
Scan to Folder / Scan to FTP
Press [Select Address].
Select “Folder” or “FTP”, and press
[Enter].
Select the destination and press
[Select].
If the user ID and password are
required, enter them and press
[Enter].
At scan to folder, press [
]
[Subfolder] to select a sub folder.
Press [Select].
Scan to USB
Press [Select Address].
Select “Scan to USB”, and press [Enter].
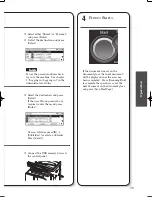
Connect the USB memory device to
the control panel.
4
Press <Start>.
If the document was set on the
document glass, “Set next document.”
will be displayed once the scan has
been completed. Press [Scanning End]
to complete the operation, or set the
next document on the document glass
and press [Scan NextPage].

